
A beautiful shot of a vibrant lipstick swatch or a close-up of an eyeshadow palette can entice shoppers to buy. But photographing makeup products comes with unique challenges.
Unlike apparel, the products are small. Their shine, shimmer, and color saturation might translate poorly from in-person to on-screen. That’s where photo editing comes in.
With some simple tweaks, you can enhance makeup product photos to showcase each item at its digital best. Whether you’re shooting products yourself or working with a photographer, we’ll walk through some editing techniques to make colors pop, fix reflections, and retouch surfaces for a spotless and ecommerce-ready look that converts.
How to shoot makeup products
Like other commercial photography, mastering makeup product photography can take years. But that’s not to say you can’t create product images that make your products stand out and drive sales. Putting a few shooting and editing tips into practice can make a big difference, even on a small budget or with a DIY approach.
And while photo editing certainly can do some magic, you’ll almost always get the best results if you have a decent original shot to work with. Considering that, you’ll want to keep some shooting tips in mind to make sure your edits go smoothly.
Clean the product and background
It’s always important to work with clean products, and makeup in particular. This includes the exterior and the actual makeup product itself.
You can expect sticky, shiny, and liquid products to attract dust, hair, and dirt, so make sure your shooting space is as clean as possible too. Use cotton gloves to avoid leaving marks or sweat on products when you style your shots.
Reduce distracting reflections and glares in the studio
Shooting items with matte surfaces will be easier because they reflect less light. However, many makeup products come packaged in reflective materials like plastic, metal, and glass.
To reduce unwanted reflections and camera glare when photographing these products, try these tips:
- Clear the studio: Remove any other shiny or reflective surfaces and turn off any lights you don’t need for the shoot.
- Remove unnecessary packaging: Unwrap solid products packaged in transparent plastic, such as beauty blenders, for a sharper, clearer photo with no reflections.
- Use light diffusers: Softboxes or white screens in front of a window produce softer light and help eliminate hotspots and light reflections.
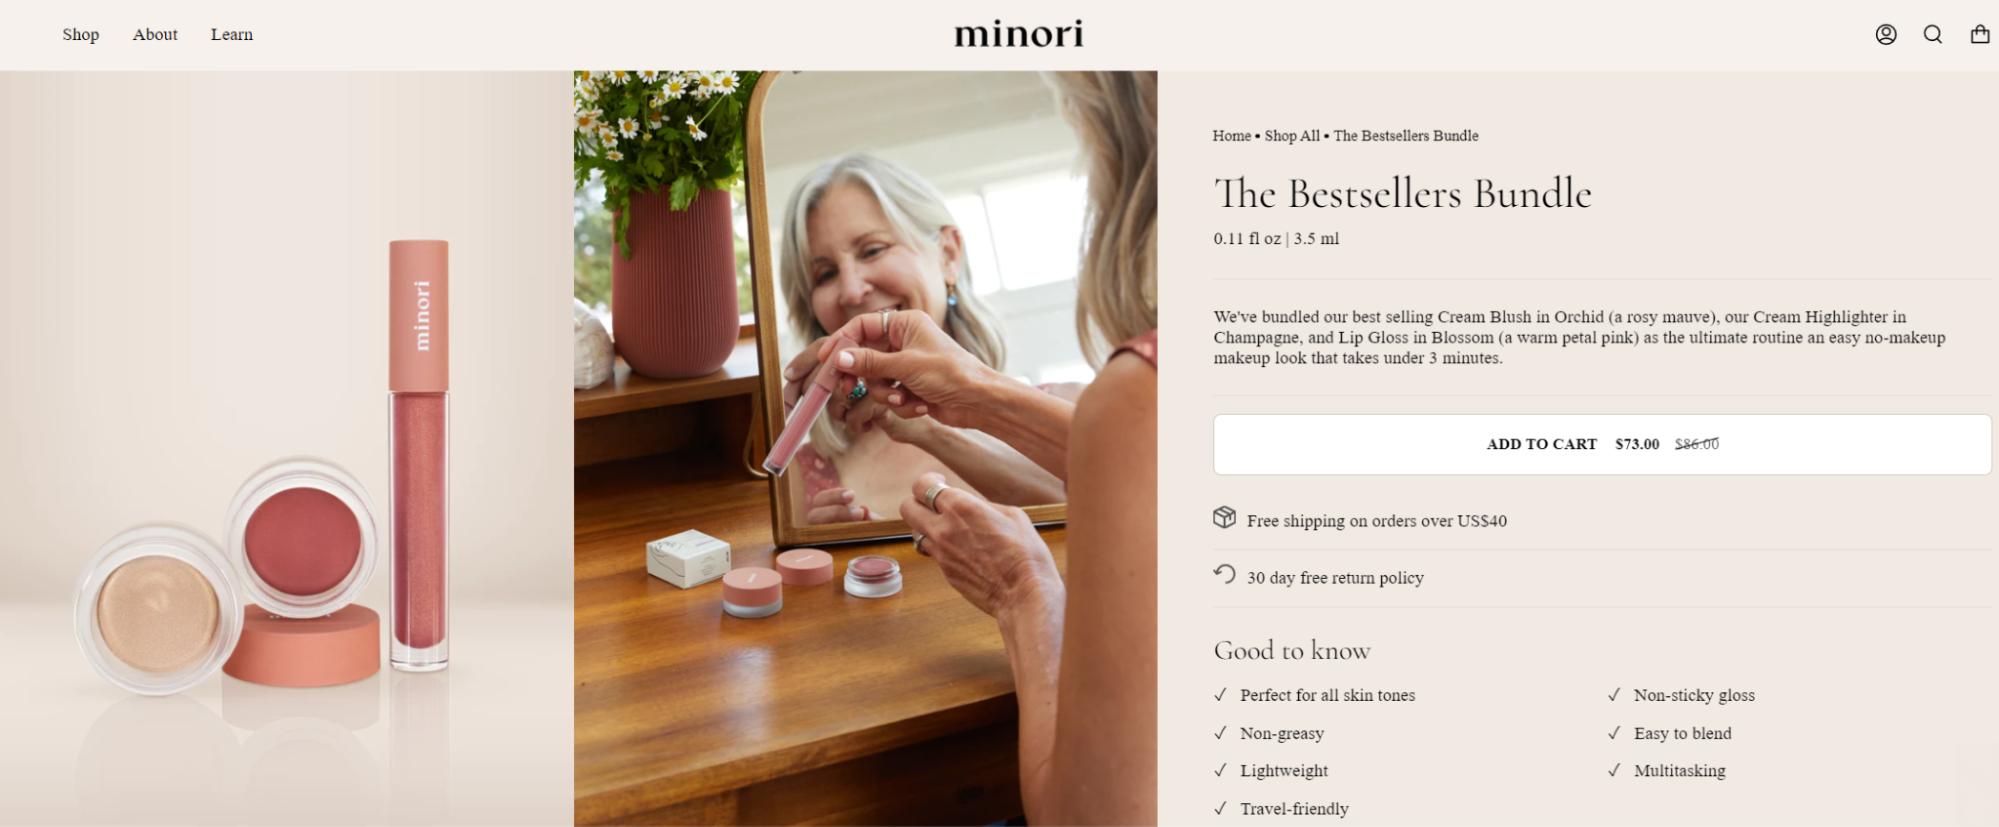
A great example of capturing challenging products in a pleasing way is beauty brand Minori. Its product bundle includes both matte and reflective packaging, but none of the surfaces have distracting reflections in the photo.
Include product swatches
Product swatches are small amounts of a makeup product like lipstick or eyeshadow. They’re common in makeup product photography because they show the true color, texture, and pigmentation of the product. Swatches make it easier for shoppers to compare different products or shades of the same product.
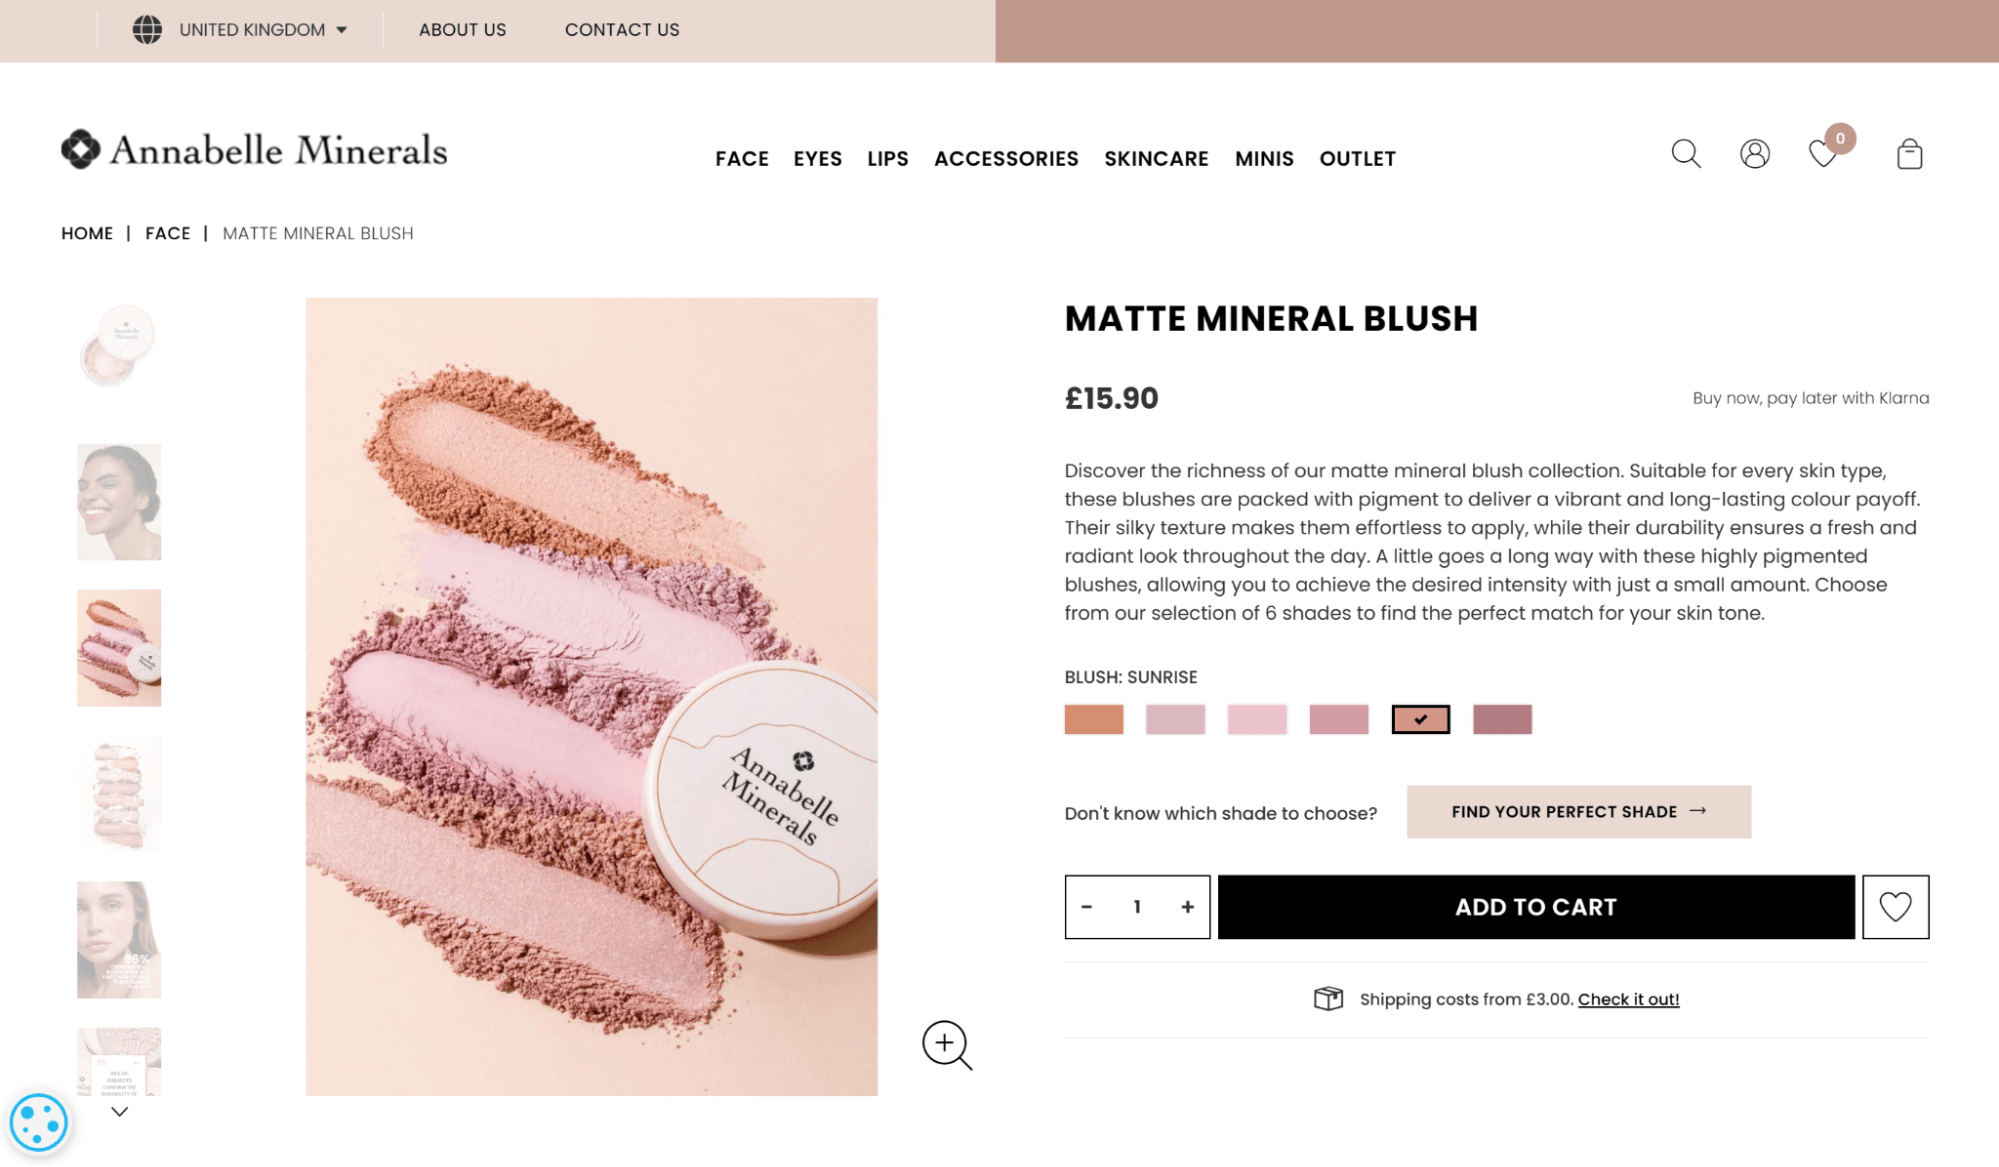
You can photograph swatches on a plain background, such as paper or cardboard. Your background doesn’t necessarily need to be white. For example, Annabelle Minerals uses a heavily layered swatch for its blush on a light peach background.
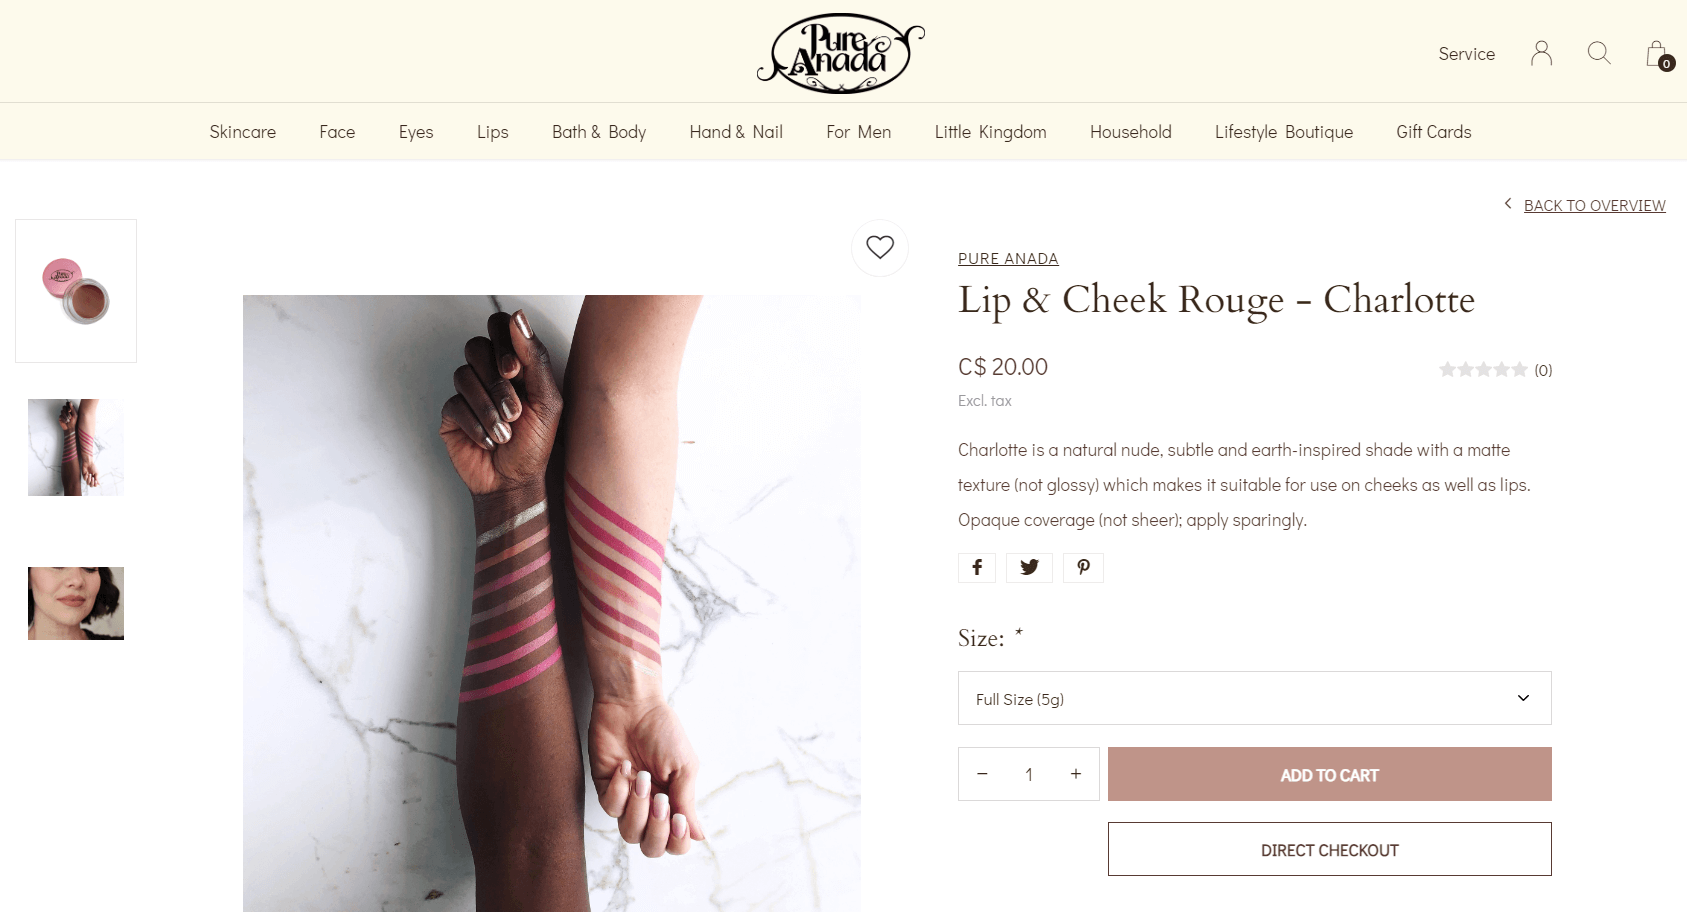
Showing swatches on the model’s skin, such as on the inner forearm, displays how the product looks on different skin tones, like on the lip and cheek rouge listing from Pure Anada.
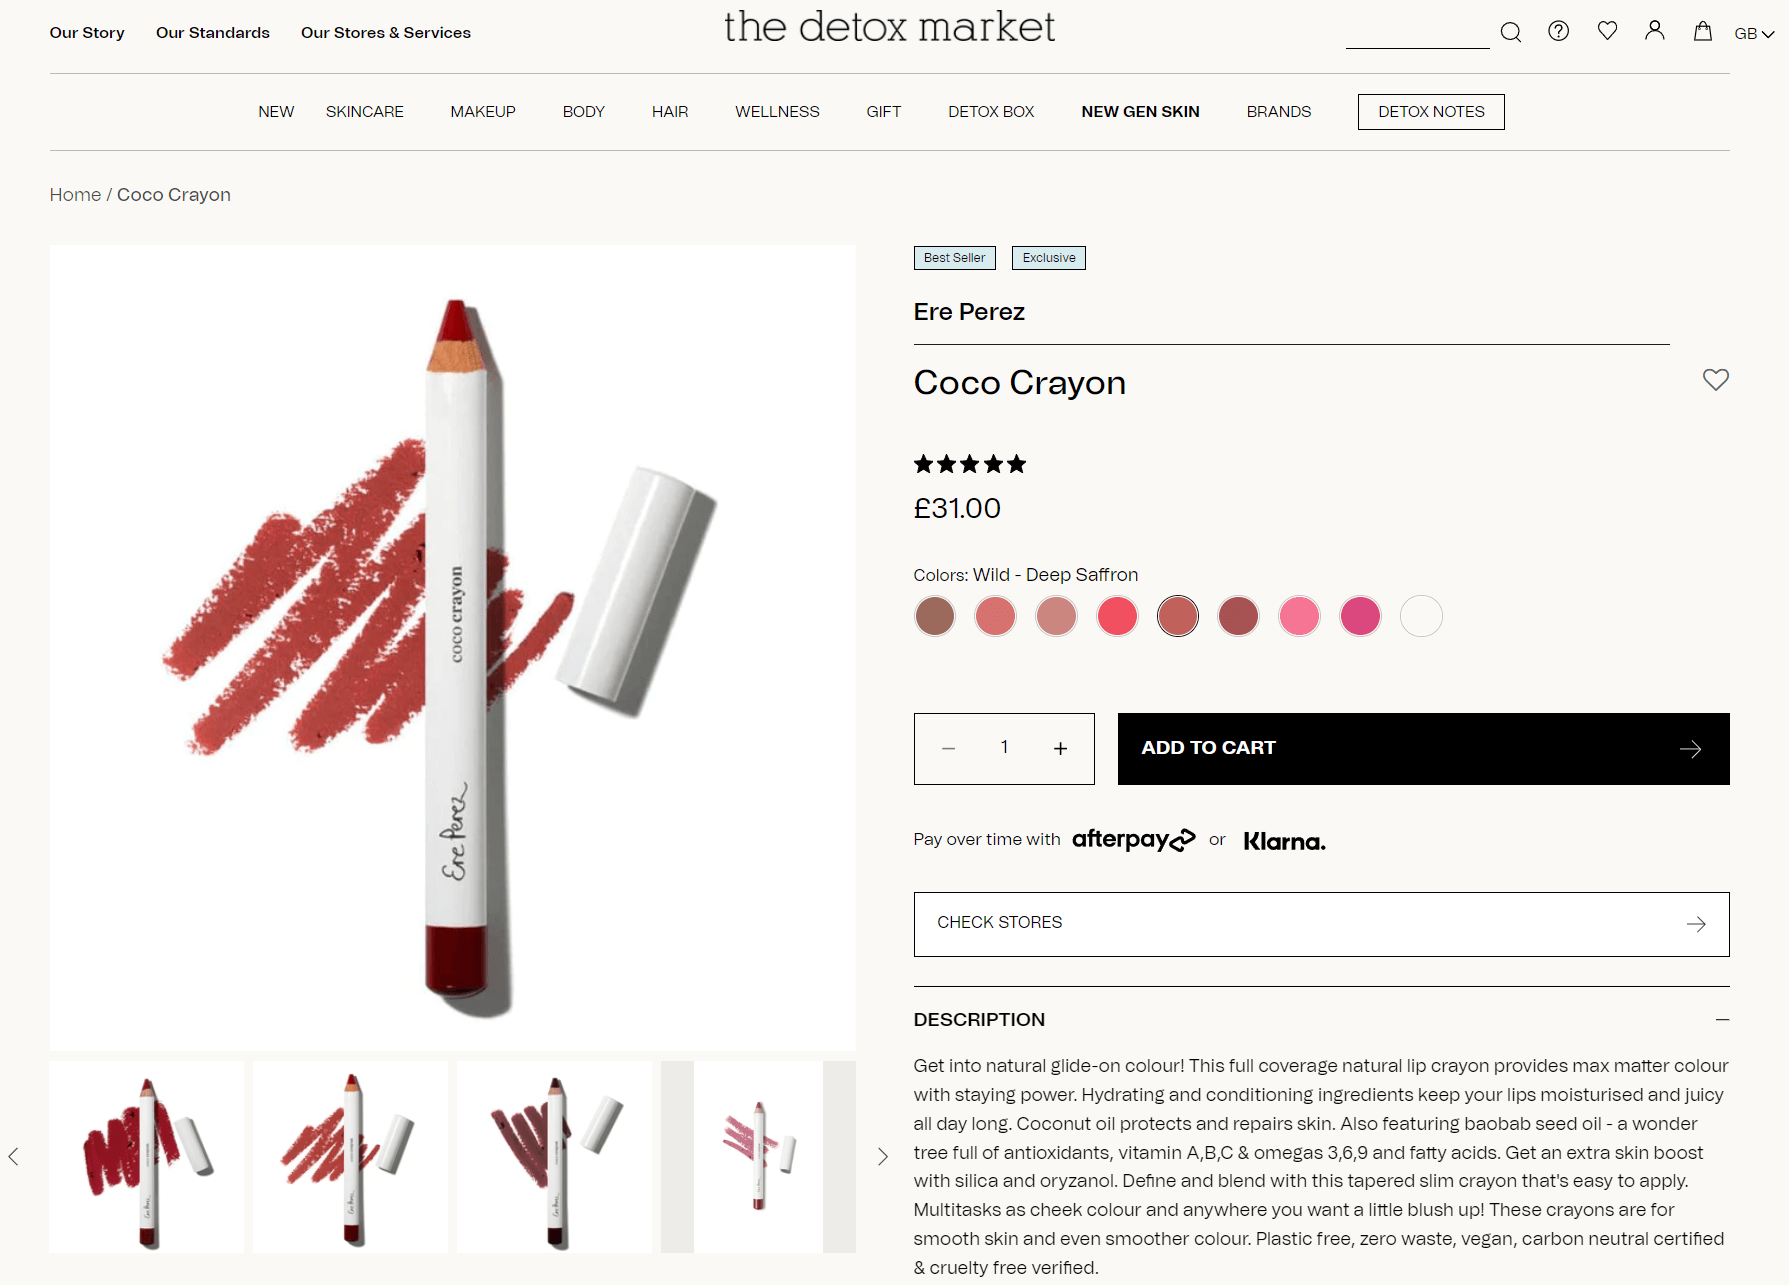
For solid products, like pencils, crayons, and eyeliners, you can get creative by drawing lines in varying intensities on a plain background, like The Detox Market which showcases Ere Perez’s lip crayon swatches.
Don’t forget to shoot close-ups
Adding to the variety of your product shots are close-ups. Shooting a product in its full size and cropping it later won’t result in the same look and image quality as shooting it up close. Reason being that an intentional close-up will ensure the product is perfectly in focus, producing sharp details.
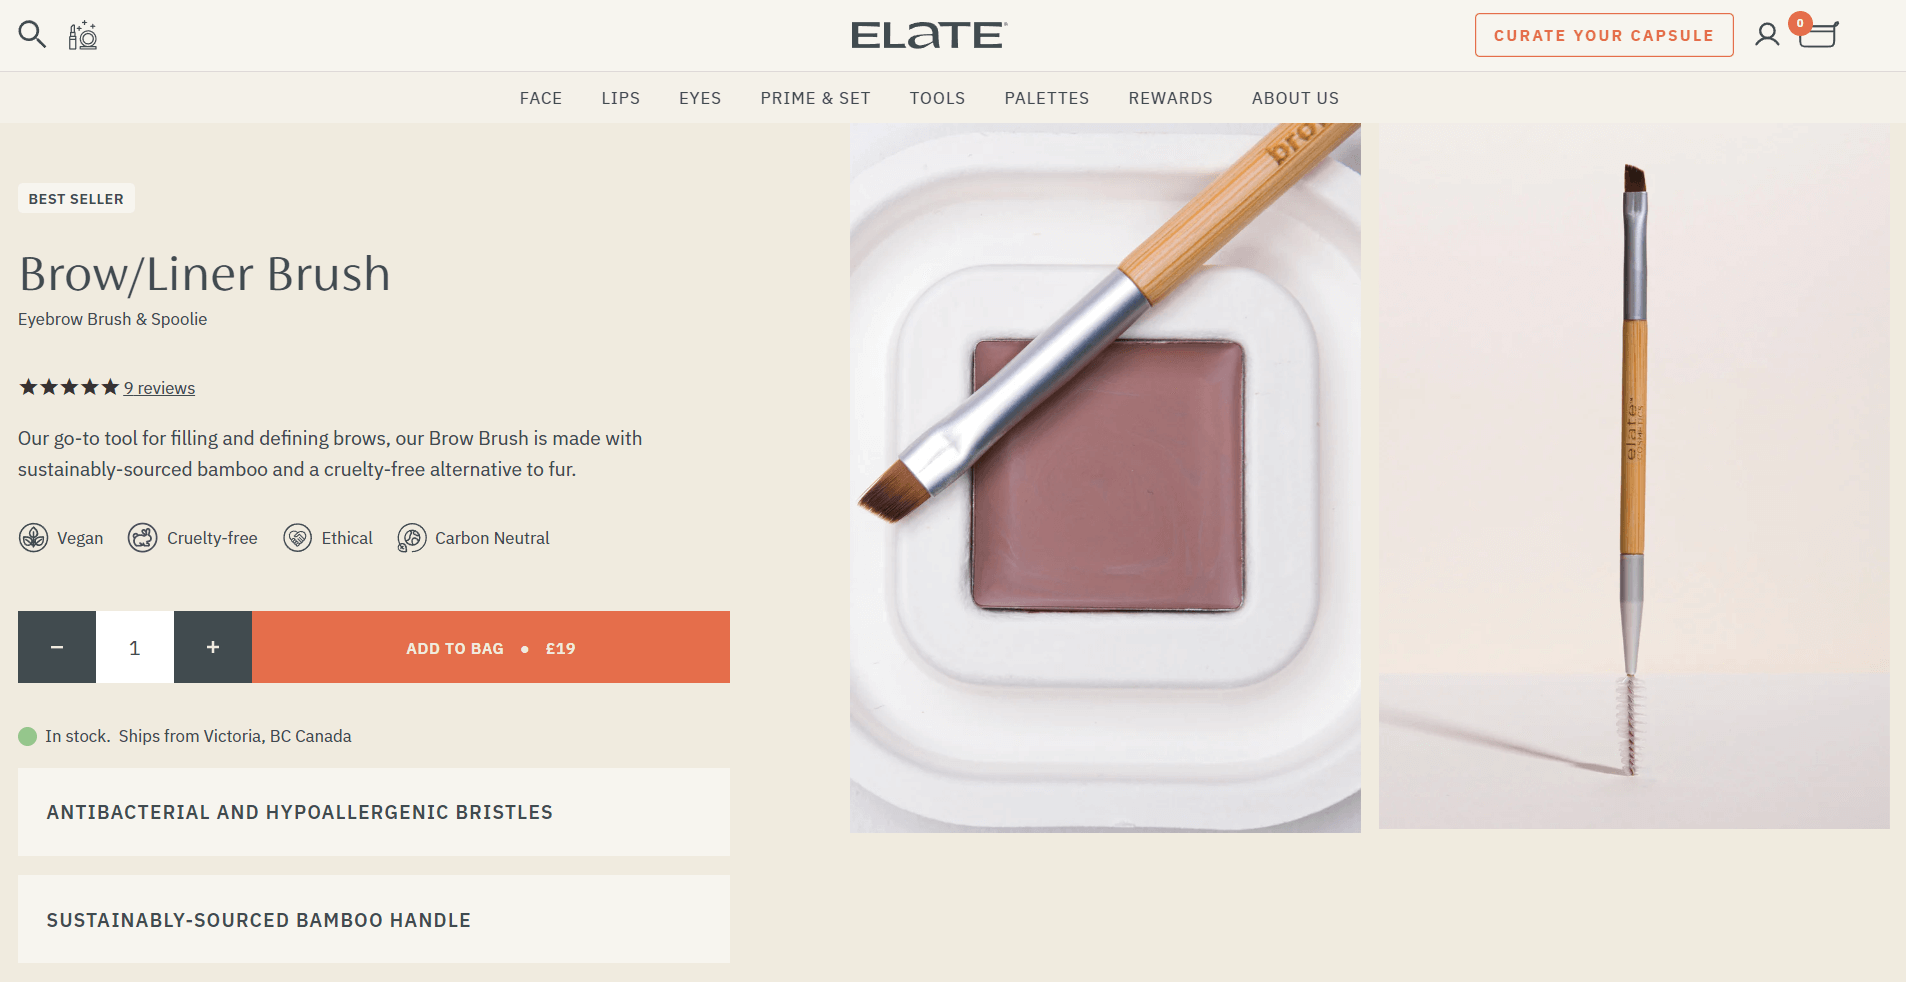
That’s not to say you need to use a close-up image straight from the camera. You’ll likely consider cropping the photo to emphasize the product and remove any distractions, like in Elate Beauty’s brow and liner brush product listing below.
Style shots with props
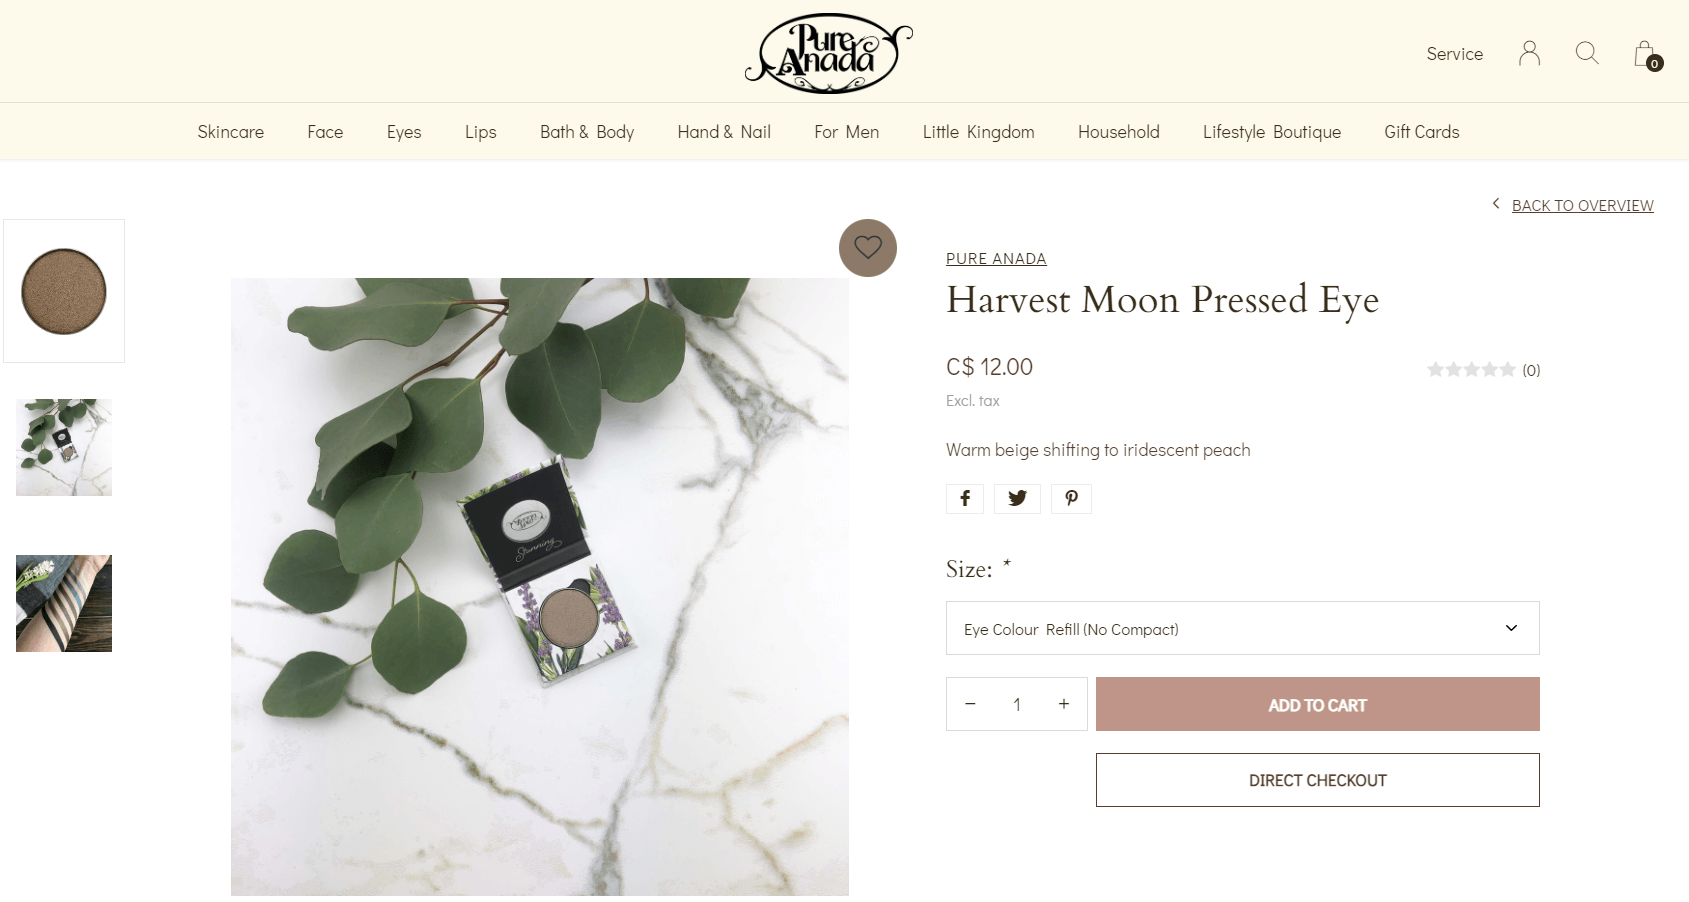
Including your brand’s props and product styling during the shoot will help you avoid complex editing later on. For example, Pure Anada uses foliage elements in every eye shadow listing.
To recreate this in post-processing would require advanced skill, especially to make your props look realistic. So, if you already know props are a must-have for your shots, use them during the shoot if possible.
How to edit makeup products for a professional result
While there are some things you can do during the shoot to help you create a beautiful product photo, images straight from the camera are rarely publish-ready. This means editing is a necessary part of preparing your photos for use in ecommerce, on social media, and elsewhere online.
The purpose of editing for ecommerce and marketing is to enhance your products while keeping their true appearance intact for buyers. Read on for some of our tips for taking your product shots from “blah” to “wow.”
Remove background
Background removal eliminates any distractions around the product—regardless of where you shot it—turning the cut out product into a flexible asset you can repurpose.

A popular method for product shots is adding a white background. Marketplaces like Amazon require sellers to use it for all products, but doing so brings visual consistency to any online store. You can also use the product with other backgrounds, including transparent, combine several products to create item groups, and much more.
Color correct for accuracy
Accurately describing your products is just one part of giving customers all the information before a purchase. Photos also need to match what they’ll receive in their order. With over 64% of product returns happening because the item didn’t match what’s on the listing, it’s a simple fix that will save you from unhappy customers and money spent on refunds.

How do you put this into practice? Focus on minimal edits. Matching makeup products to the skin is already difficult, but accurate colors in photographs make it easier for online shoppers. Also, ensure image white balance is neutral—you can read more about it in this product editing guide.
Remove any blemishes or imperfections
You may notice some smudges, spots, or marks on your photos that you missed during the shoot. They may be on your products, in the background, or on the model’s skin or clothing, as in the example below.

But all it takes is a spot removal using Photoshop:
- Spot Healing Brush: use it to brush over any imperfections, which the software will replace with pixels sampled around the area.
- Clone Stamp: you can copy an existing part of your photo and “paint” it over the blemish.
If your shots need more advanced editing or you’re tasked with a large volume of images to fix, you can outsource it to a team of experienced editors.
Create a lifestyle composite
We mentioned removing the background for your products, but did you know you can create completely new images using lifestyle composites? The method involves taking a cut-out product and placing it on a contextual stock photo, like a makeup kit added to an image of a bathroom cabinet.
Lifestyle composites can save you time and money otherwise spent on organizing a new photoshoot. However, for the composite to look natural, you have to pay particular attention to:
- Shadows: For a product to fit in a new scene, add shadows that match where the light source may be in the stock photo.
- Colors: You may have shot your product in neutral light, but the stock photo may have a warmer or cooler look. This means you have to correct color for both separately.
- Perspective: If you photographed a product head-on, look for stock photos that match the angle of your product shot. For some images, you’ll be able to skew the product perspective using Photoshop.
- Size: A product that looks too large for the background will stick out like a sore thumb. Consider other elements in the image to help you correctly size the product to match its real-life dimensions.

Lifestyle composites can be complex to create. However, you can outsource to photography studios that specialize in them.
Design a collage for an advertisement
Like lifestyle composites, background-free product shots are perfect for creative marketing assets like collages. The difference is, collages don’t require advanced photo editing skills. You can easily create them in apps like Canva.
Using your brand’s colors and typography, you can design a simple collage like on Elate Beauty’s Instagram page. You can reuse your background-free product shots in so many different ways without ever having to repeat a design.

Create product infographics
Product infographics combine photography and graphic design elements to offer a playful and informative way to present product information. If you want a creative way to share your product benefits or ingredients without using walls of text, that’s where infographics come in. All you need is to pick a background, add a product with a transparent background, and include text.
Graphics like these are also popular in marketplaces like Amazon. Vegan beauty brand Ecco Bella uses an infographic in its own online store. In just a few seconds, infographics give buyers a convenient way to learn about products before reading descriptions.

Remove labels or logos
Some marketing visuals may call for logo-free product shots. You can remove the product label or logo using Spot Healing Brush or Clone Stamp in Photoshop—the same Photoshop tools used for removing blemishes.

Add brand labels or logo
On the flip side, if your logo has changed since the photoshoot or if the product sample used in the shoot didn’t have the logo-facing side towards the camera, you may want to add it.

Similar to creating a lifestyle composite, you’ll have to ensure the logo or label matches the surface you place it on. For example, if you’re adding it to a glass jar, you’ll have to bend or skew the logo for it to align with the shape and look natural. You can follow this video tutorial to learn how to create this effect.
Add shadows for a subtle 3D look

White background ecommerce shots may be fit for online stores and marketplaces, but they can also look flat if that’s all you use. To fix that, adding a shadow, like a subtle drop shadow, will help your products stand out from the background and look more realistic.
Create color variants
If your products come in different colors, you can create color variants of the same product. The result will be a uniform look in your store, apart from the color changes in each photo. You’ll also save time setting up a shoot whenever new color variants come in stock.

One method to do this in Photoshop involves adjusting the hue of a particular color in your product photo:
- Open your product image in Photoshop.
- In the top menu, click on Layer > New Adjustment Layer > Hue/Saturation.
- Select the color you want to change by using the pointer icon and clicking on the color in your photo or choose one from the dropdown menu, like Reds.
- Move the Hue slider to select your new color. Use the Saturation slider to fine-tune its vibrancy.
- To remove this effect on other parts of your photo, click on the layer’s mask and select the Brush tool. Make sure its opacity is at 100%, and paint over sections that don’t need the color change.
For more complex color changes, you can repeat the steps above several times—targeting a different part of the image each time—or outsource to professional photo editors.
Crop to fill the frame
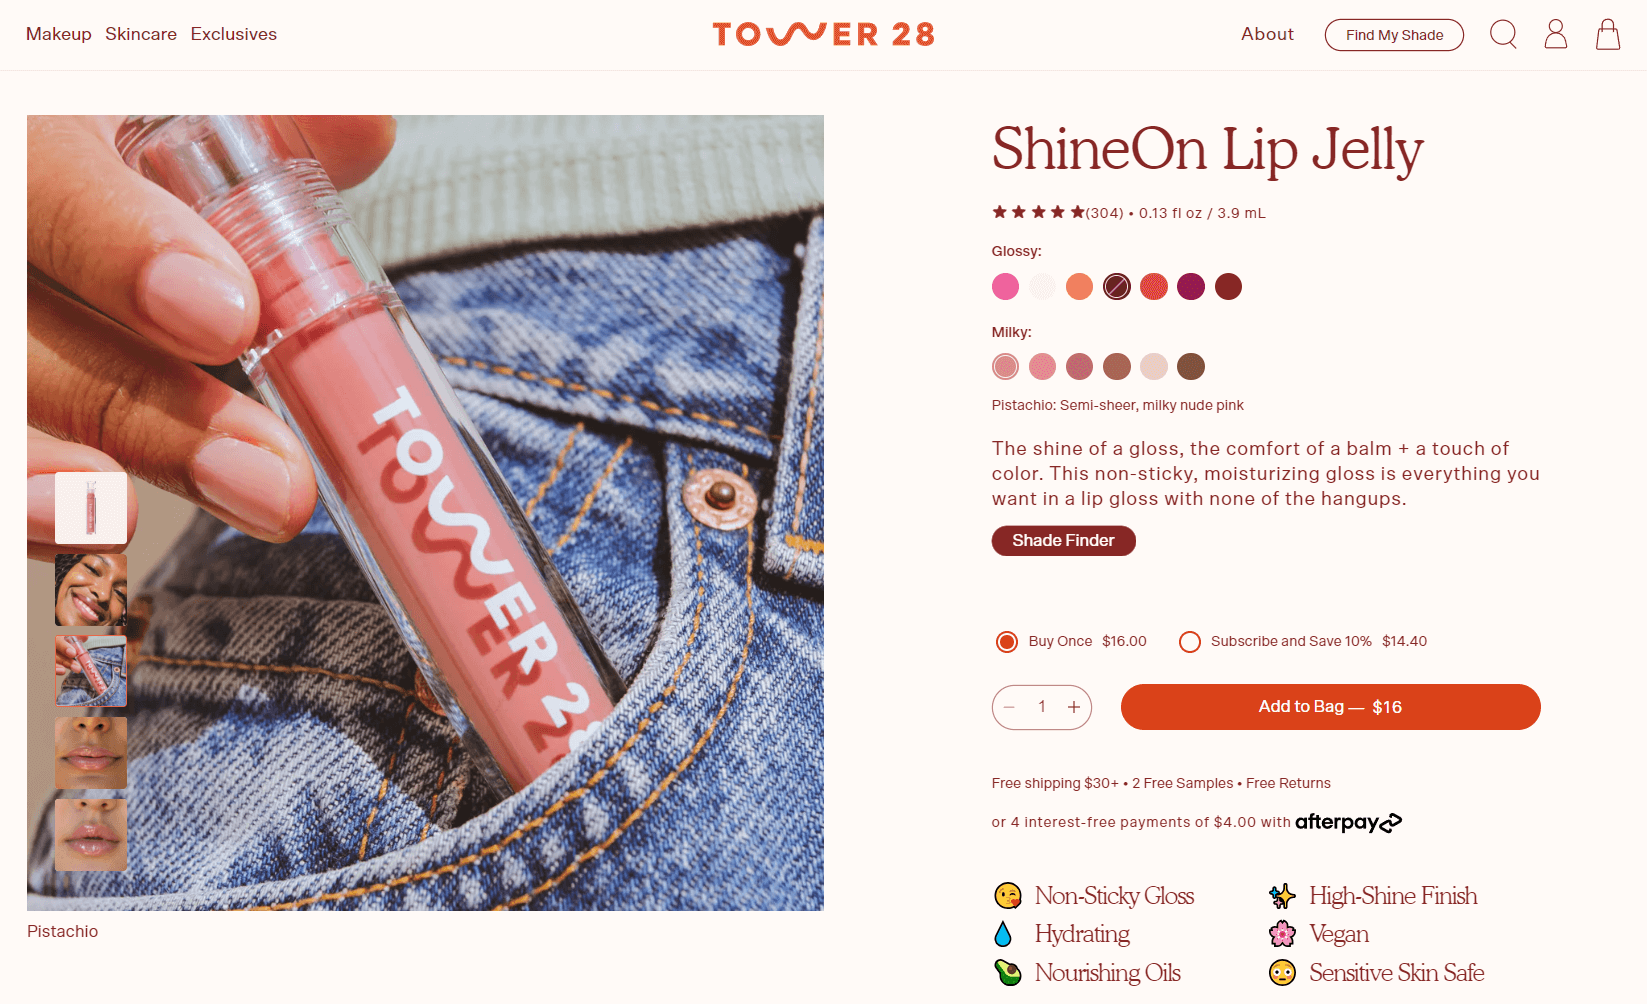
As we mentioned earlier, close-up shots often still need manual cropping in Photoshop or any other photo editing app—this helps eliminate unnecessary details in the shot and takes focus straight to the product. Square crop is particularly effective for centering your product and filling the frame to grab attention, like in the example below by beauty and skincare brand Tower 28.
Photoshop’s Crop tool has built-in ratio templates and a grid to create pixel-perfect crops every time. First, select the Crop tool in your sidebar. Then, click the dropdown in the top menu and select 1:1 (Square).

You’ll see a crop grid overlaying your image. You can adjust it by moving the image or cropping it further to fit your photo. The middle square helps you find the center of each photo if you want your product to be in the middle.

Align products for a uniform look
Cropping and centering each product creates alignment in your online store, particularly when viewing all product ranges together. It helps guide the shopper to compare products rather than get distracted by odd, uneven framing.
Clean beauty brand Tower 28 has different types of products in its store, but all listings look central. How do you achieve this?

If you know the image dimensions used for displaying products in your online store, you can use those same dimensions to create visual consistency—centering each product in the frame evenly, even if the actual products are different sizes in real life.
You can also find the image size your store is using by right-clicking on any existing product image and choosing Save image as... to download it. Open the downloaded file and look at the image properties for the pixel dimensions. Make a note of this size.

For example, we’ll use 600 pixels as width and 700 pixels as height.
- Open your product photo in Photoshop.
- Click on the Crop tool in the sidebar.
- In the crop dropdown menu, select W x H x Resolution.
- Add the correct pixels in the two boxes to the right of the dropdown, starting with width.
- In the same dropdown menu, click on New Crop Preset and give it a name.
Now every time you crop photos for your store, you can use the same crop template. Use the crop grid to help you center your products. This way, regardless of product size, you’ll be able to center them each time and create an appealing, uniform look for your store.
Improve your makeup product shots for growing sales
The beauty ecommerce market continues to thrive, with order volume up 10% in 2022 alone. To stand out from the competition, you need product shots that look professional and give shoppers what they want before clicking “buy.”
With some simple editing techniques, you can elevate your product photography even on a DIY budget. But if you need something more advanced or want to save time and effort, our team of professional editors is ready to help refine your shots and let your products shine.

Let us look after your image edits, so you can get back to the fun stuff. Try Path free.
Learn more


