Illustrations can enhance the style and appeal of your ecommerce site. However, creating illustrations (or hiring skilled illustrators) can be costly and time-consuming.
Thankfully, you can learn how to turn a picture into a line drawing in Photoshop CC 2019 following the photo editing steps below. Images of objects isolated on a white background work best for this technique, making this a great option for modifying or enhancing product photos.
Scroll down below the video for the written tutorial.
Getting started: How to outline an image in Photoshop
If you want to turn a photo into a pencil sketch in Photoshop, but don't want it to look like you did it in Photoshop, you'll need to pay attention to detail and prepare your image properly before you apply any filters.
I’m going to show you one method on how to convert your image into a pencil sketch flawlessly, and then we'll discuss specific tools you can explore to achieve other image outlining effects in Photoshop.
Not all photos are the same, so you'll need to use your judgment as you adjust filters, blurs and layer opacities each time you use Photoshop to convert a photo into a line drawing.
Step 1: Adjust the contrast of your photo
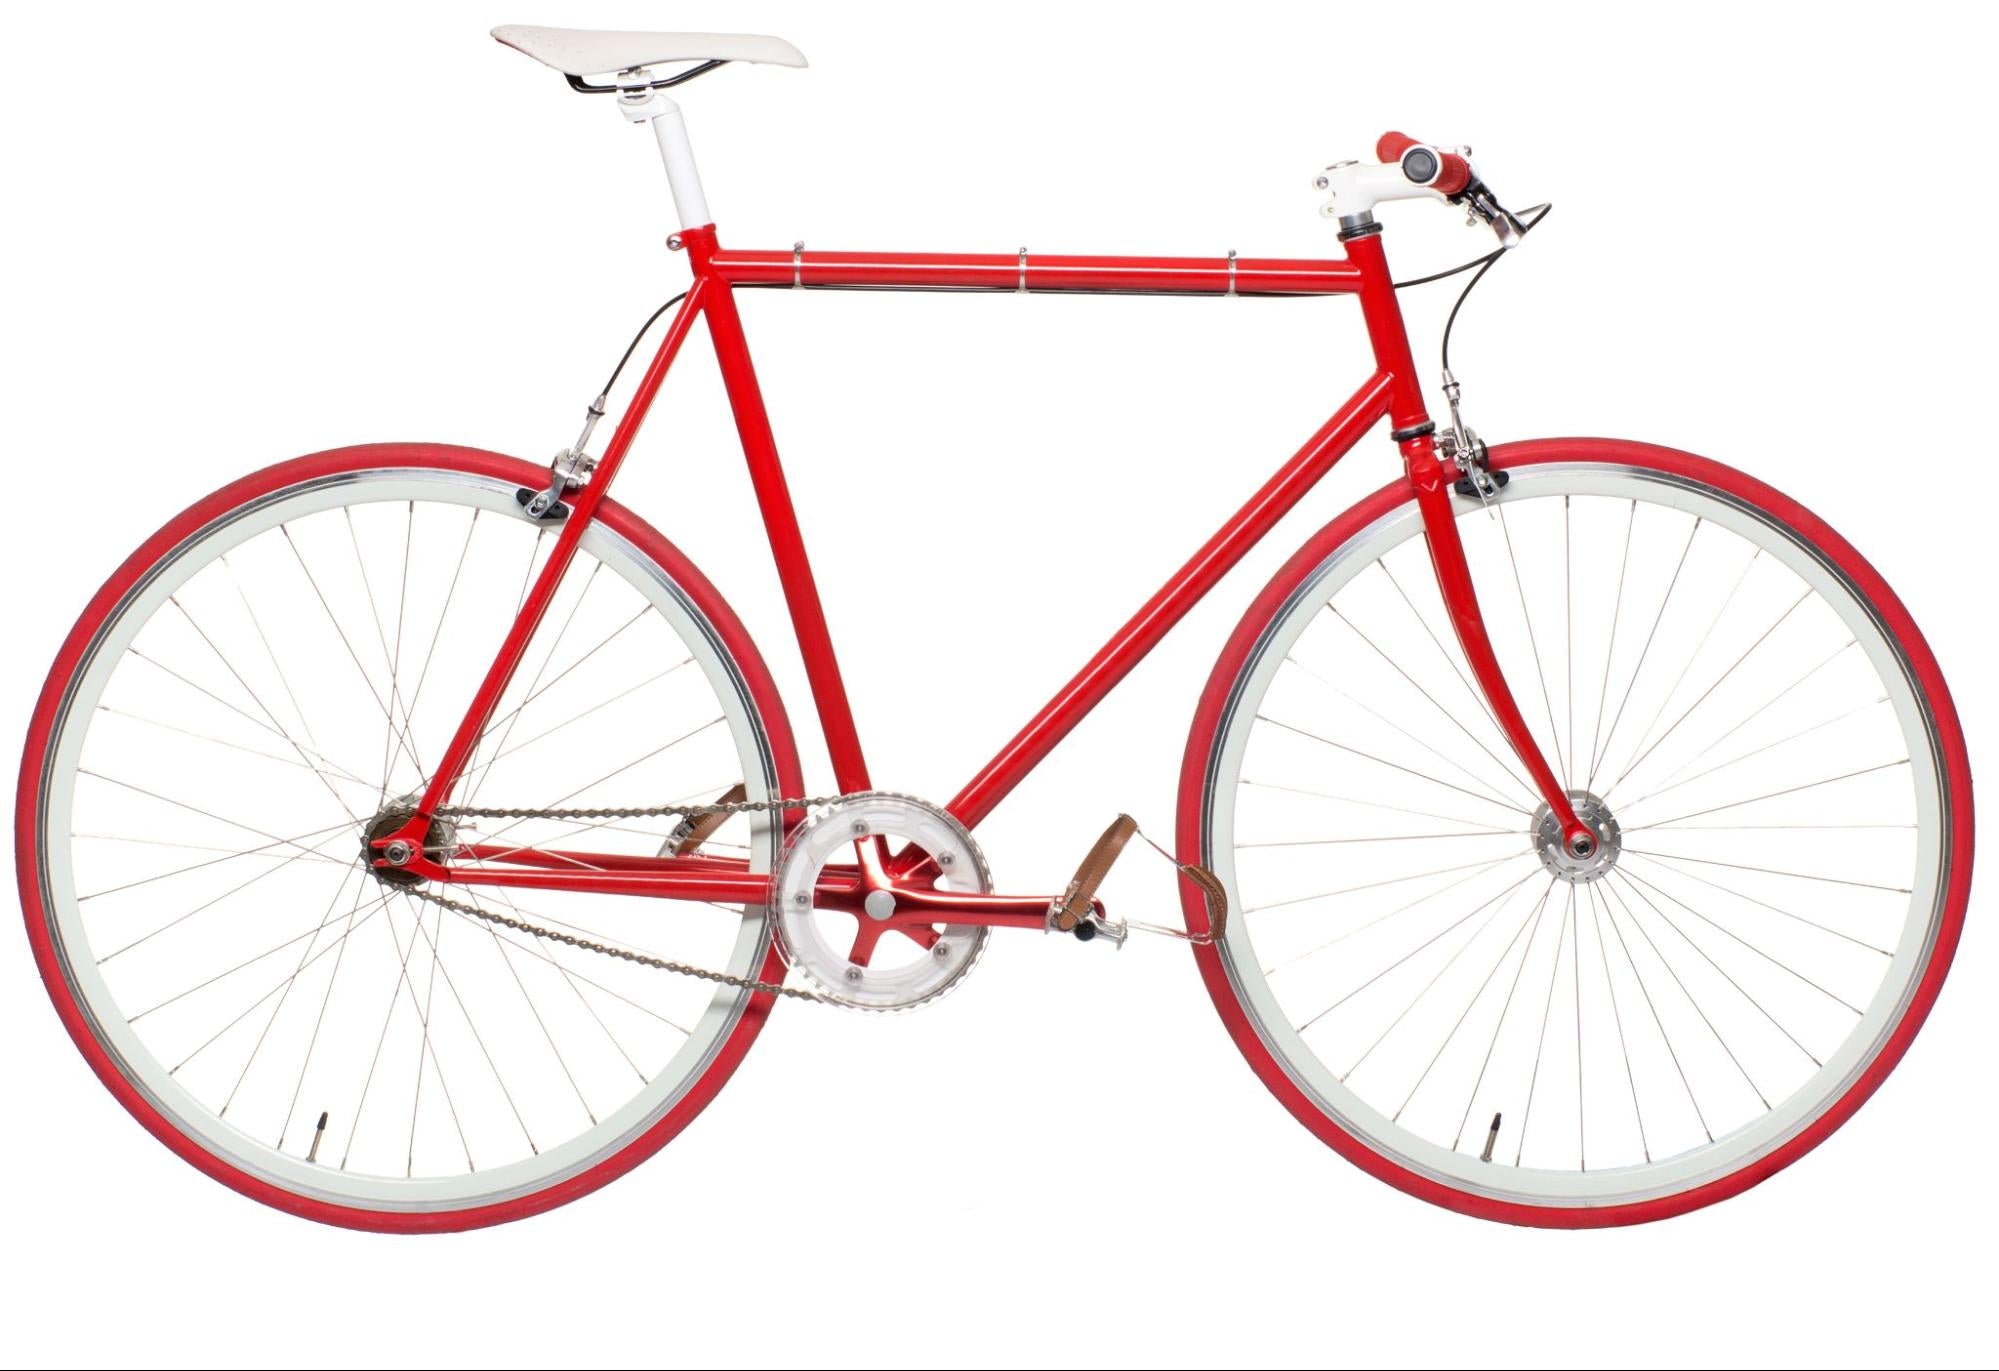
For the first step, we’re going to adjust the contrast of the photo to optimize it for a line drawing. In this photograph, the red parts of the bike contrast significantly against the white background. However, you’ll see there are sections of the bike’s frame that are very light, like up here by the bike’s seat.
We'll adjust the contrast of the entire photograph so the light areas of the bike won’t blend into the background as we modify this photo. Go to your Layers panel and make sure the layer that contains your image is selected. If you're working in a flattened image (such as a JPG), this layer will be the locked Background layer.

If you can’t see your Layers panel, you can access it by going to the top menu here, selecting Windows, and then scrolling down until you see “Layers.”
Using Curves
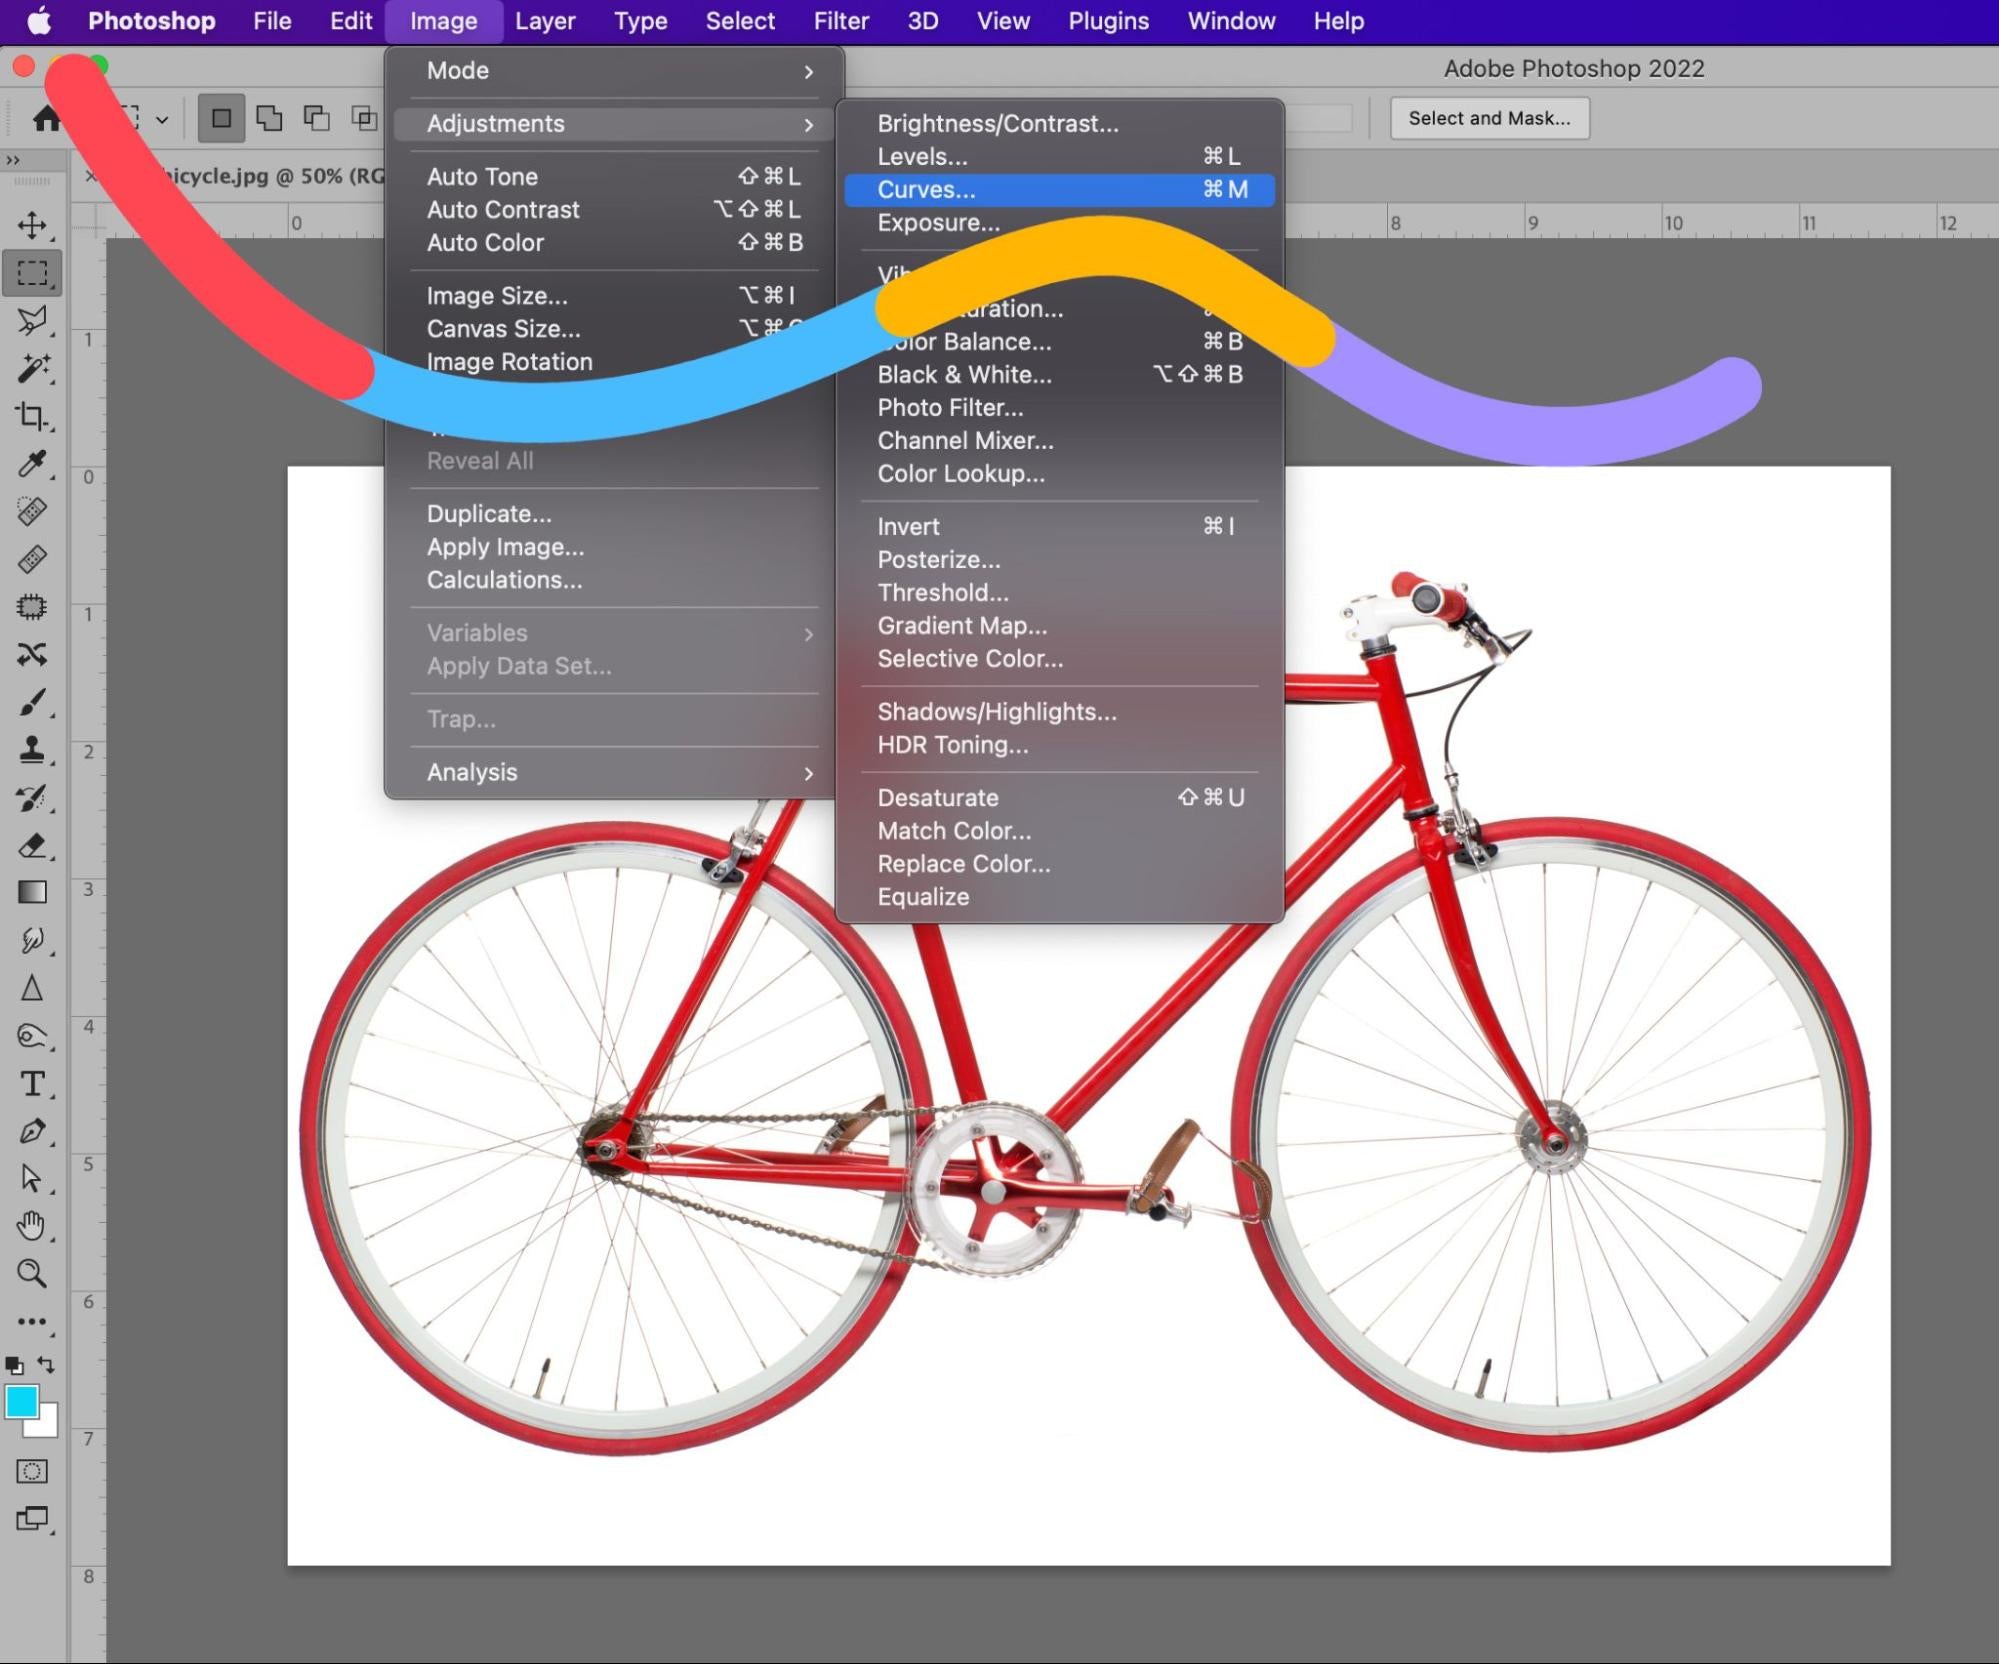
We’re going to use Curves to make the light parts of the photo darker against the light background. To do this, choose Image > Adjustments > Curves from the dropdown menu at the top of Photoshop's application window.
Now I have my Curves window open. This can look intimidating but it’s actually really easy and fun to use. What I’m going to be doing is clicking and dragging on this line here to change the lights and darks in my image, like this.
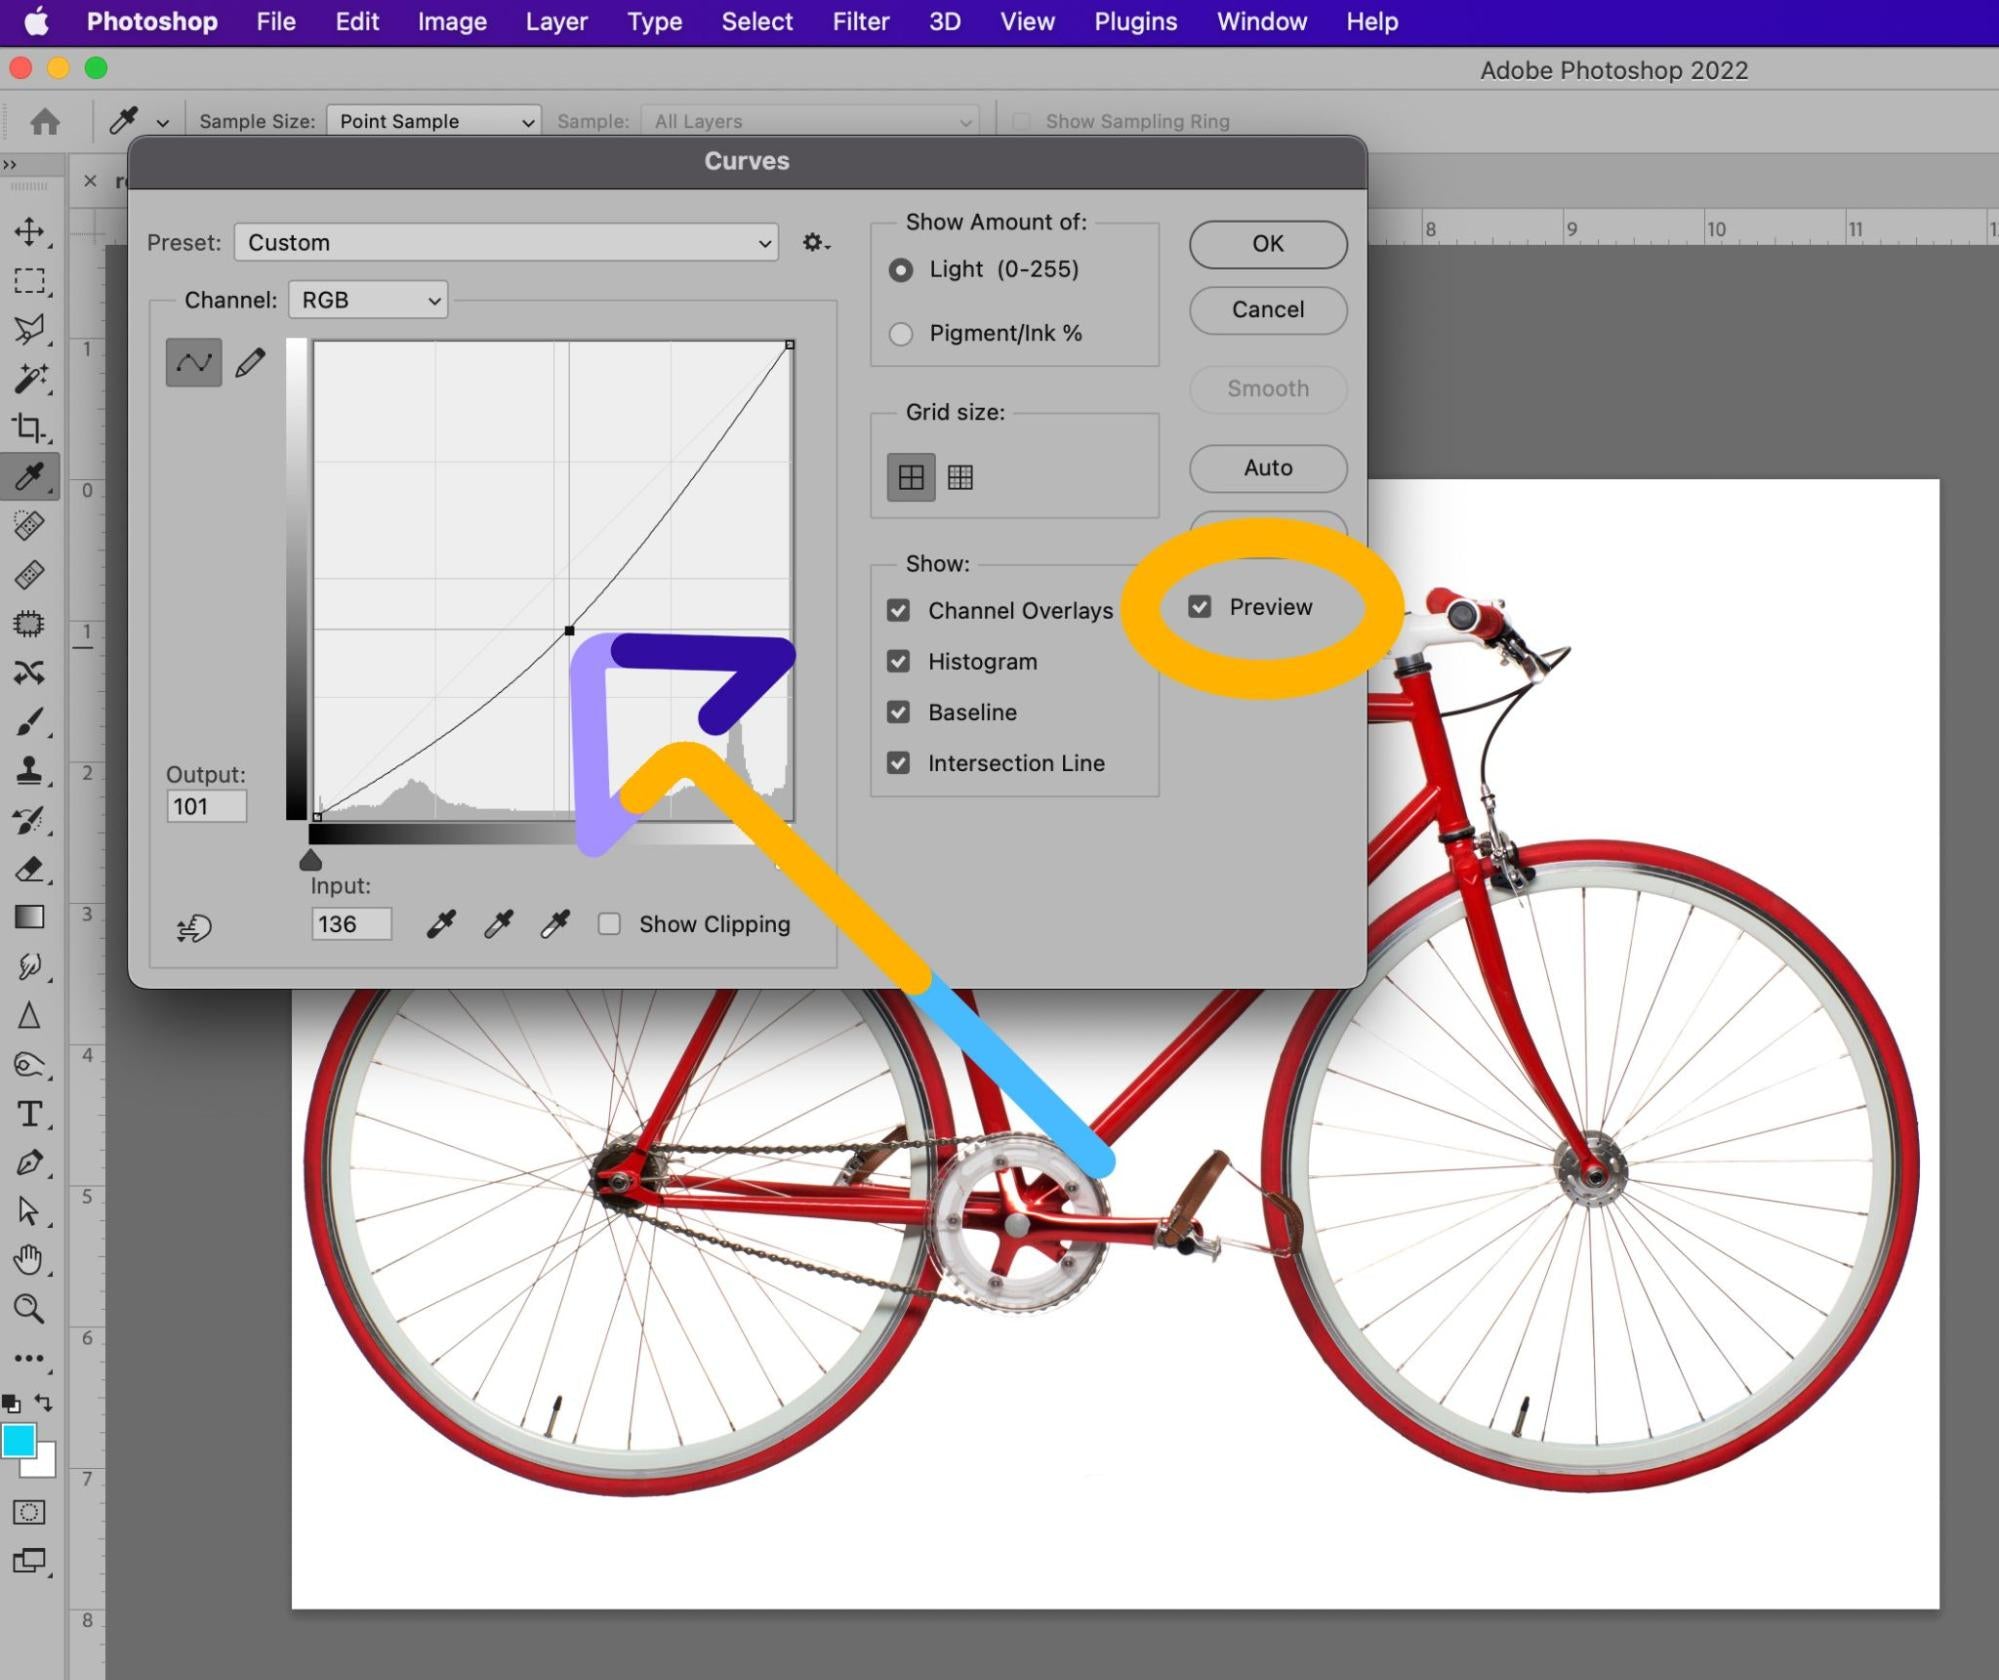
I’m working in RGB, so when I pull down on the curve, it darkens the inside shades of the image, and when I pull up, it lightens them. If you’re working in CMYK, it’s just the opposite—down to lighten, up to darken.
I want to adjust just these white areas of the bike, so I’ll click on the area in the image to see where those colors correspond on my curve—for this image, it’s up here—and that gives me an idea of where I need to adjust my curve. So, I’ll grab here, and pull down here, and see what that does to my image? Every image is a little bit different, but you should have an idea now of how to use curves to create more contrast between the object and the background.
Once you’ve got some significant contrast going on, click OK in the Curves dialog box.
Step 2: Set up your layers
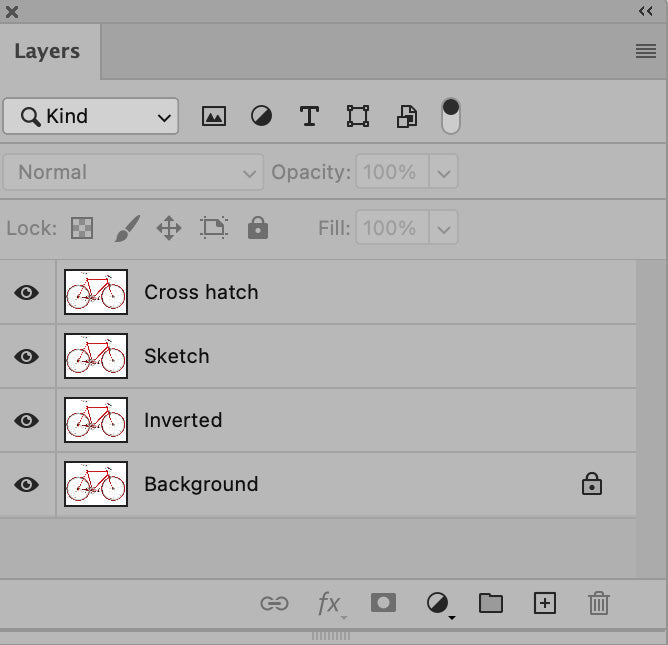
Next thing we’ll be doing is setting up our layers. We’re going to have four regular layers in all and an adjustment layer, and I’ll walk you through each layer, one by one.
In your Layers panel, duplicate the layer containing your image three times, so that you have four identical layers. To duplicate the layer, select the original layer in the Layers panel, click on the Layers panel menu in the upper right hand corner of the panel, and choose Duplicate Layer.

Name your layers
Let’s name these layers so we don’t get confused. We can keep the Background layer called “Background,” that’s fine. Now, click on the layer name of the Background copy layer so you can rename it. We’ll call this one “Inverted.” The next layer up—this one called “Background copy 2”—we’ll name “Sketch.” And the top one we’ll rename to “Cross hatch.” Let’s move on to the next step.
Step 3: Convert the image to grayscale using an adjustment layer
This is going to be a black and white sketch, so the next thing we’re going to do is convert our image to black and white. Yes, you can go to Image > Mode > Grayscale and convert it that way, but we’re going to use an Adjustment Layer, which is a little more elegant and isn’t as destructive.
To start, select the duplicated layer at the top of the Layers panel. We’re doing this so that the adjustment layer we’re going to create will sit on top of all the other layers.
Select the Adjustment Layer icon at the bottom of the Layers panel—it’s the icon that looks like a half black, half white circle. Choose Hue/Saturation from the dropdown menu.
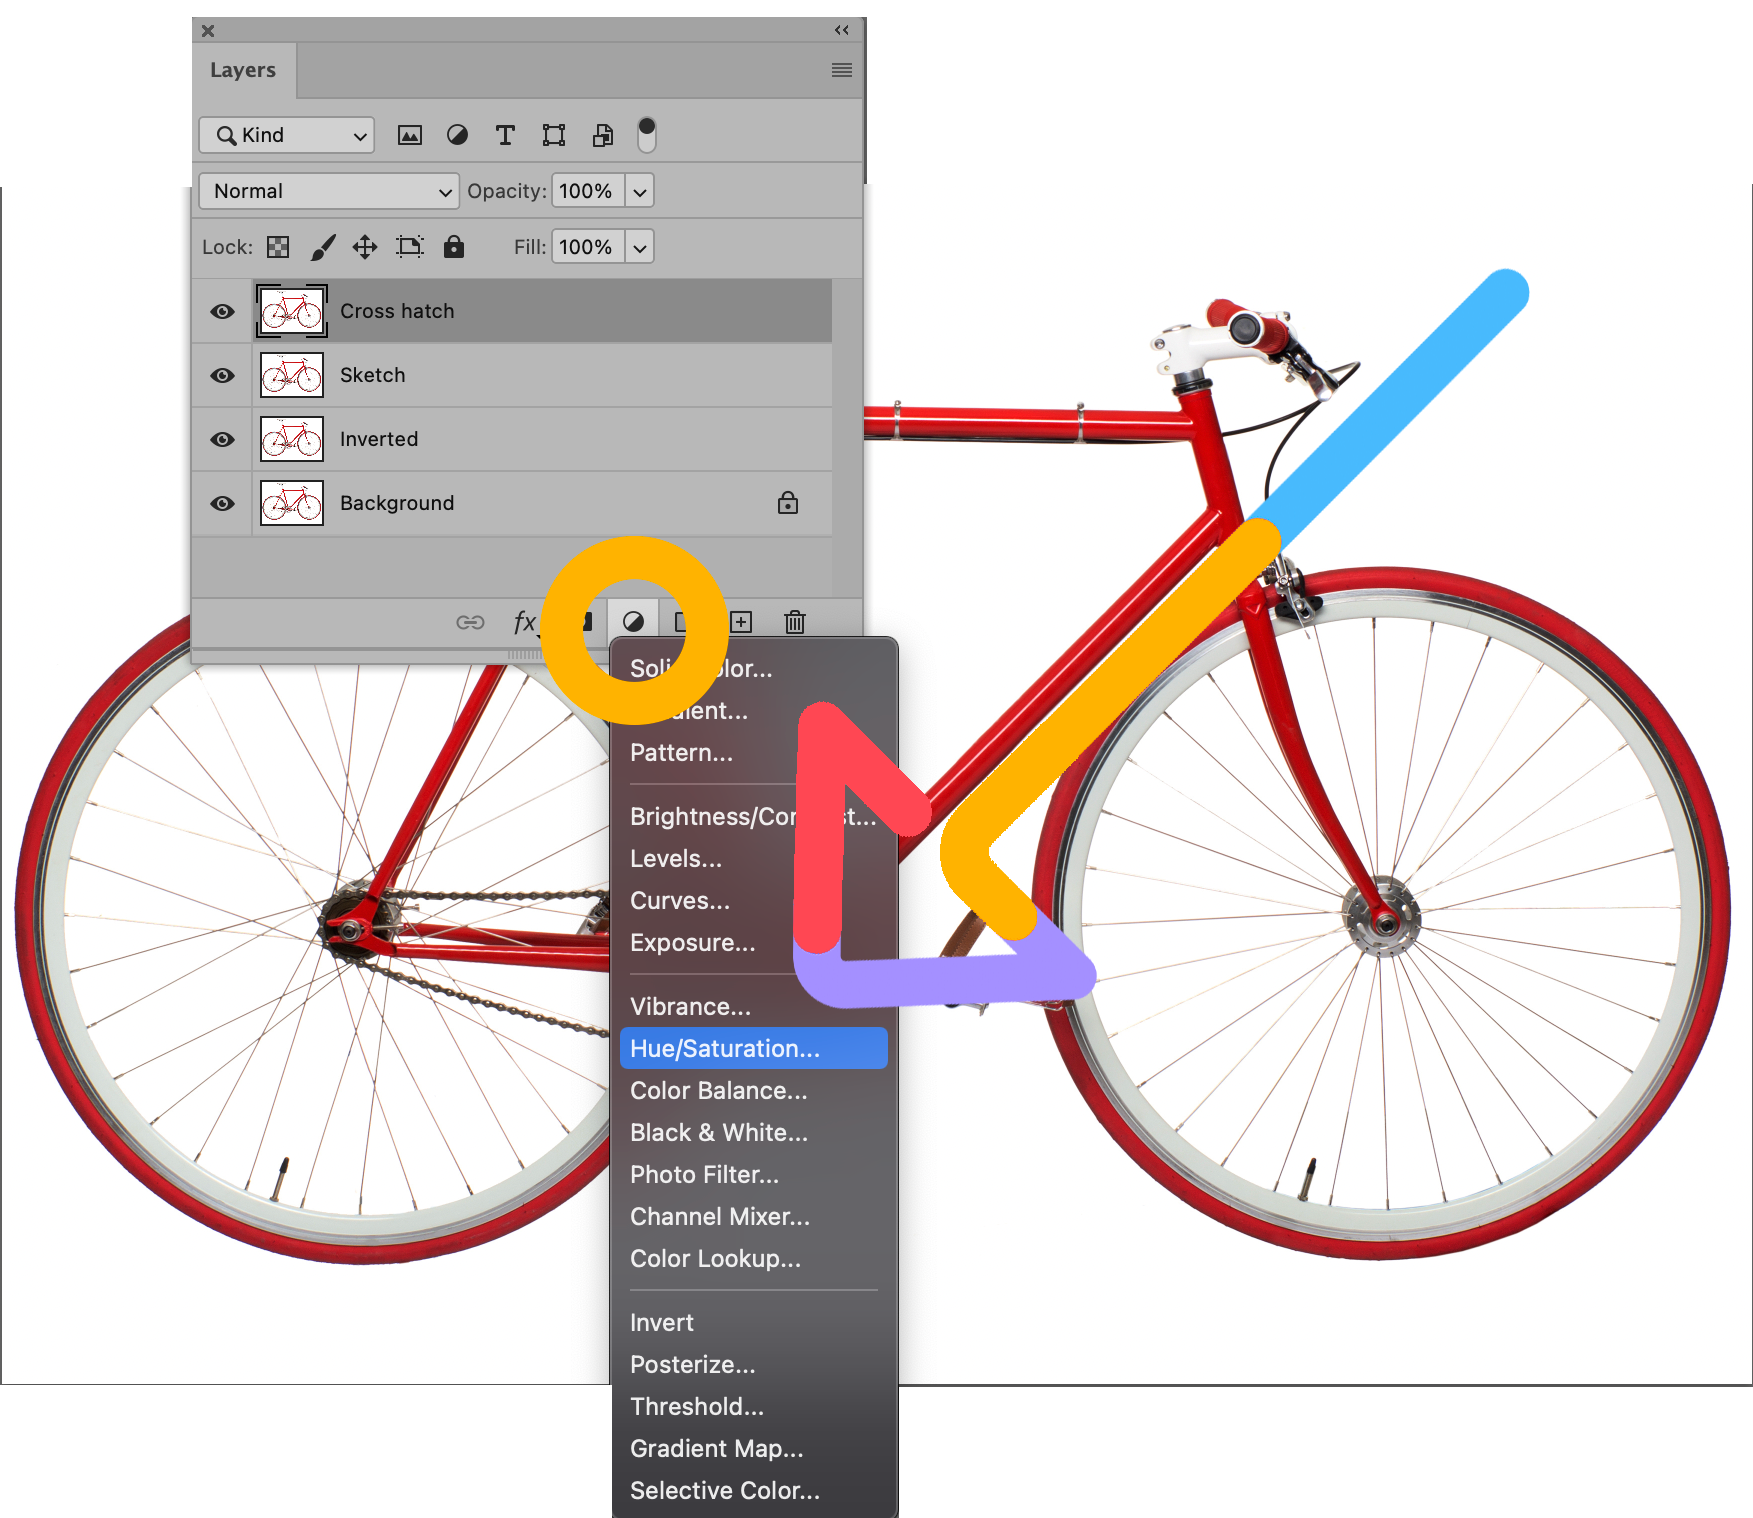
Voila! You've just created an adjustment layer for Hue/Saturation, which means all layers that appear beneath the adjustment layer will retain the Hue/Saturation properties you set for that adjustment layer.
Adjust properties
With your adjustment layer still selected, go to your Properties panel, located to the right of your image by default. If you don't see your Properties panel, you can choose Window > Properties from the dropdown menu at the top of the Photoshop application window.
You'll see three sliders in the Properties panel: Hue, Saturation and Lightness. Drag the slider for Saturation as far as it will go to the left, so that the value listed for Saturation is now -100.
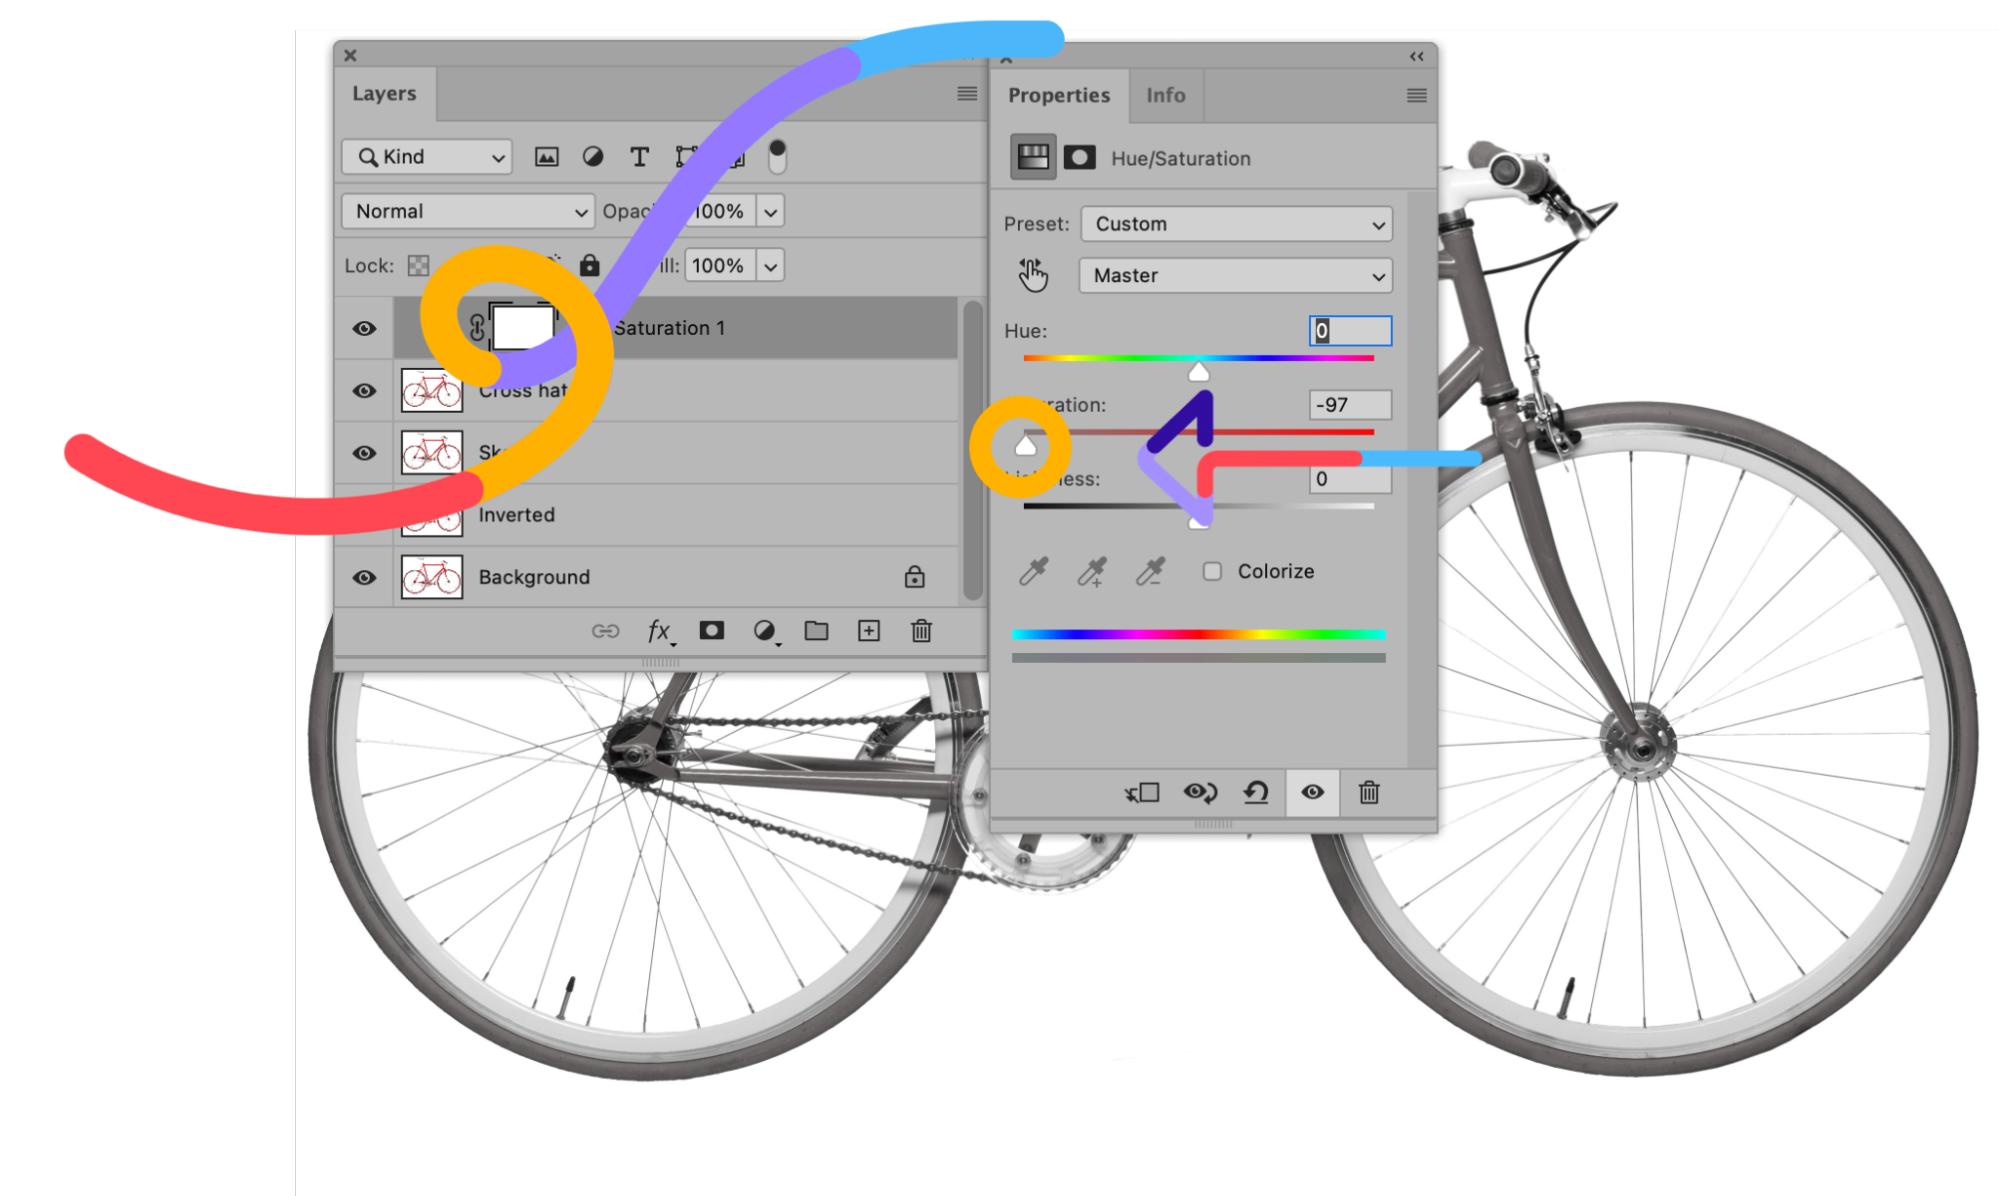
Your image now appears grayscale. Pretty cool, right?
Step 4: Convert your photo to a line drawing
In this next step, you'll learn how to outline, or trace, the picture in Photoshop using a series of layer effects. If your goal is to create just an outline of your photograph, you may decide your picture is complete after this step.
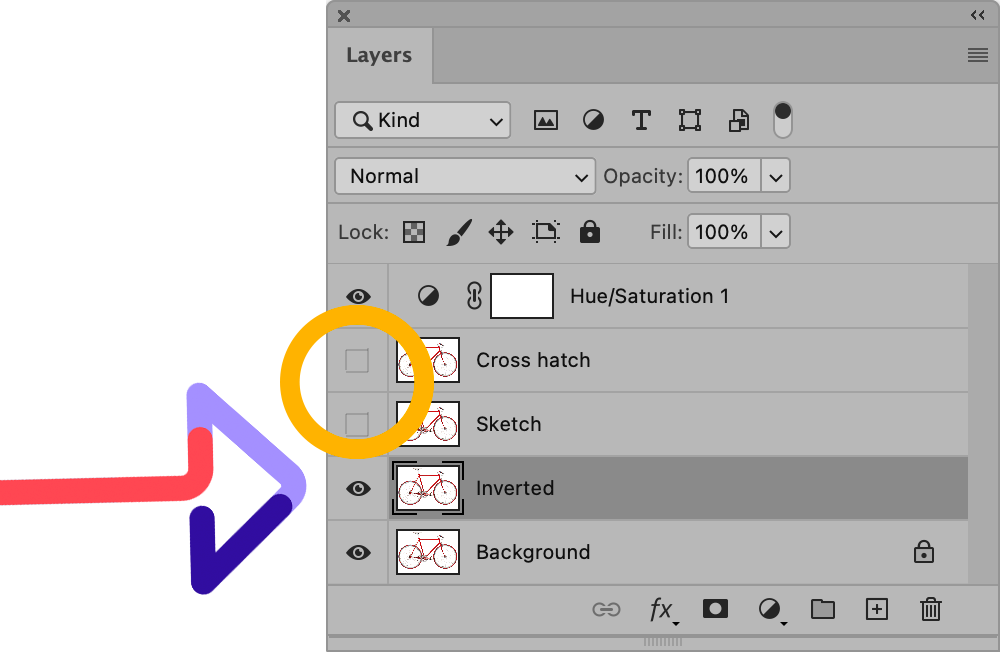
Make your top two duplicated layers invisible by clicking on the eye icons next to the layers in the Layers panel. Then select the visible layer that is second from the bottom of the Layers panel, the one we named “Inverted.”
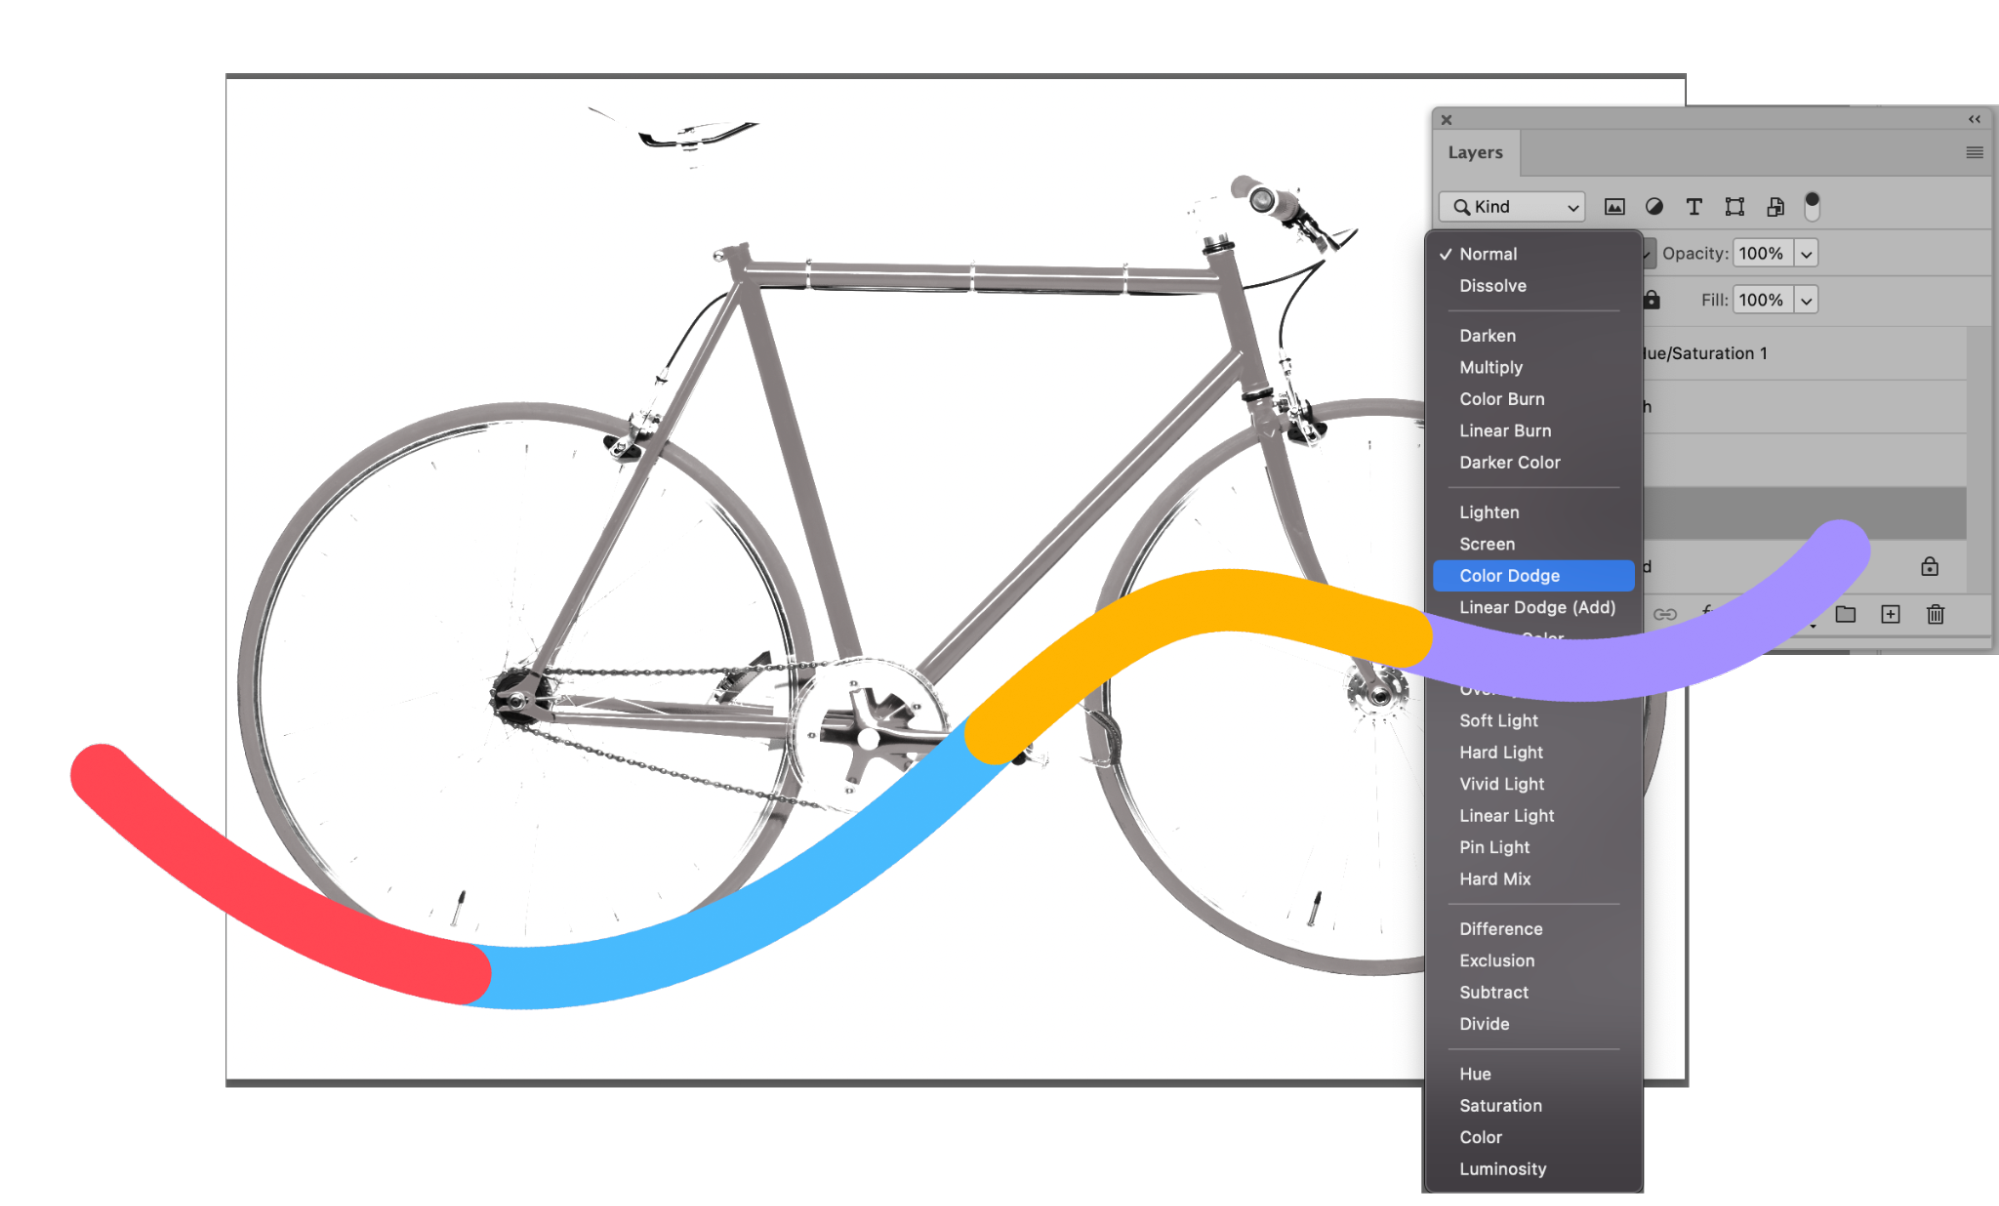
Change the Blending Mode
Click on the dropdown menu at the top of the Layers panel next to Normal. Select Color Dodge.
With the same layer still selected, invert the image by typing CTRL+I (COMMAND+I on a Mac). You can also invert the image by choosing Image > Adjustments > Invert from the dropdown menu at the top of Photoshop's application window.
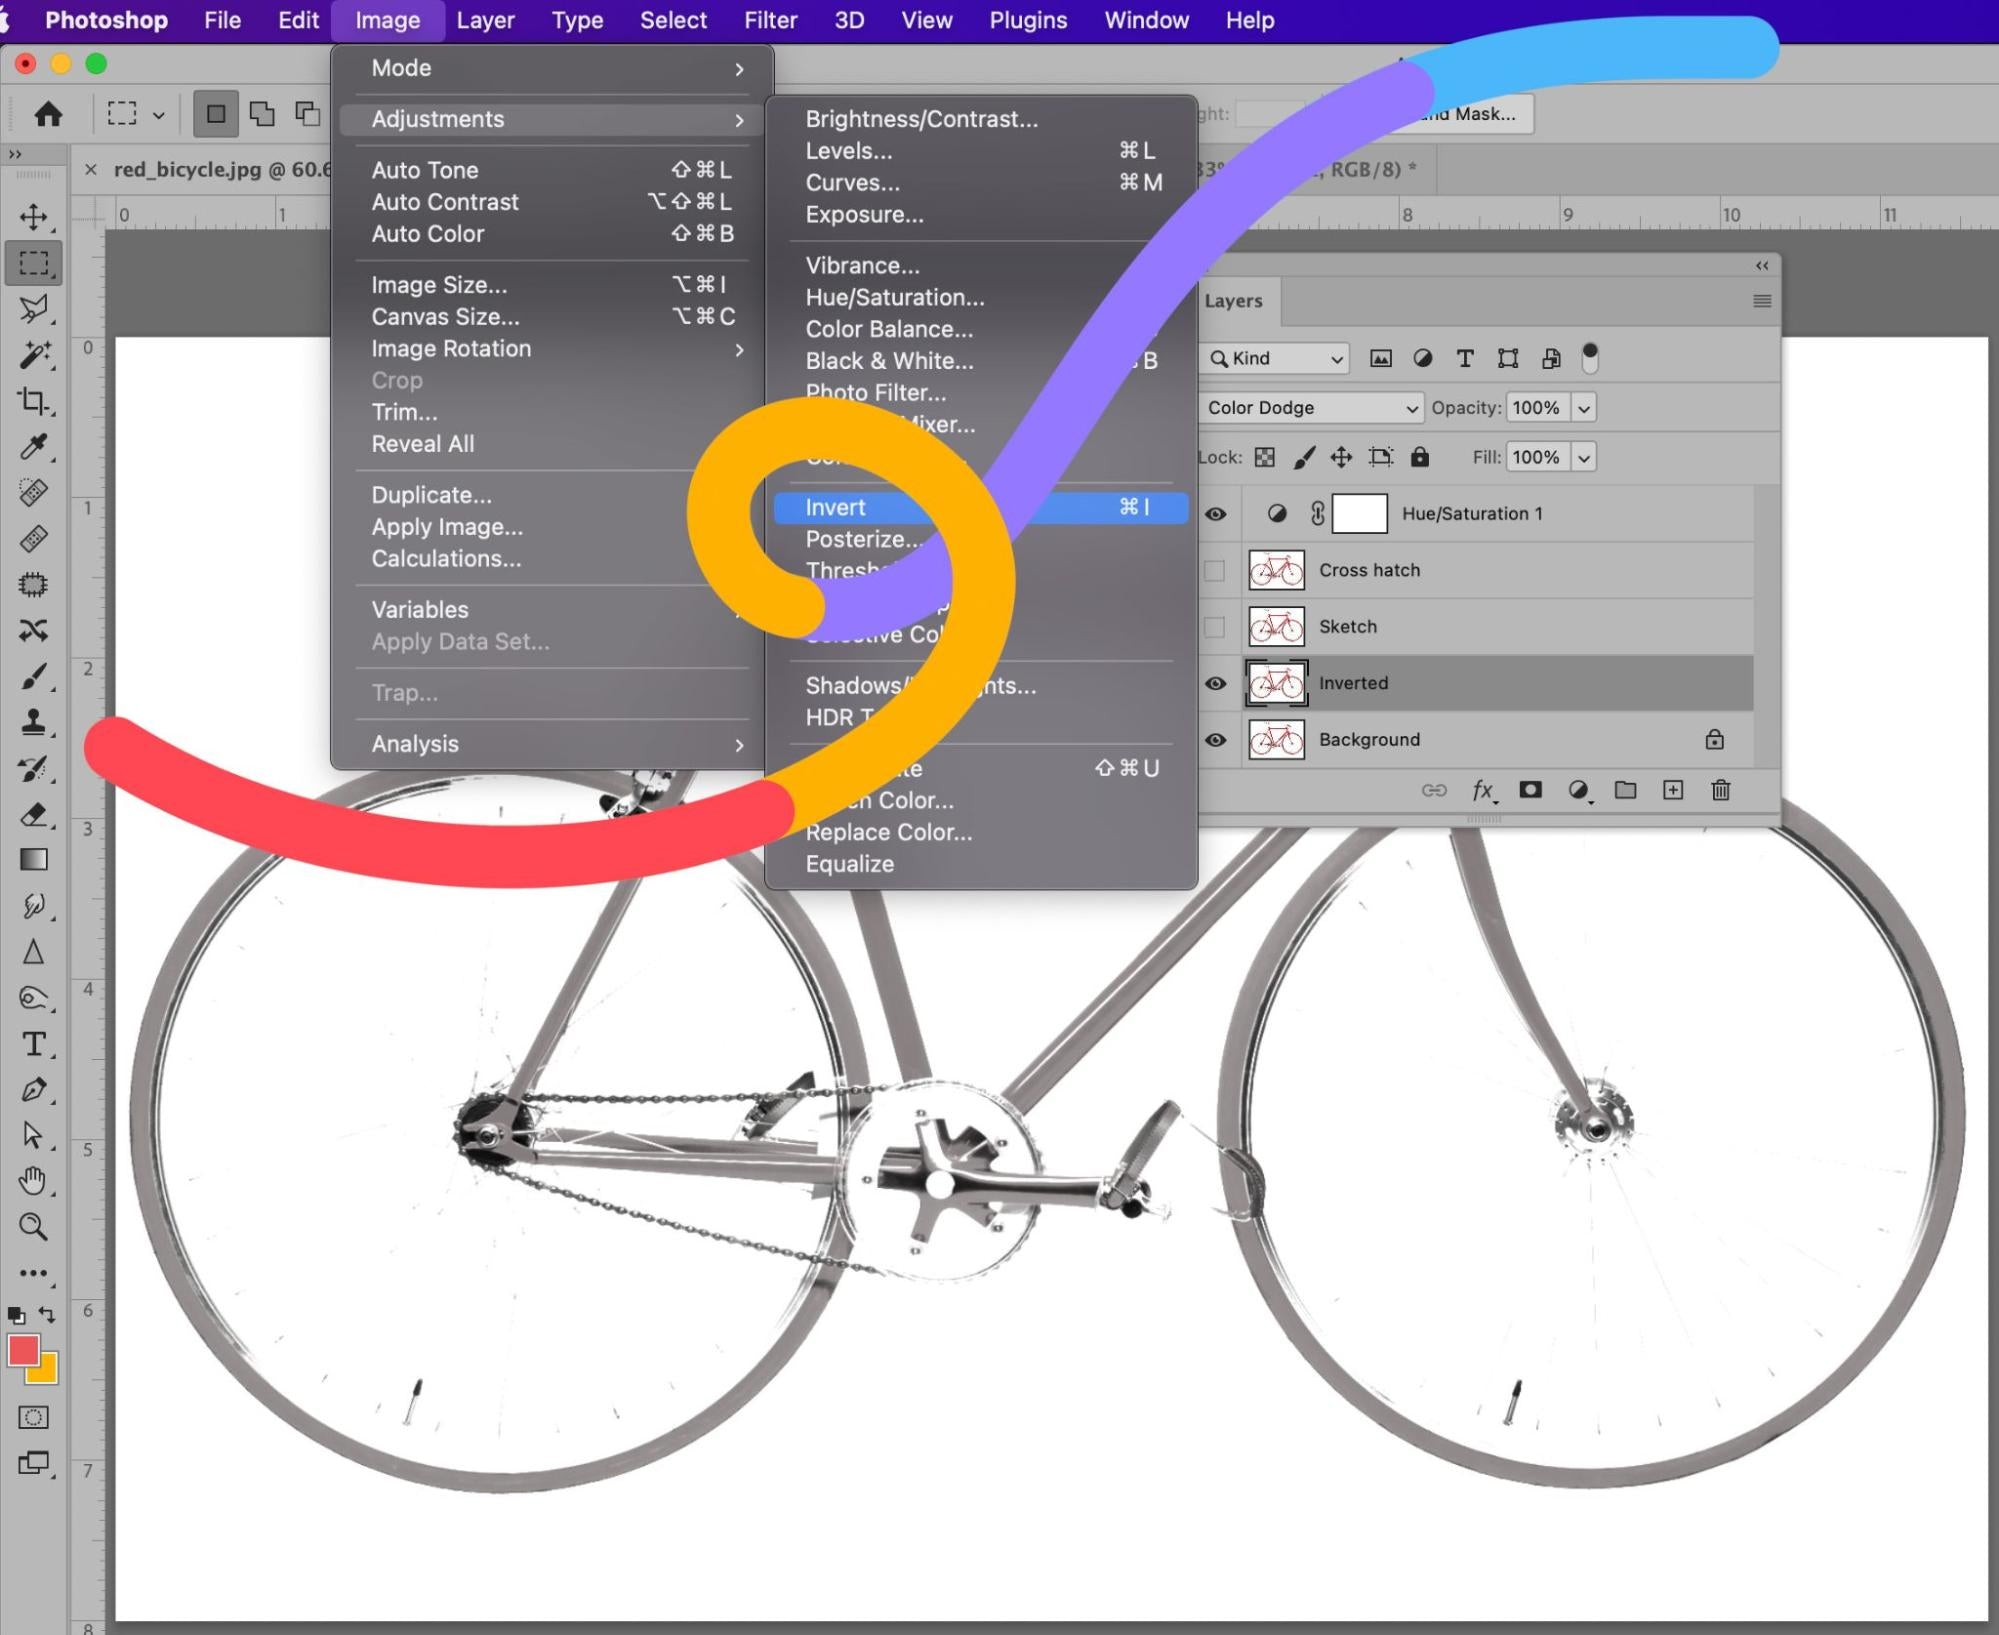
So, if you look here in the Layers panel, there’s a preview of what the image would look like if it didn’t have the Color Dodge blending mode attached. Don’t worry—this is all correct. And it’s about to get even better.
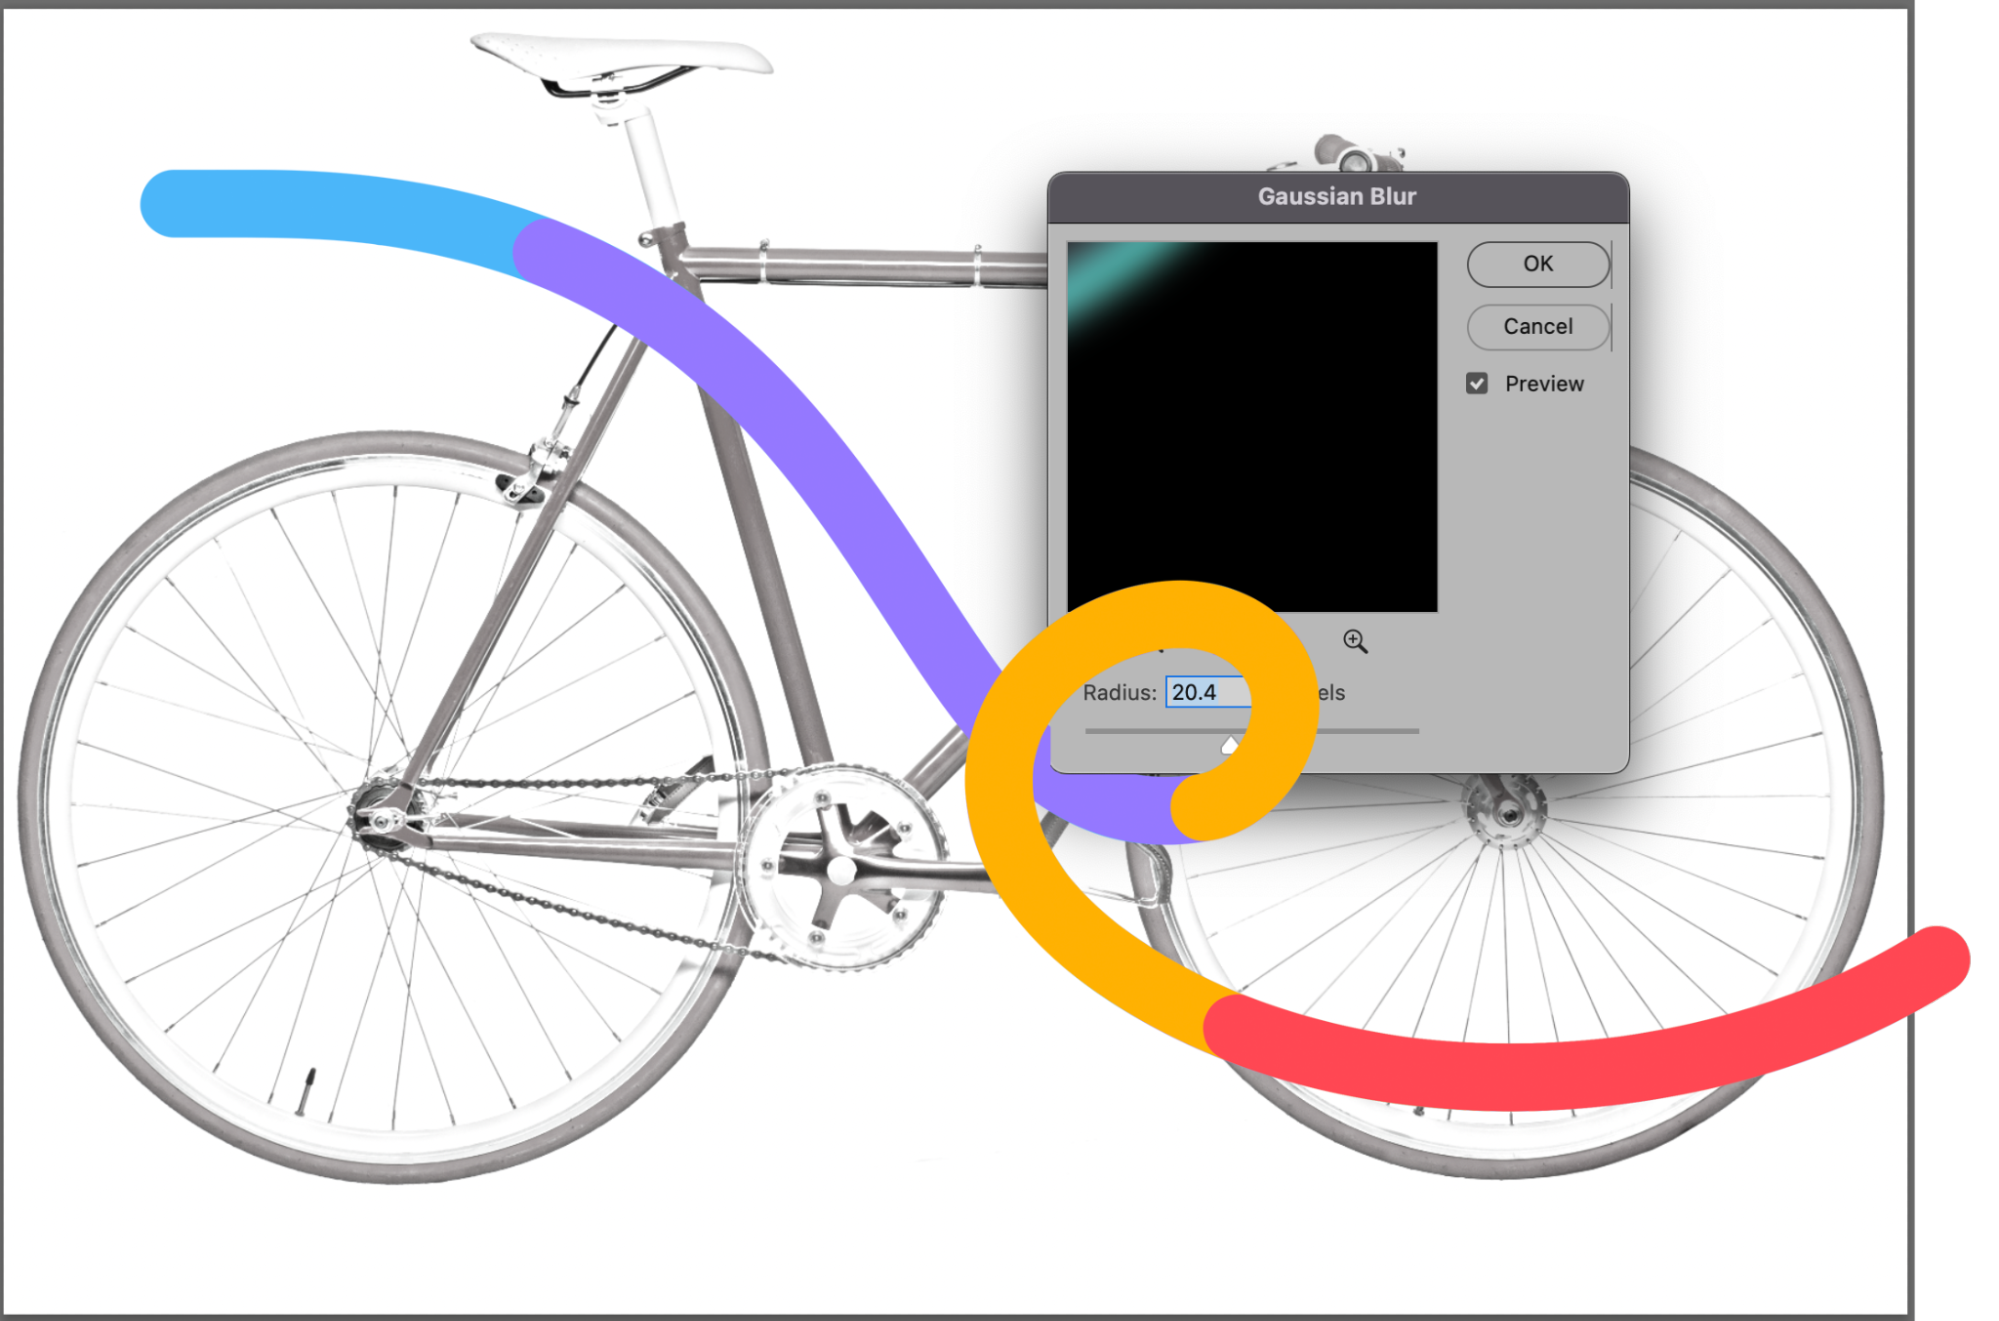
Add a Blur
Next, choose Filter > Blur > Gaussian Blur from the dropdown menu at the top of the application window.
In the Gaussian Blur dialog box that appears, adjust the slider until your image looks like a line drawing.
Moving the slider to the left will result in thinner lines; moving the slider to the right and increasing the blur will thicken and darken the lines, and add some shading to the image. Make sure that Preview is checked in the dialog box so that you can see how the image changes as you move the slider to the right or to the left.
How to make the strokes of your line drawing thicker in Photoshop
Now, as a side note, you may decide you want to thicken the strokes of your line drawing as it looks so far. To thicken the strokes, duplicate your original layer one more time and move the new layer above the layer you just adjusted (layer with Color Dodge blend mode).
Choose Filter > Filter Gallery... from the dropdown menu at the top of the application window. Choose Glowing Edges under Stylize. Here, you can adjust the Edge Width on the right-hand side of the window. Reducing Edge Brightness will result in a cleaner edge. Click OK.

Back in your Inverted layer, click CTRL+I (COMMAND+I on a Mac) to invert the layer, and change the layer blend mode to Multiply.
The outlines of your image will now be thicker and darker.
Step 5: Set your background and foreground colors
For the next steps in this process, we’ll need to make sure that our foreground and background colors are set up correctly before we do anything with our filters. So let’s do that now.
In your Toolbar, set your Background Color to white by double-clicking on the Background Color icon. In the Color Picker (Background Color) dialog box, click on the upper left-hand corner of the large color box.
Next, set your Foreground Color to a medium gray. Double click on the Foreground Color square in the Toolbar. In the Color Picker (Foreground Color) dialog box, click midway down the left side of the large color box.
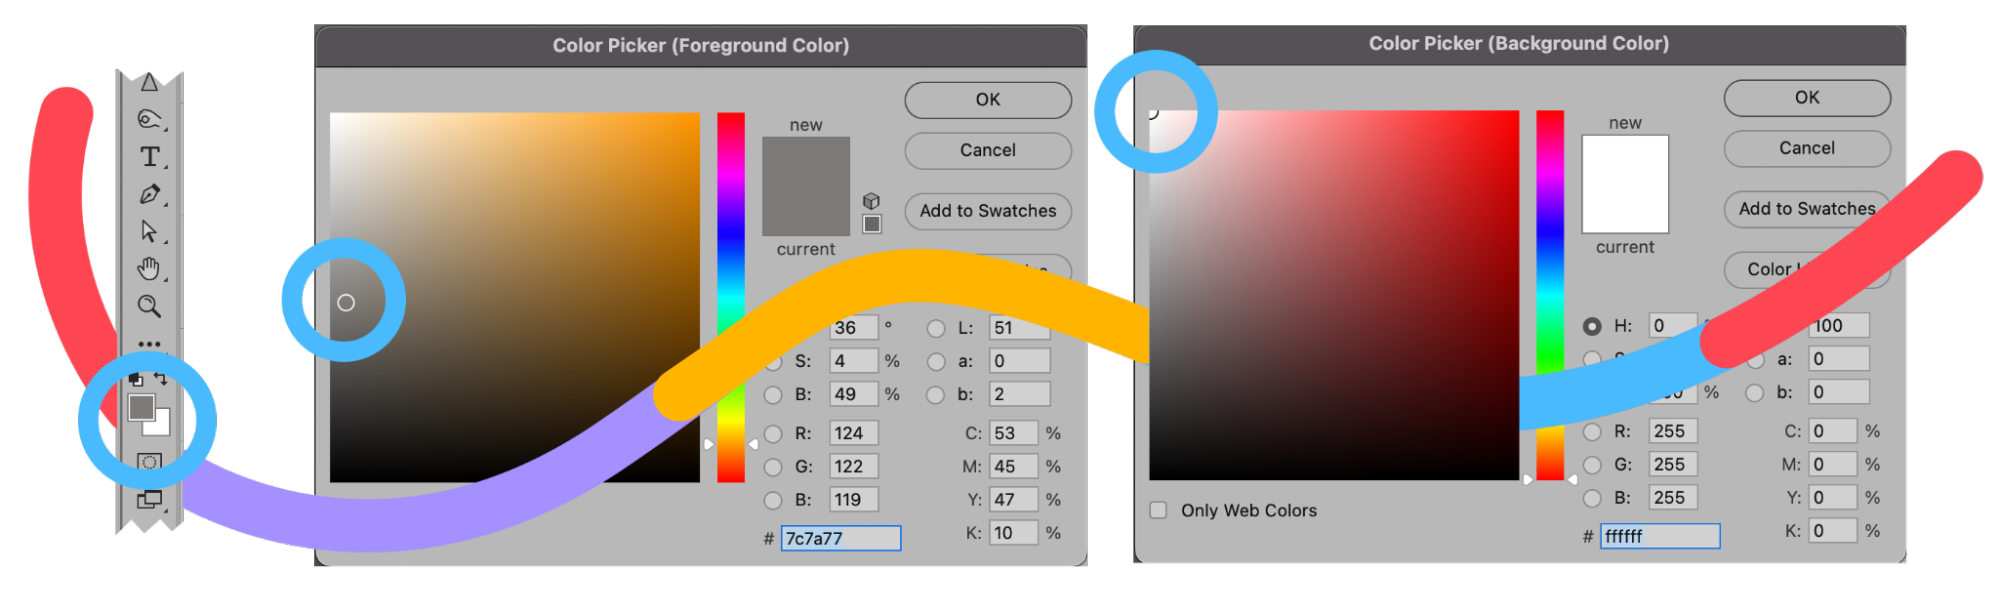
Other colors in the large color box (such as the blues and reds visible in the Color Picker panel image below) are irrelevant since you're keeping the cursor all the way to the left side of the large color box.
Step 6: Add pencil shading to your image
In the Layers panel, select the layer above the layer you just worked with—the layer called “Sketch.” Click on the eye icon to make the layer visible again. Your image will now look like a black-and-white photograph again.
Choose Filter > Filter Gallery... from the dropdown menu at the top of the application window. That big Filter window will pop up again.
Add Charcoal Filter
In the Filter window, click on the folder marked Sketch and choose Charcoal.
Adjust the Charcoal Thickness, Detail, and Light/Dark Balance sliders until the image in the preview window has the appropriate amount of detail. Remember, you already have a line drawing of the photo in a lower layer, so you only need to create shading in this step.
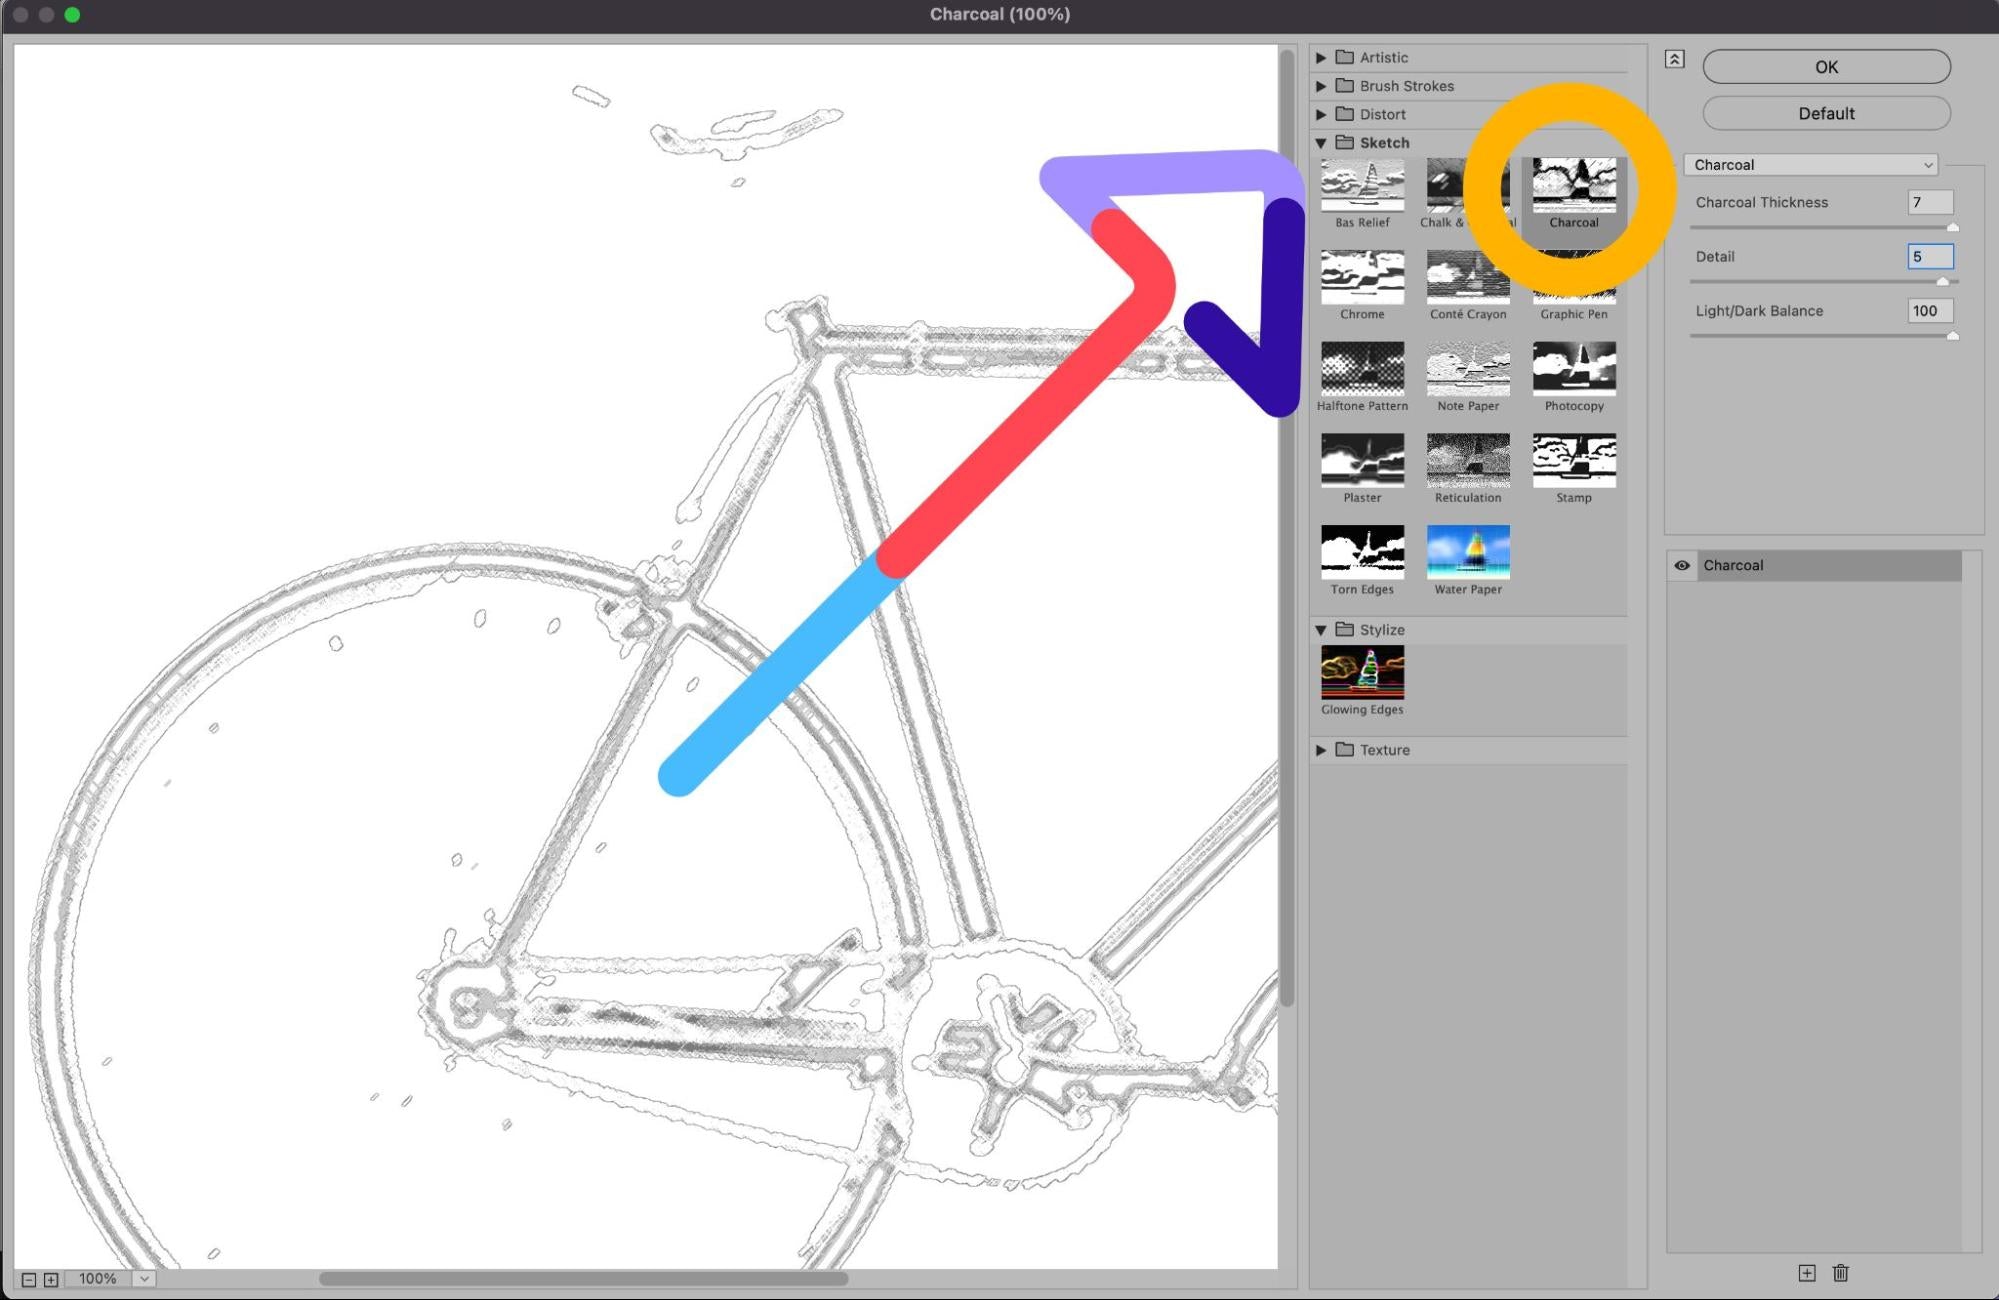
Click OK.
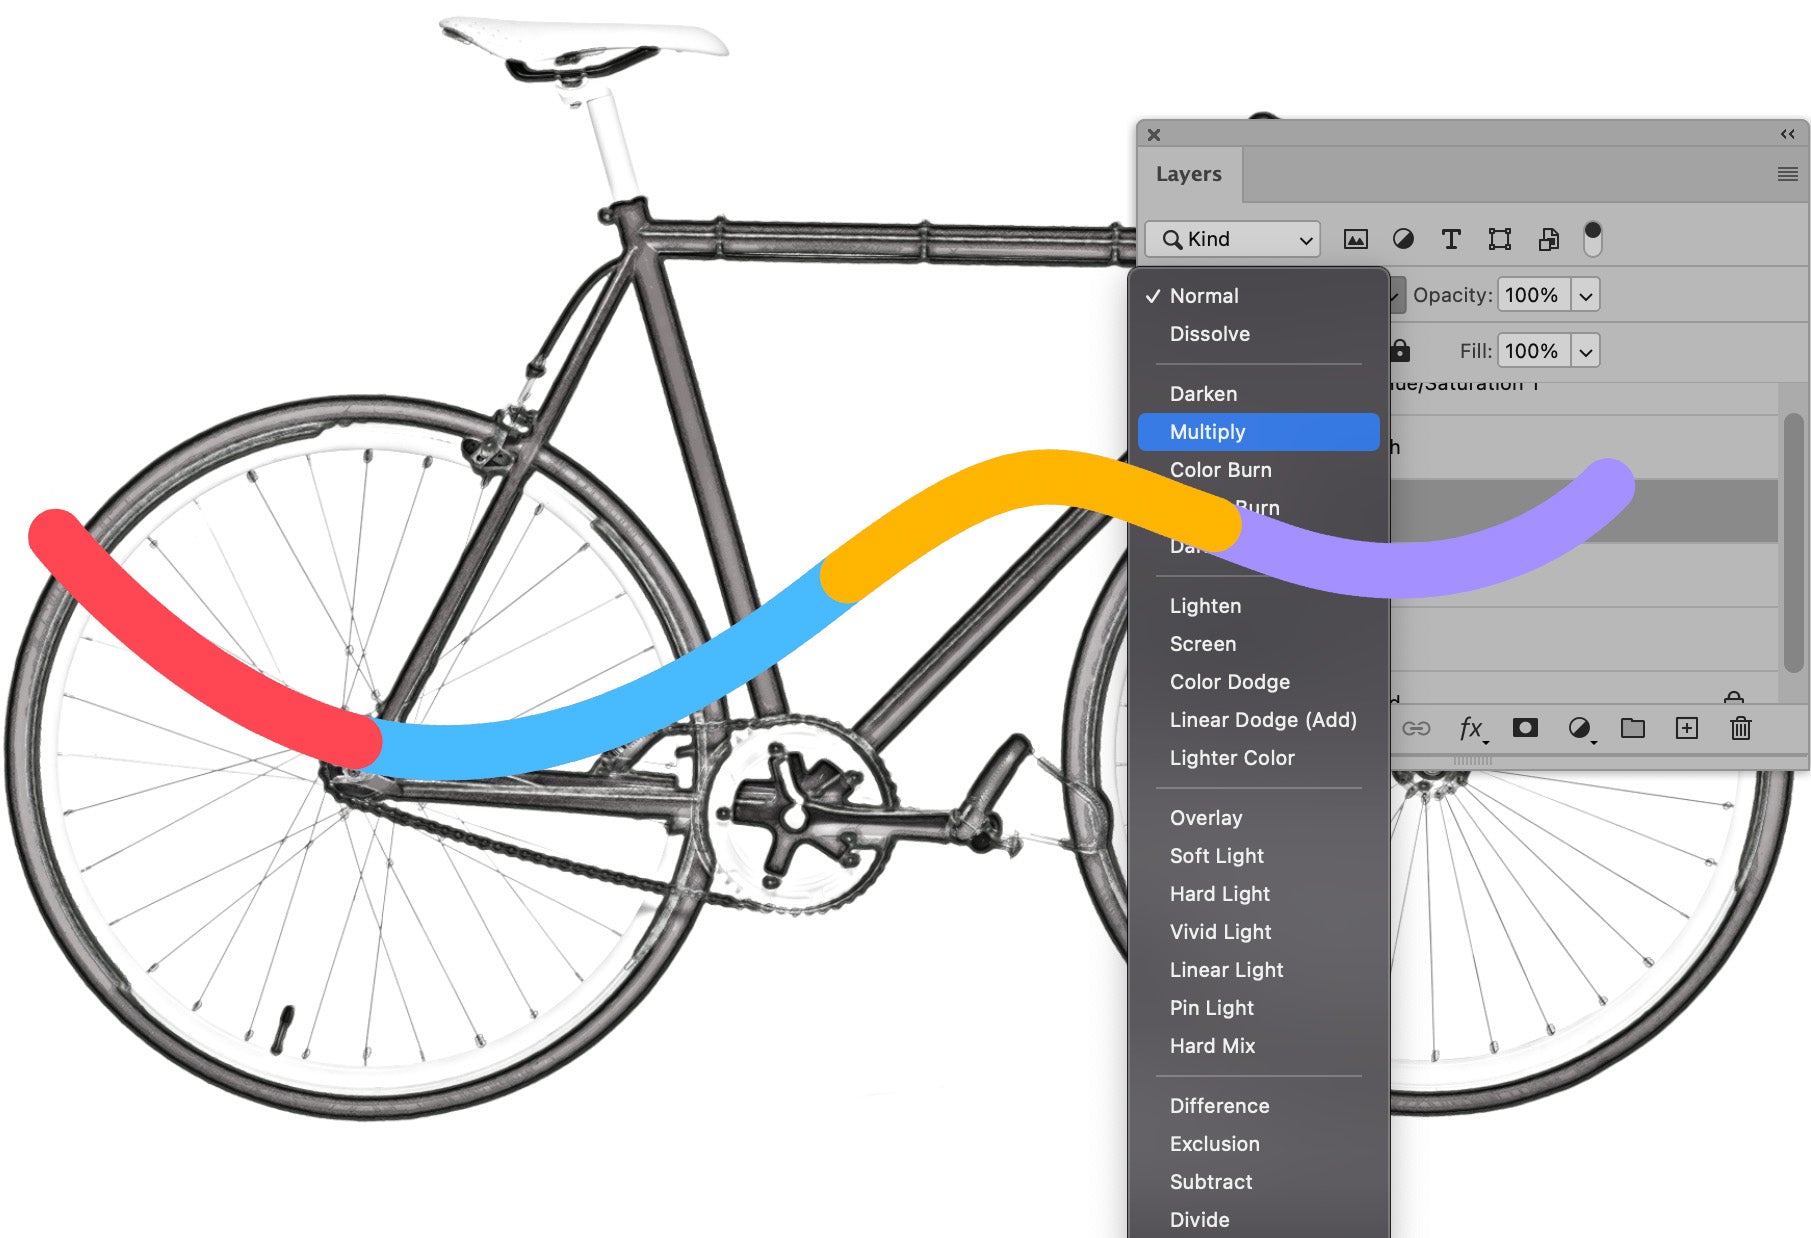
Back in the Layers panel, click on the dropdown menu next Normal and adjust the Layer Blend Mode of the charcoal layer to Multiply.
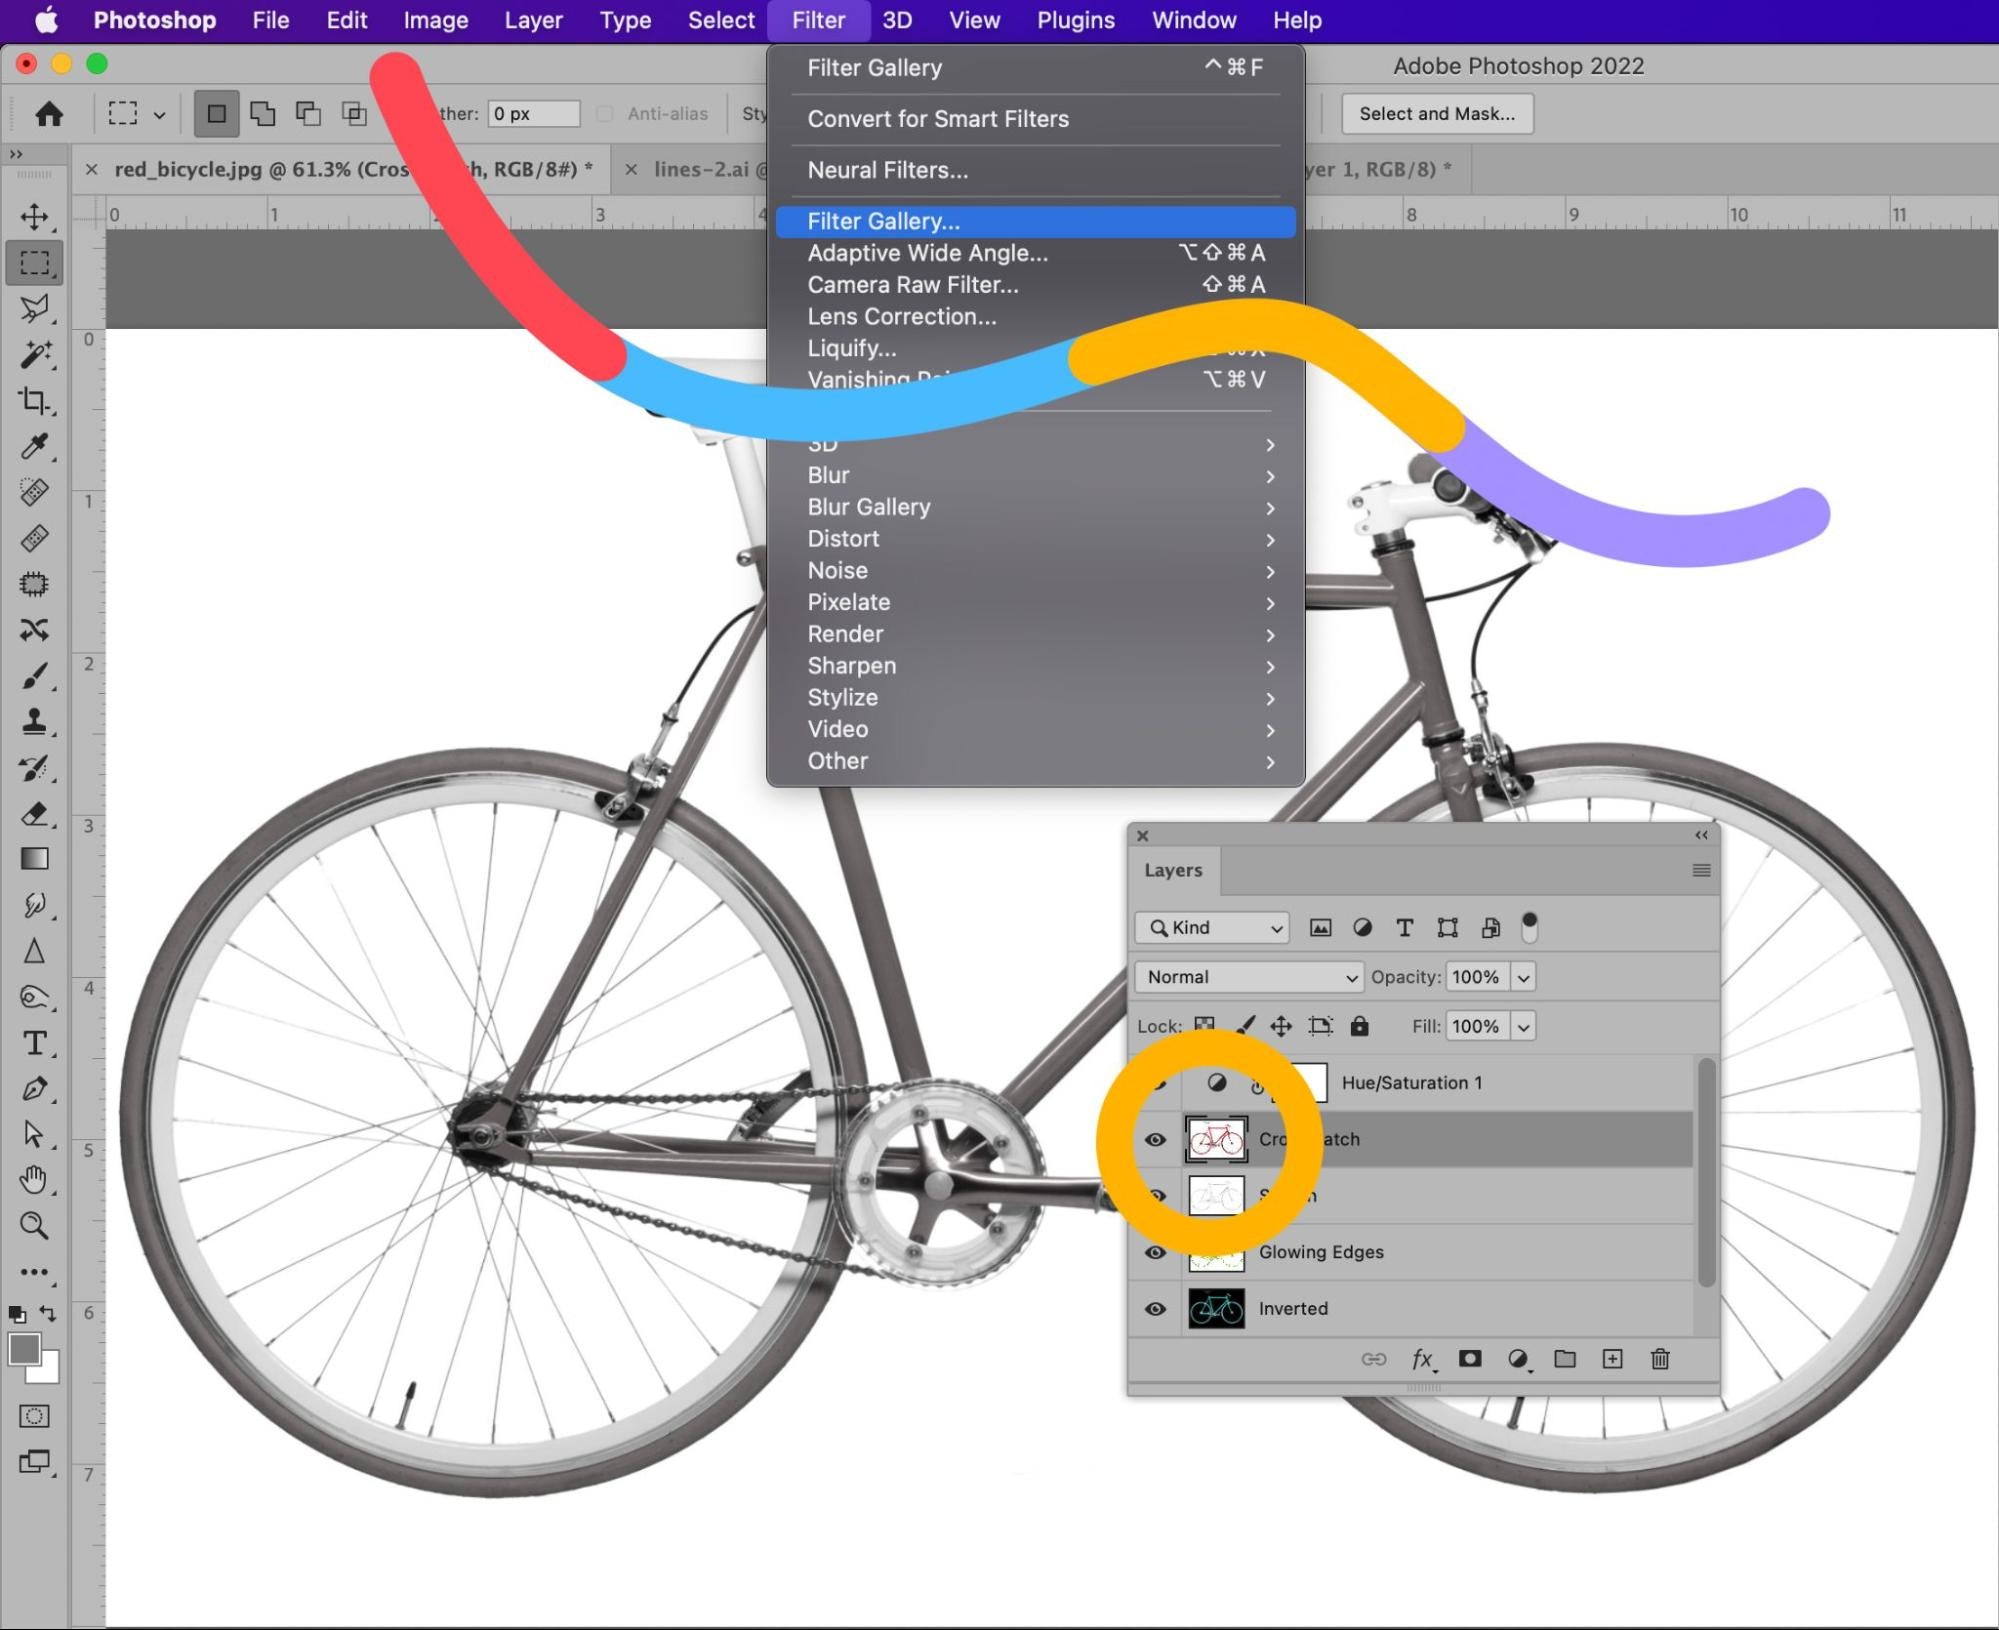
Step 7: Add a cross-hatching effect to your image
The last part of the process is what will really set your image apart, and make it truly look like something drawn by hand. We’re going to add a cross-hatching effect.
In the Layers panel, click the eye icon on the top layer—the “cross-hatch” layer, to make the layer visible. All layers should now be visible in your image.
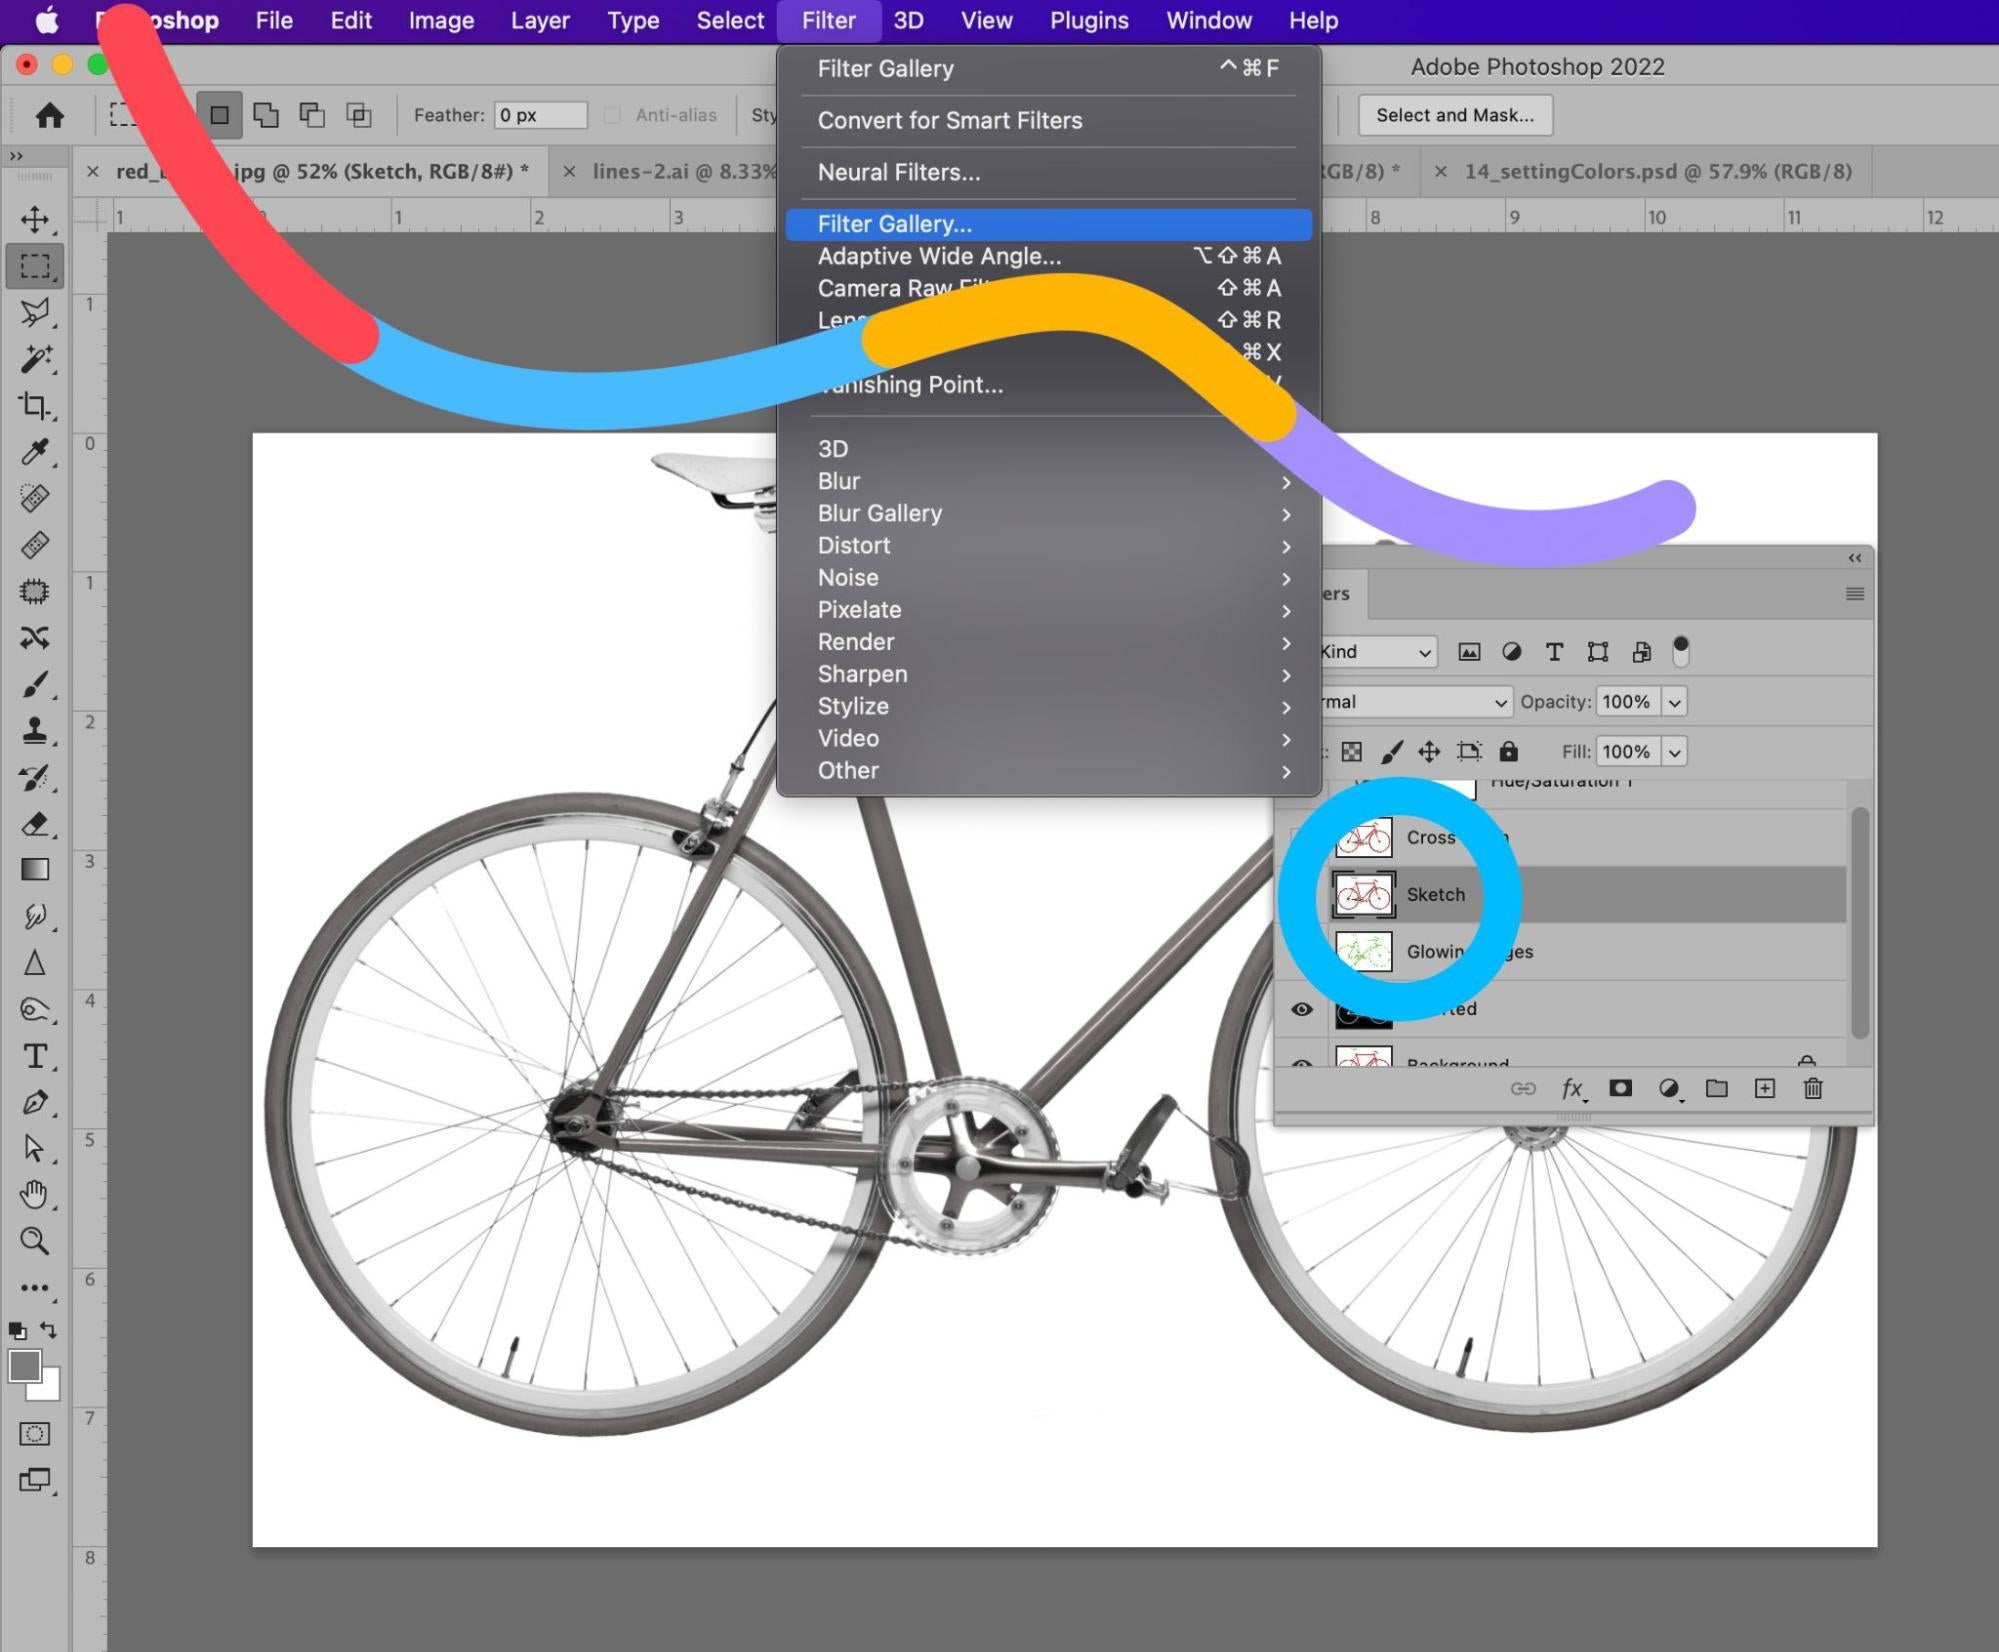
With the top layer selected, choose Filter > Filter Gallery... once more from the dropdown menu at the top of the application window. If you see the Filter Gallery option more than once in the dropdown, make sure you select the lower option.
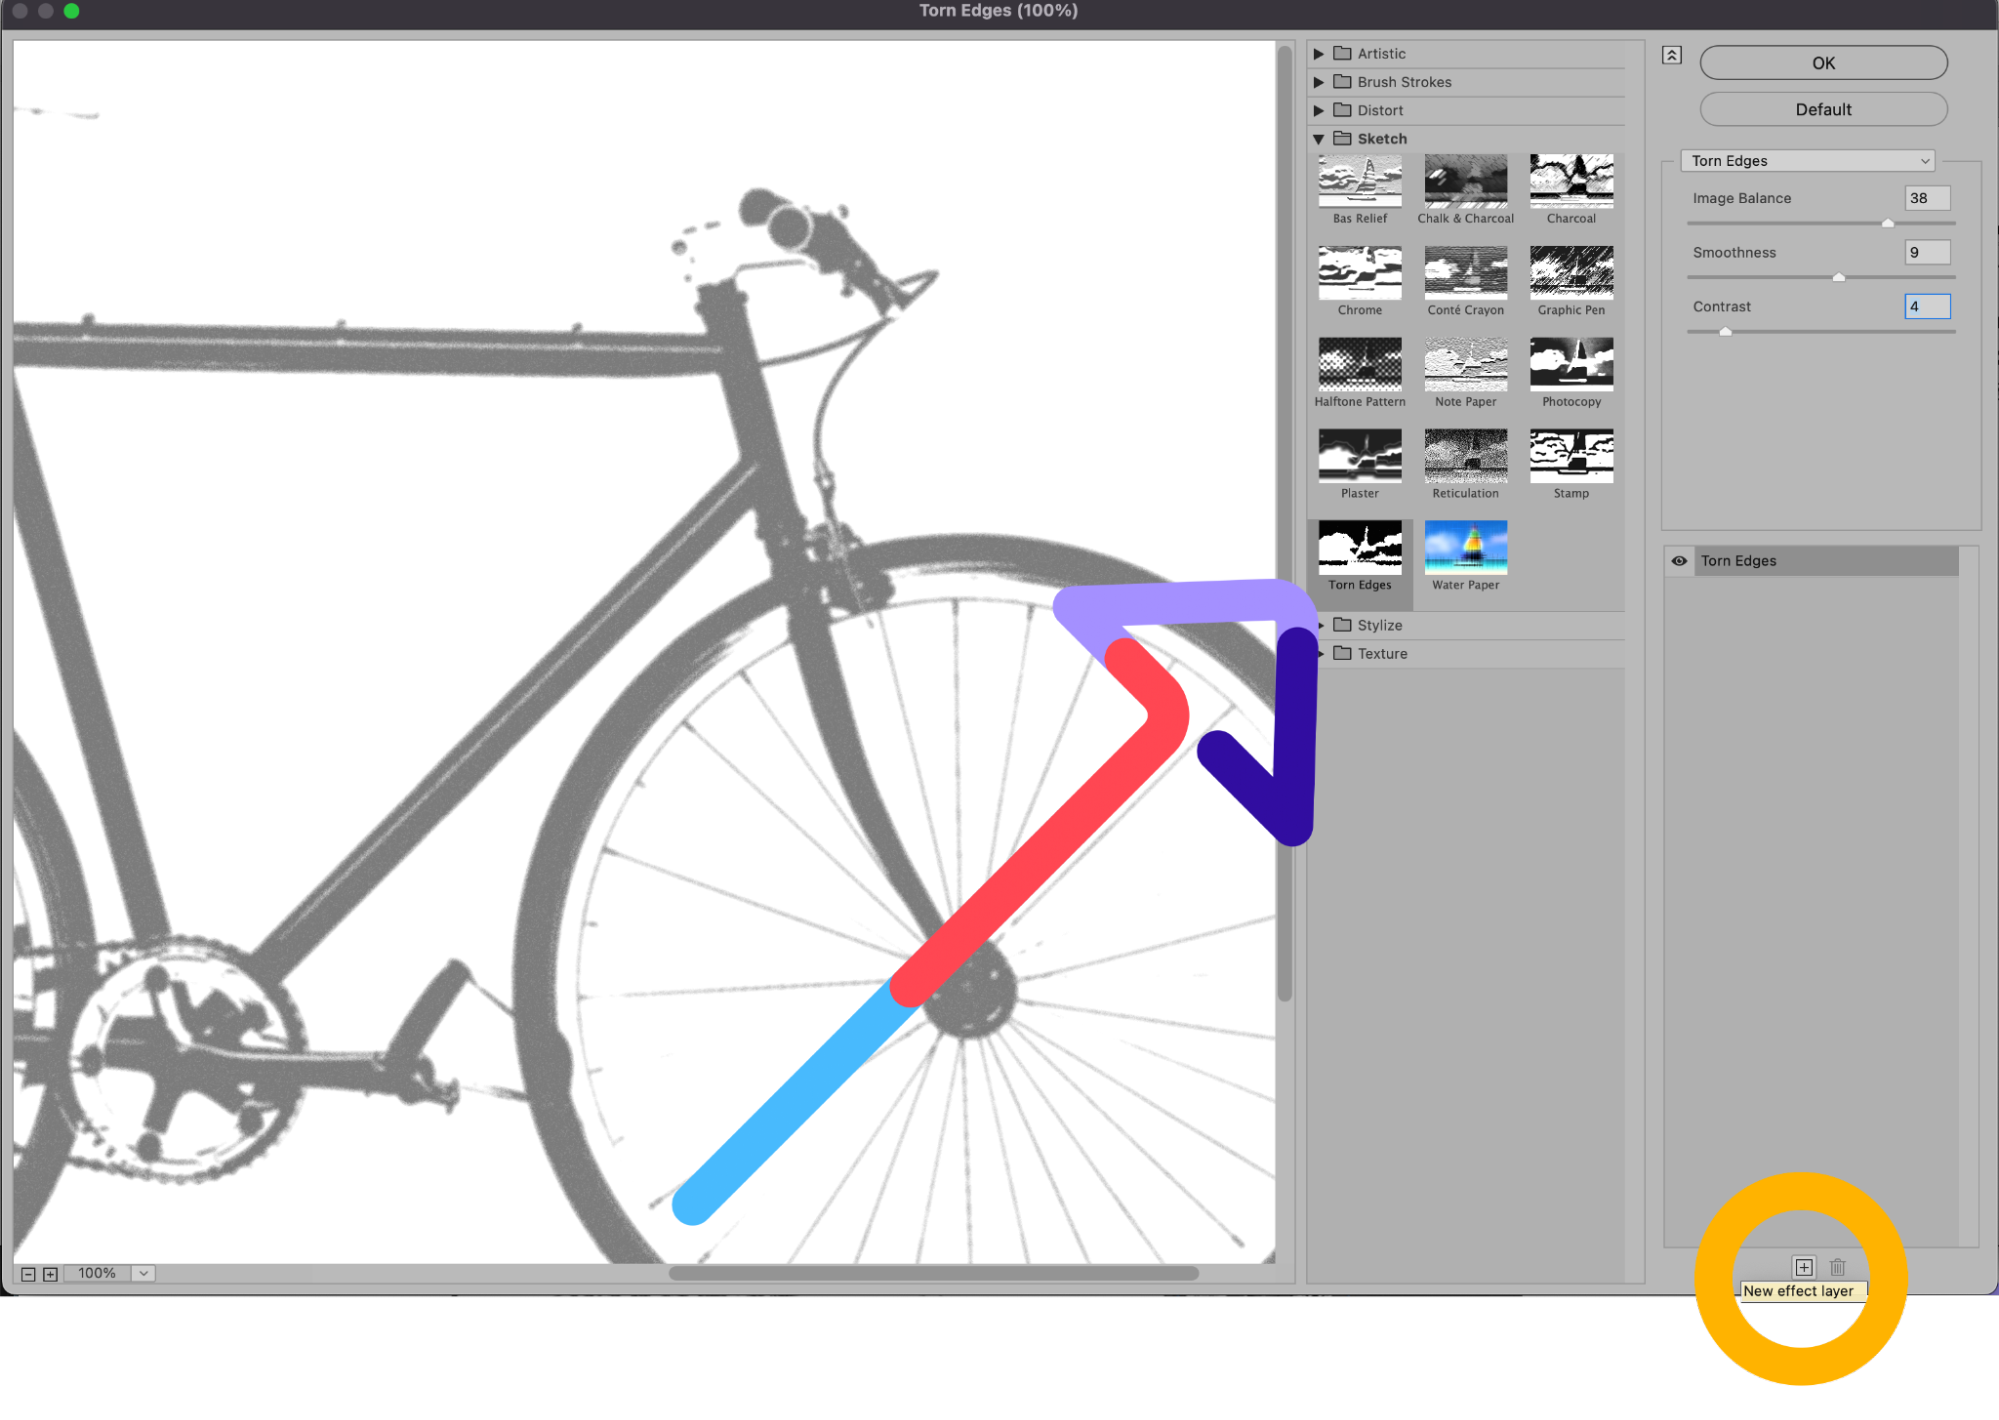
Add Torn Edges Filter
In the Filter window, click on the option marked Sketch and choose Torn Edges. Adjust the toggles on the right-hand side of the window until you can see the details of your image, just like you see here on my screen.
Once you're happy with the appearance of the Torn Edges filter, click on the New icon located at the lower right-hand side of the Filter window. (This icon looks like a piece of paper with a plus sign in the middle of it.)
Add Graphic Pen Filter
You'll see Torn Edges appear twice in the right-hand side of the Filter window. While the top instance of Torn Edges is still selected, click on the Graphic Pen filter and change the Stroke Diagonal to Left Diagonal.
You can also adjust the sliders for the Graphic Pen filter until you're satisfied with the image in the preview window. As with the previous layer, you're only creating shading at this stage.

Click OK.
Change Layer Blend Mode
And now, change the Layer Blend Mode from Normal to Multiply as you did with the previous layer.

We’re almost done!
Finally, because the graphic pen filter is crisper than the charcoal filter we applied to the lower layer, we'll add a slight motion blur.
Add Blur
With the same layer still selected, choose Filter > Blur > Motion Blur from the dropdown menu at the top of the application window.
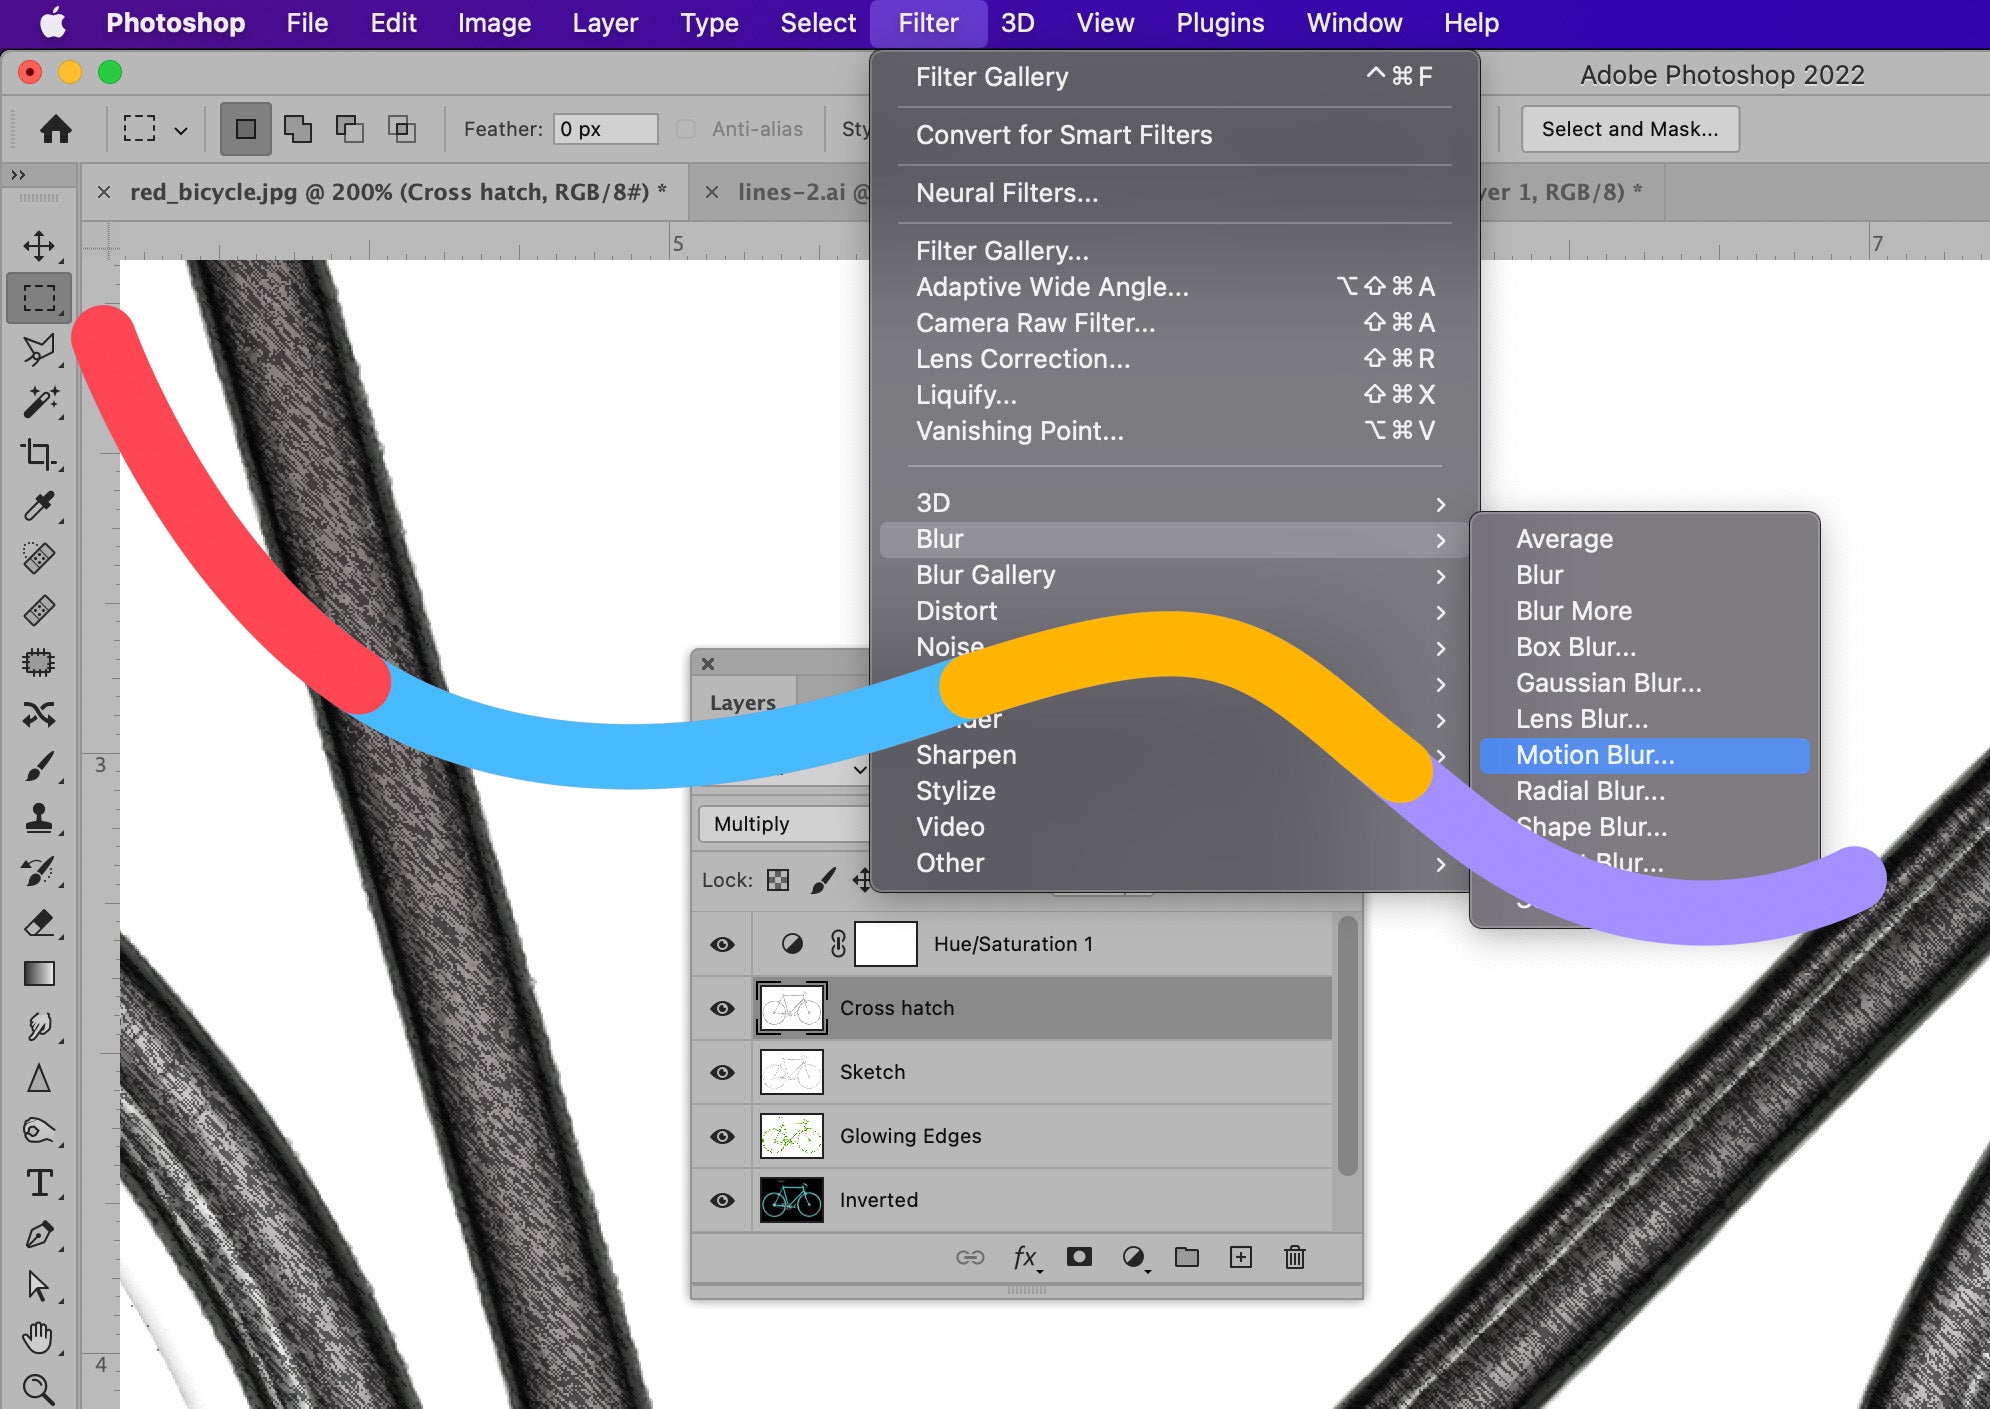
In the Motion Blur dialog box, set the angle to -45° and move the Distance slider to the left to create a very slight blur. Make sure Preview is checked so you can see the blur before you apply it.

Click OK.
Step 8: Make your final tweaks
You're not done yet! Playing with the opacity of your layers and cleaning up any dark spots that you see in your image will put the final touch on your new pencil sketch.
First, let’s adjust the opacity of some of our layers. You can adjust the opacity of the top two layers to reduce the intensity of the pencil shading.
In the image below, the top layer's opacity is reduced to 60% and the next layer down has an opacity of 70%.
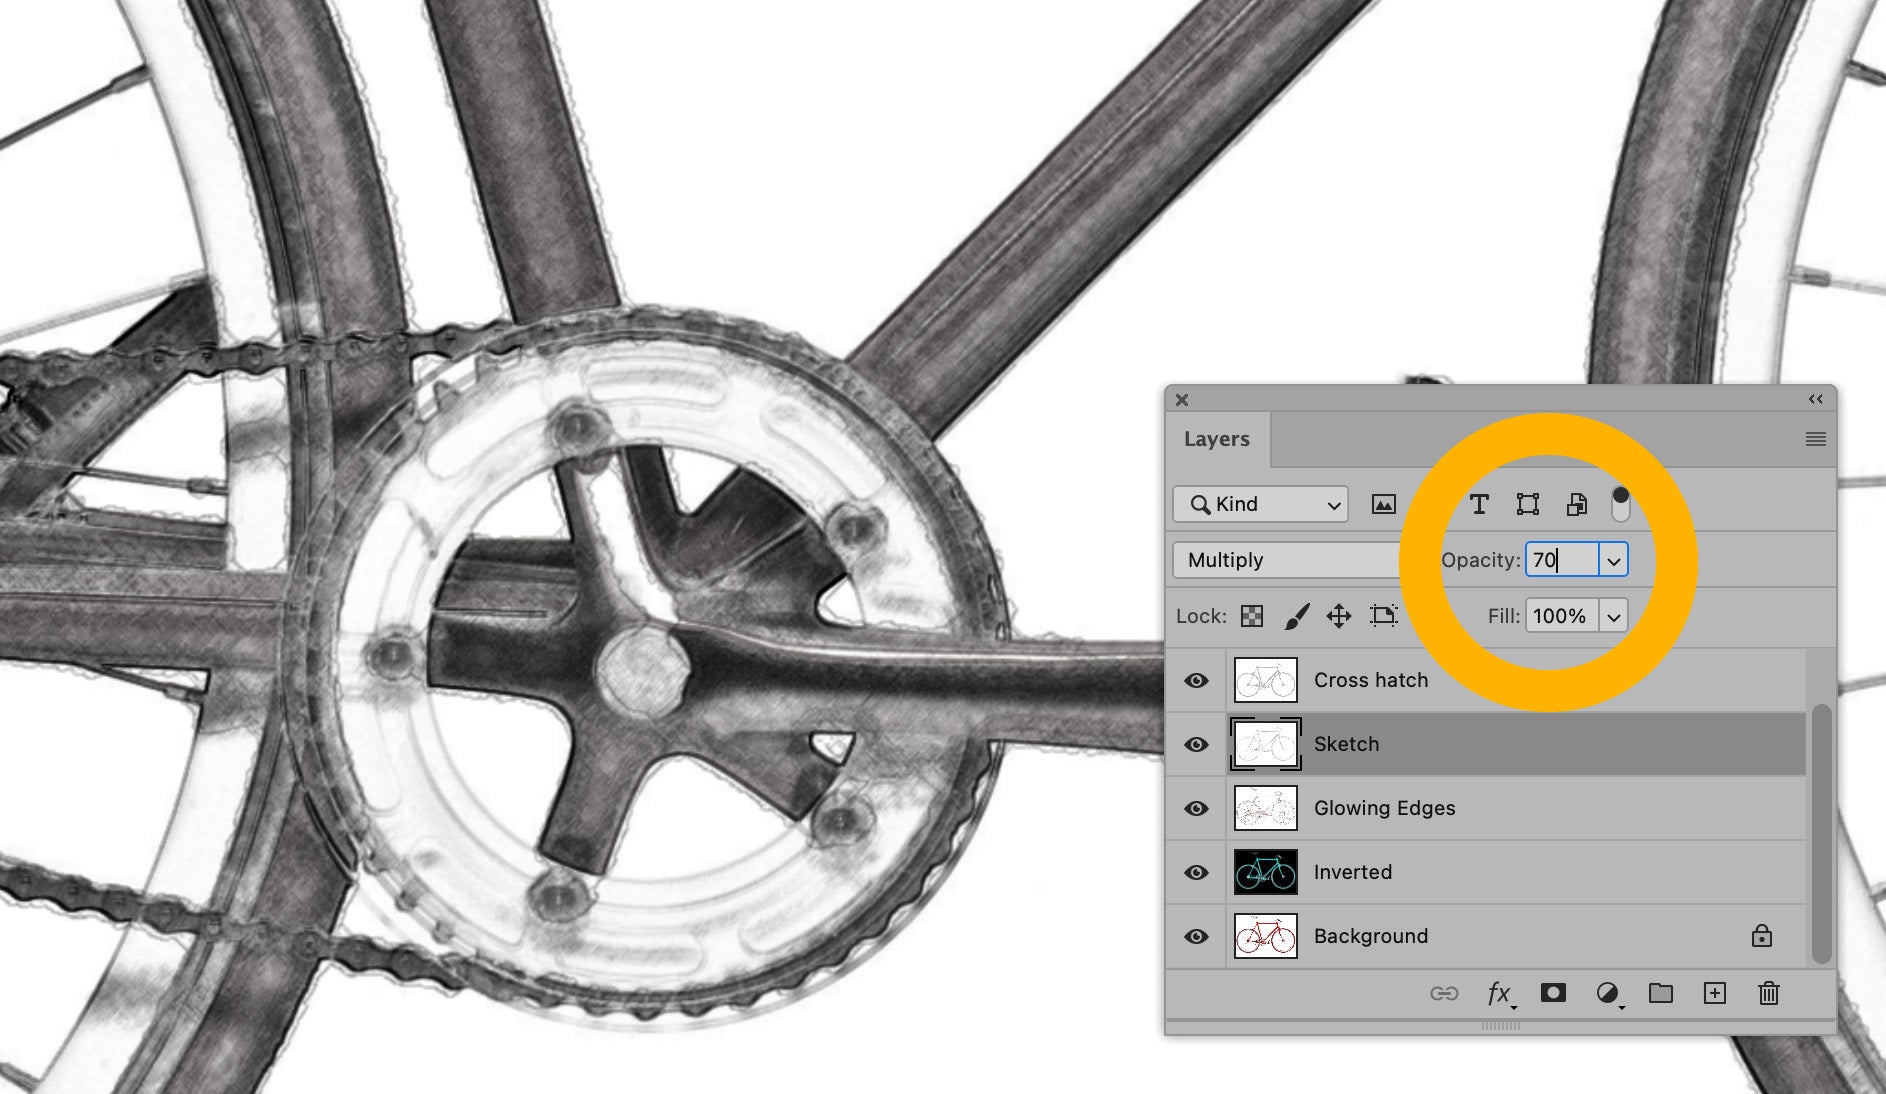
You should not adjust the opacity of the bottom two layers as doing so could undermine the line drawing effect you have created.
Erase artifacts
Next, let’s clean up any artifacts.
Depending on your image, there may be several places where the white background looks as if it has smudges, or dark spots.
In order to remove dark spots such as these, stamp the layers by selecting all layers, including the Hue/Saturation adjustment layer, within the Layers panel. Type SHIFT+CTRL+A+E (SHIFT+COMMAND+OPTION+E on a Mac) to create a stamped layer, which will appear at the top of your Layers panel.

Set your foreground color to white in the Toolbar and choose the Brush tool from the Toolbar. Within the new stamped layer, carefully paint over any smudges using the brush tool. And there you have it! Your finished image will now look like a pencil sketch.
Now that you know how to turn a picture into a line drawing in Photoshop, be sure to check out our other Photoshop tutorials to master your skills.

Browse Photoshop tutorials and fine tune your image-editing skills
Learn more