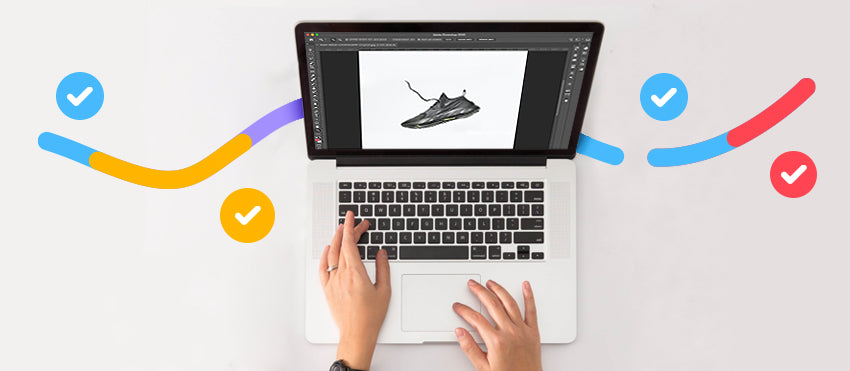
Every photographer knows the joy of finishing a session… followed by the sinking realization that you have to edit each and every photo you intend to use or send to your client.
Photo editing is an important step of the photography process. Without it, your photos lack the zing it takes to stand out online.
The only problem? The editing process can be so tedious — especially if you don’t start with a finished product in mind.
No one wants to spend hours in front of Photoshop, so begin with a plan in place. Whether you need basic edits or a full-fledged beauty retouching, a standardized photo-editing workflow can help.
Whether you’re a professional photographer or an ecommerce entrepreneur, this complete fundamental photo-editing checklist will help you save time and end up with an attention-grabbing finished product.
General steps for editing photos quickly
Before you even start your edits, there are things to consider during the shoot that can make the process of photo editing a lot faster and easier.
Shoot in RAW
Make your editing process smoother by starting with a RAW file. Because RAW files contain more information, you can manipulate them more without making them crunchy or lossy. Editing JPEGs always results in some damage to the original file — but that’s not the case with RAW files.
Begin by culling ruthlessly
Good news: You don’t have to edit every photo you take. In fact, you shouldn’t. No matter how good a photographer you are, not every image will make the cut — and that’s okay. So, cull with an editor’s mindset. Check for razor sharp focus and toss anything less than that. Here are some more guidelines on photo culling.
11-step fundamental photo-editing checklist
- Perform lens corrections
- Straighten the horizon
- Choose your crop
- Fix your exposure
- Reduce noise
- Correct your white balance
- Dial in the contrast
- Check your histogram
- Adjust the colors
- Increase sharpness as needed
- Export
Now that we have a few of the shooting basics out of the way, let’s get started with our beginner’s edits.
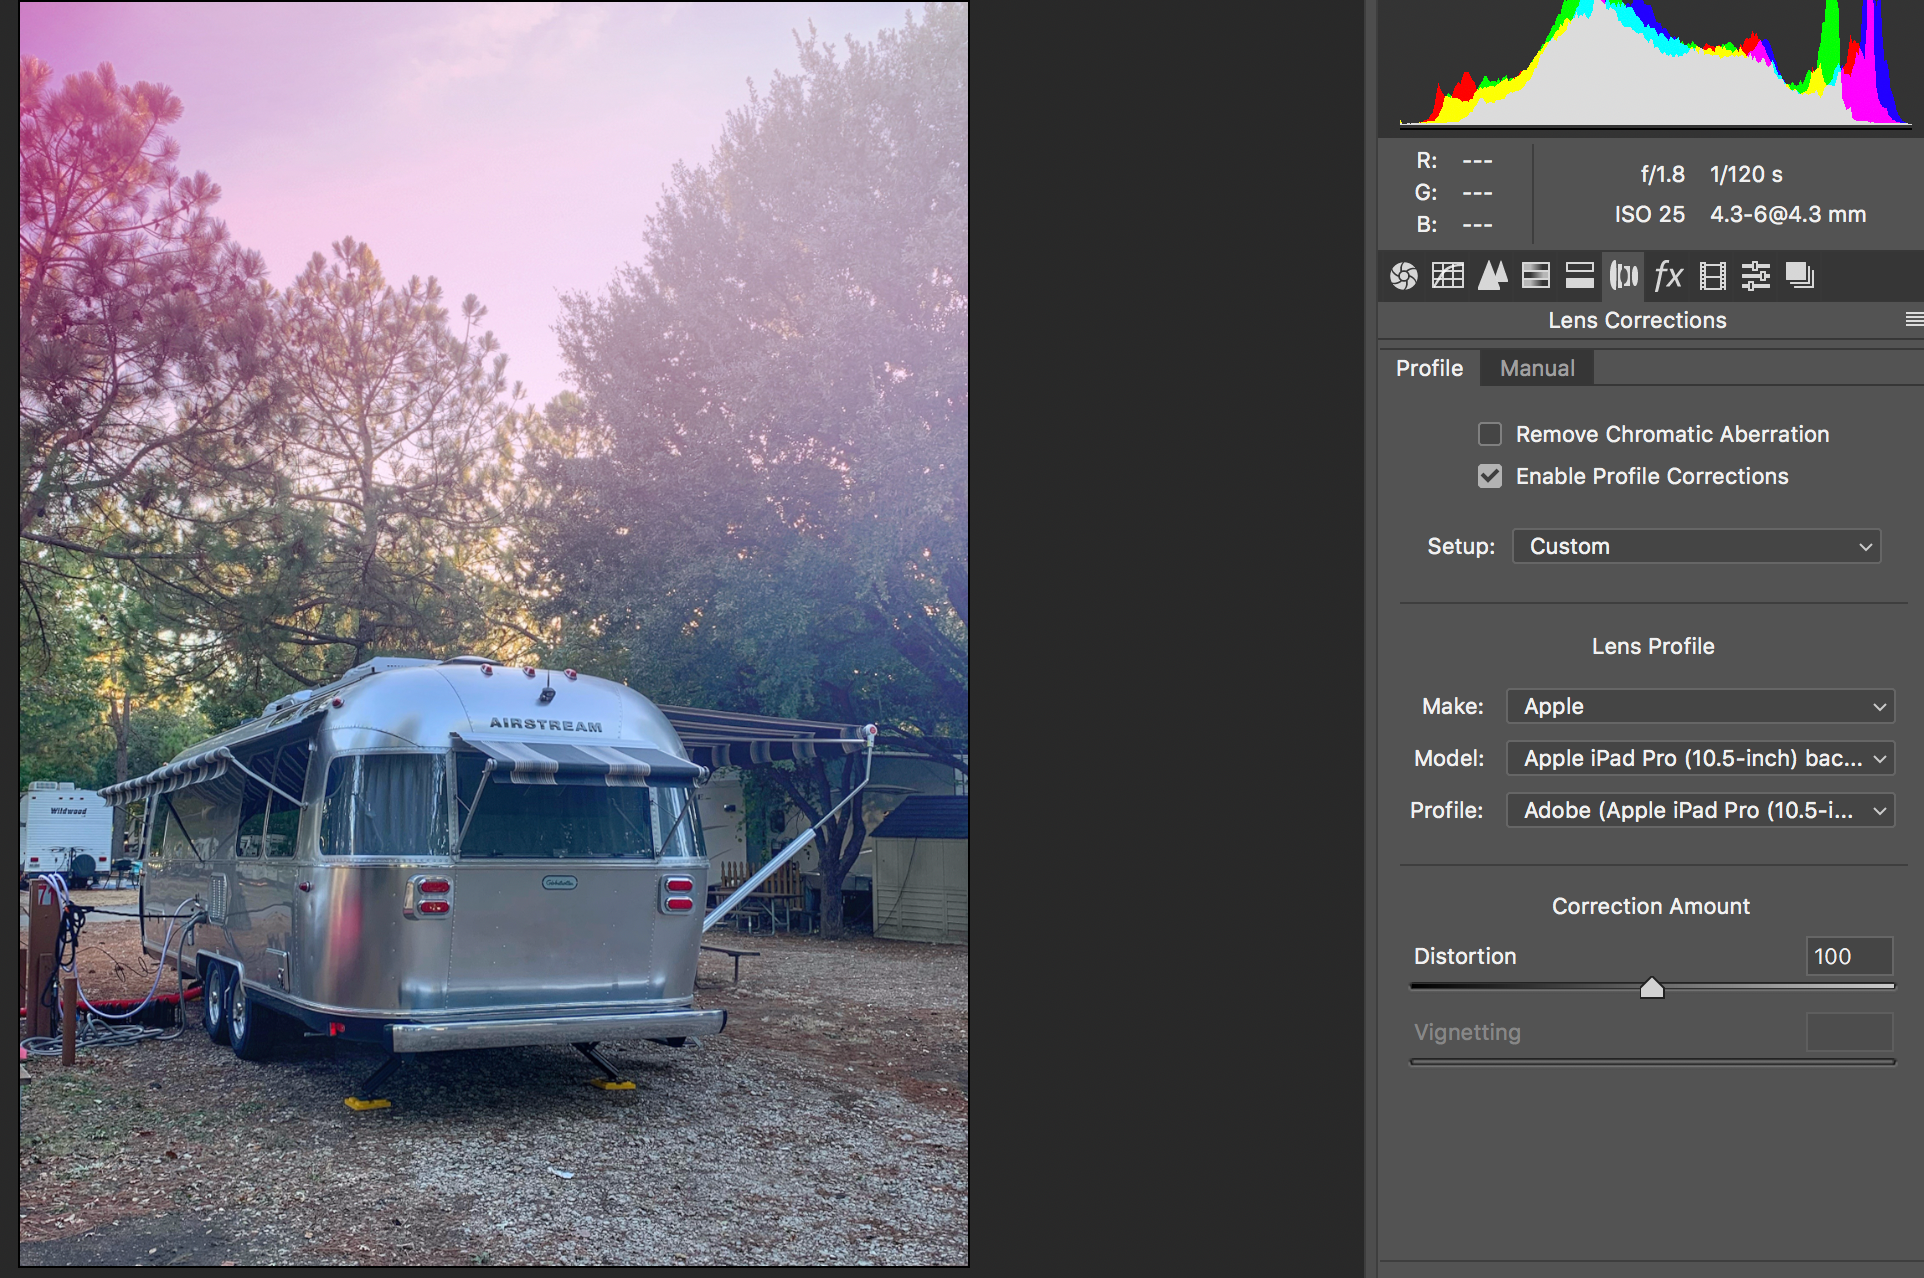
Perform lens corrections
When you’re ready to edit, first select your photos and apply lens corrections. This is particularly important if you’re using a wide angle lens.
You can also use lens corrections to help with chromatic aberration correction if you happen to see strange purple or green pixels around the edges of your subject.
Straighten the horizon
When you see a photo that’s askew — even if it’s just a little bit — your brain immediately registers the subject as off-kilter. Straighten your horizons right away so this doesn’t happen.

Choose your crop
Once the subject is straight, you can dial in your crop. If you’re creating an artistic image, the crop is, of course, up to your discretion — but for many photos, the rule of thirds can help with this. In product photography, though, you typically want the product to be front and center — a tight crop will do for your main listing images while you can get more artistic for lifestyle shots.
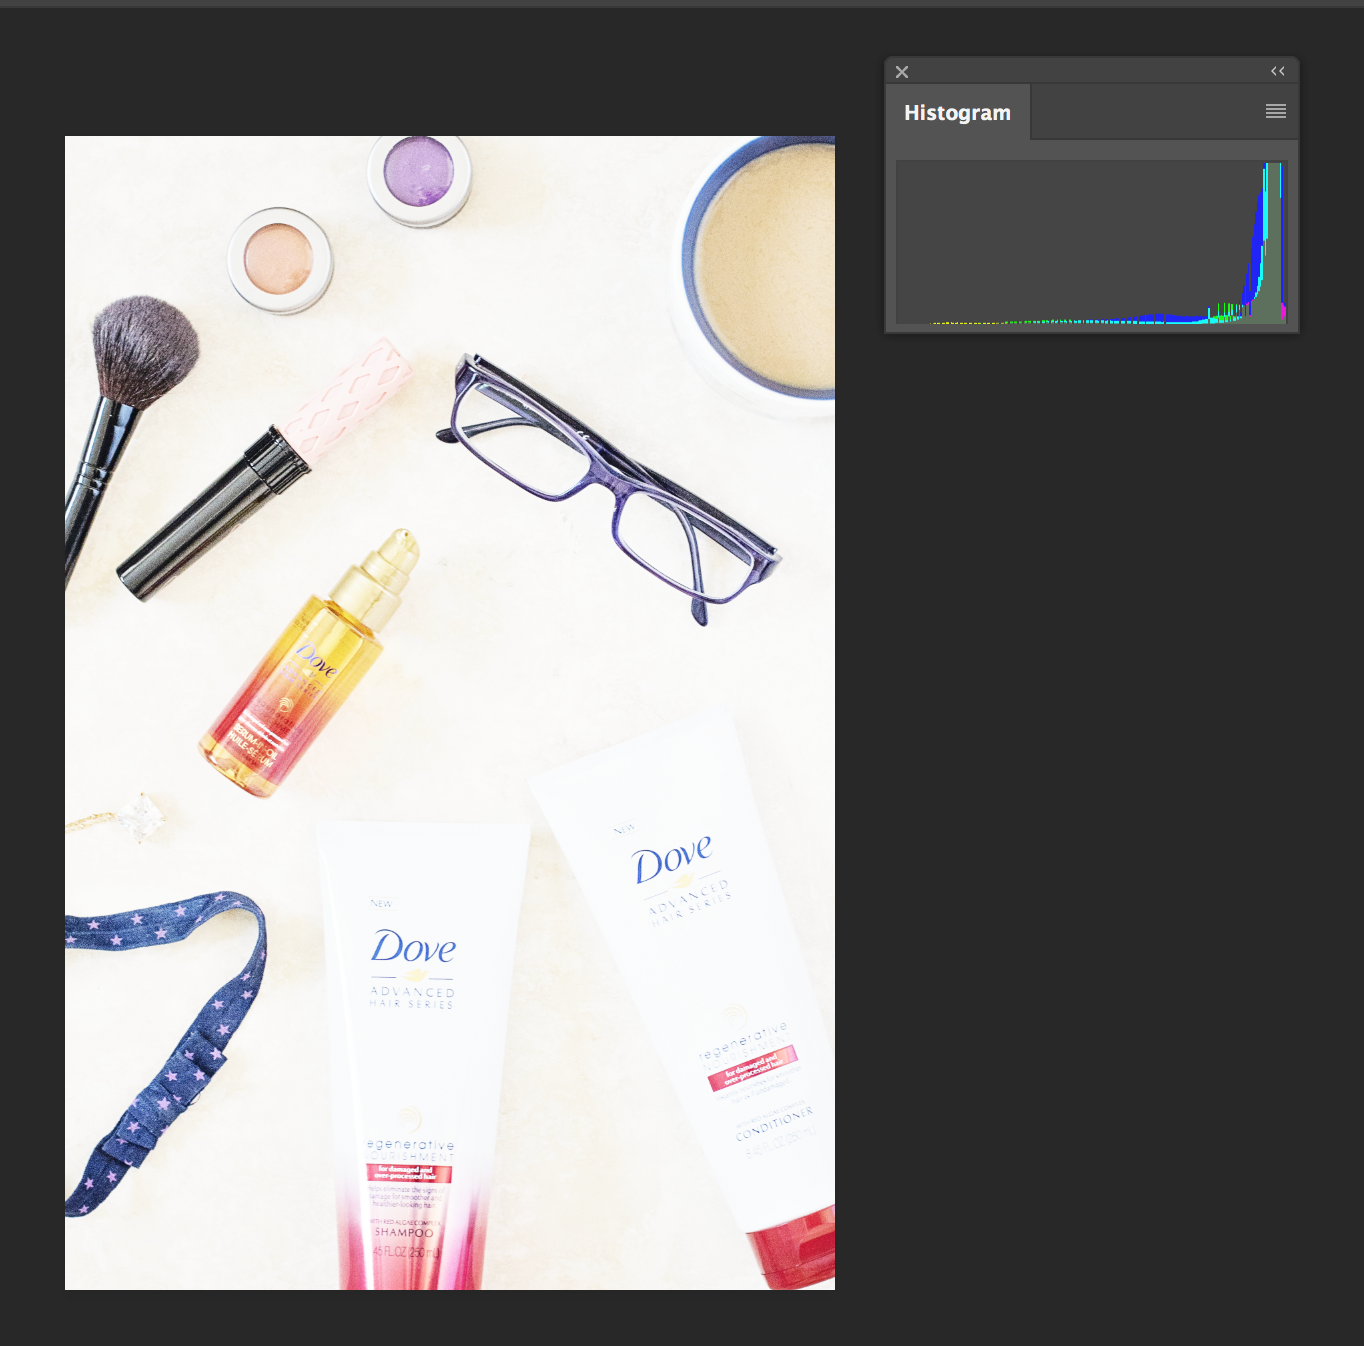
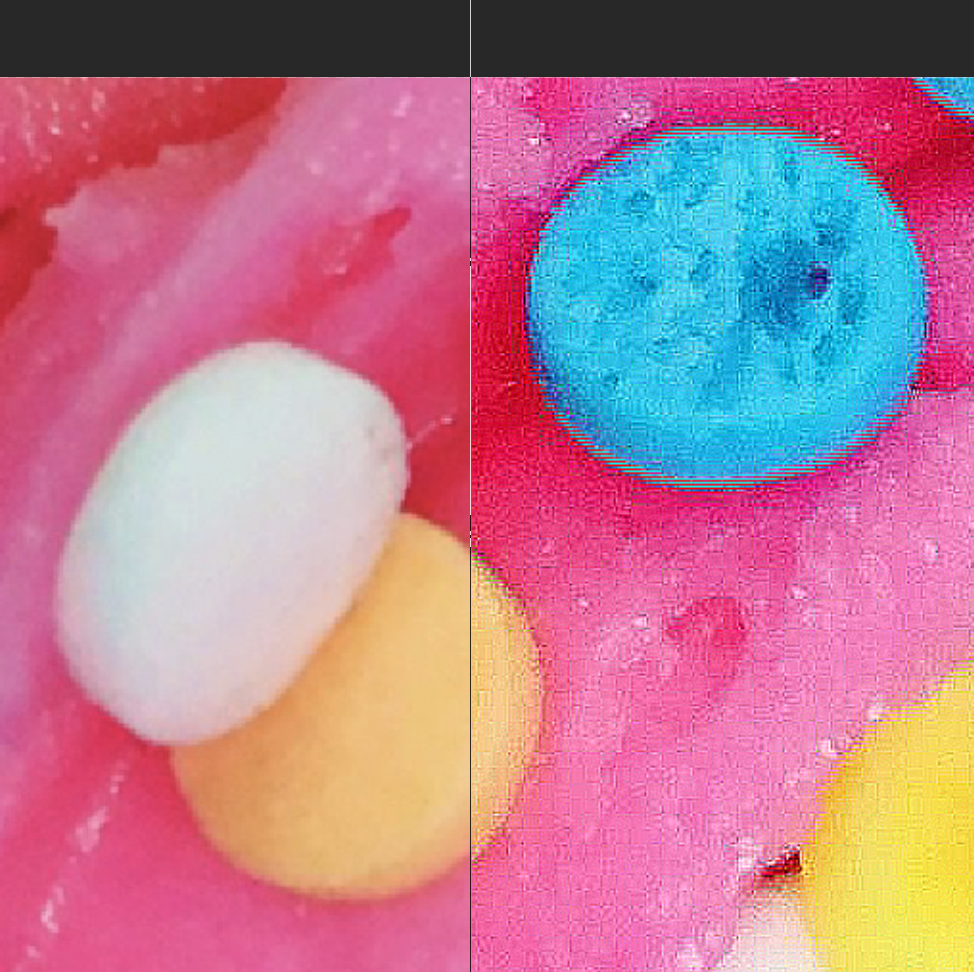
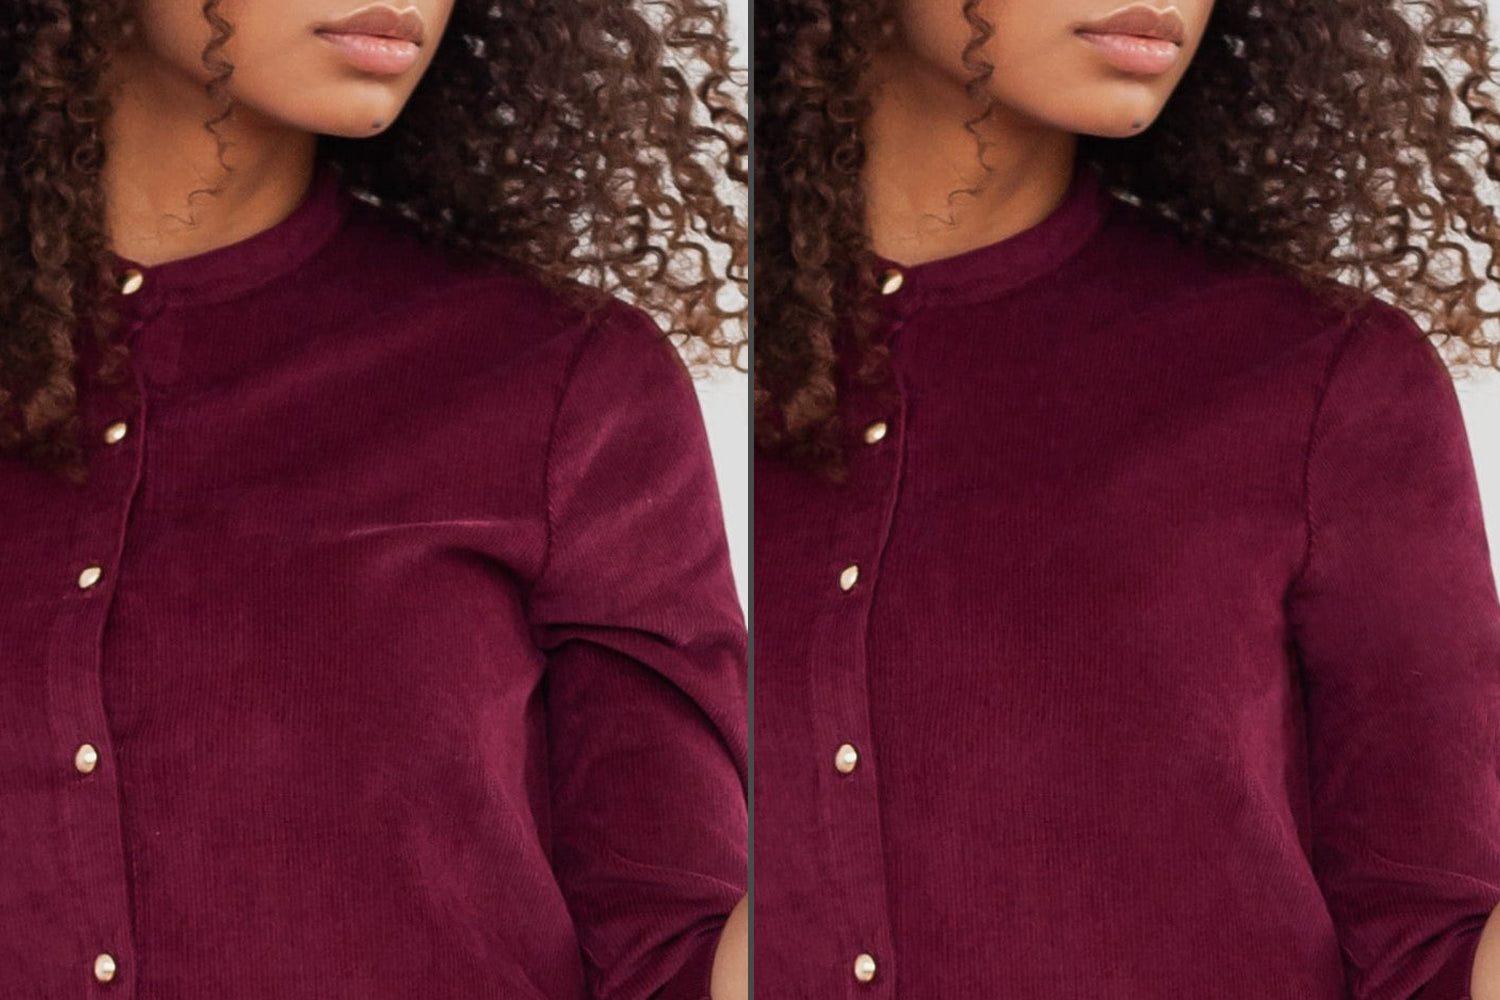
Hopefully you’ve gotten pretty close to a perfect exposure in camera. If you’re way off, you might introduce noise when you bring the exposure back to where it needs to be — so try to get close when shooting. When you have a decent exposure SOOC (straight out of camera), all you need to do is adjust your sliders up or down a bit in Bridge or Lightroom. Speaking of noise, if you do see some (white or off-colored pixels) in the dark areas, you can fix this with the noise reduction sliders in Bridge or Lightroom. If you’re only working in Photoshop, you can use plugins like Topaz DeNoise to achieve stellar noise-free results. After you’ve done your noise reduction, look for banding patterns in your solid colors. This can occur sometimes after significant noise reduction. Banding is a digital artifact that shows up sometimes when you’re editing your images. It looks like a series of lines and you can see it in the sky, plain backgrounds, or in other areas of solid color. No banding? Great! Banding? That’s okay, too. You can still fix it by adding the noise back a little bit. White balance is an afterthought for some photographers, but it’s too important to leave as the last step. Proper white balance is crucial. If you’re not shooting with a grey card or a color checker tool, look for true blacks and whites in your image and adjust the white balance from there. Contrast is one of those small things that takes a photo from acceptable to genuinely interesting. There are many ways to adjust the contrast of a photo. Play around with the clarity, levels, and curves tools to see which method fits your image best. When you’re only worried about your photo appearing in a digital space, you have a little more leeway with your histogram. When it’s in print, though, you need to be very careful with this. If you “clip your blacks” or “blow your whites,” these will print as areas with no data — so they’ll look blocky and strange. Similarly, if you blow a color channel, you’ll have colored areas with no detail. To avoid this, look at your histogram and adjust accordingly. See the blown highlights in the product? No bueno. When it comes to colors, you want them to be vibrant and juicy, but also at least close to true-to-life. Some artistic edits may get away with breaking these rules, but it’s important to be realistic when shooting product photography. As such, you’ll only want to bring your vibrance and/or saturation up a little. Bringing up colors too much is reminiscent of early 2000s editing, and that look is dated and out of fashion for a reason. A little sharpness is a good thing. Too much sharpness and your photo starts looking, well, crunchy and weird. Be judicious with this step. See how the right starts to fall apart and look crunchy? That’s way too sharp. Once you’ve done all of the steps above, you’re ready to save and export. Decide where the images will be used, and save in the right format for that use. For example, images for Amazon need to be in TIFF, JPEG, GIF, or PNG format with pixel dimensions of at least 1,000 or larger in either height or width — and they must be in sRGB or CMYK color mode. Photos to be used in print, though, are best when saved as PNG, at least 300 dpi, and in CMYK color mode. Check the specifications for your intended use before you start editing your images. This will save a ton of time and frustration. If you’re shooting apparel, pay special attention to lumps, bumps, and wrinkles in the fabric. While it’s ideal to get this perfect in camera, mistakes are inevitable. Zoom in and look for imperfections. You can use the Content Aware Fill Tool, Healing Brush Tool, or Clone Stamp to make them disappear so your subject looks as impeccable as possible.
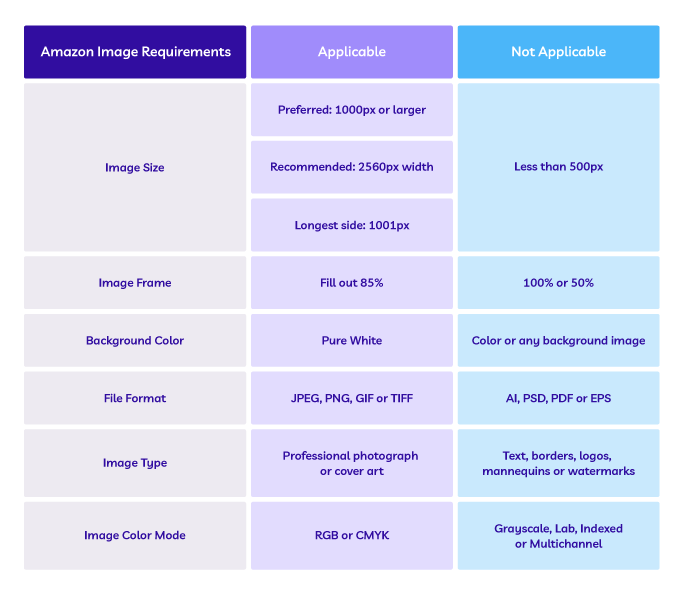
There are a few extra steps you need in your photo-editing checklist if you’re manipulating product photos: Amazon has very specific requirements about image size, background color, file type, and more. Save yourself time by becoming familiar with the requirements before you even begin to edit. Next on our photo-editing checklist might seem obvious, but it’s super important. And if you do it wrong, that’s a lot of tedious hours spent converting the files. When you save your finished files, use the proper format. It must include a product identifier such as the ASIN or ISBN — anything else is likely to get rejected. For your internal records, it’s also important to have a system and guidelines. “Name your individual files in a way that is easy to track,” says Jeff Delacruz, CEO and founder of Products on White Photography. “Use something unique.” Here are some ideas:
This one is probably obvious if you’ve ever shopped on Amazon, but there’s a right and a wrong way to remove backgrounds. Not keen on doing the clipping yourself? You can outsource the nitty-gritty clipping paths to our team of professionals who meticulously do every step by hand — no robots needed. If you’re shooting products for Etsy or eBay, these tips work for those marketplaces, too, but you don’t necessarily have to remove the background.
With this photo-editing checklist in hand, you can create a reliable photo-editing workflow. This way, you’ll have polished and professional product photos in a fraction of the time it normally takes.
Note: if you’re taking product photos, the rule of thirds isn’t as important as centering your subject. Do your best to find a happy medium.

Fix your exposure

Reduce noise

Correct your white balance
Dial in the contrast
Check your histogram
Adjust the colors
Increase sharpness as needed
Export
Extra steps for apparel photography projects
Extra steps for product photography projects
Check the platform requirements
Name your files accordingly
Remove the background
Download the product photo-editing checklist